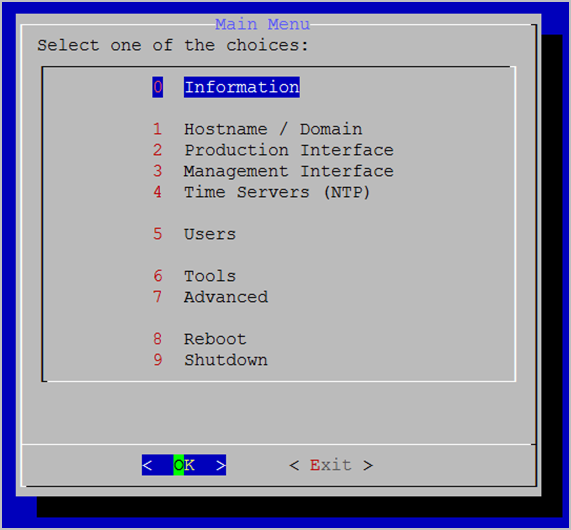
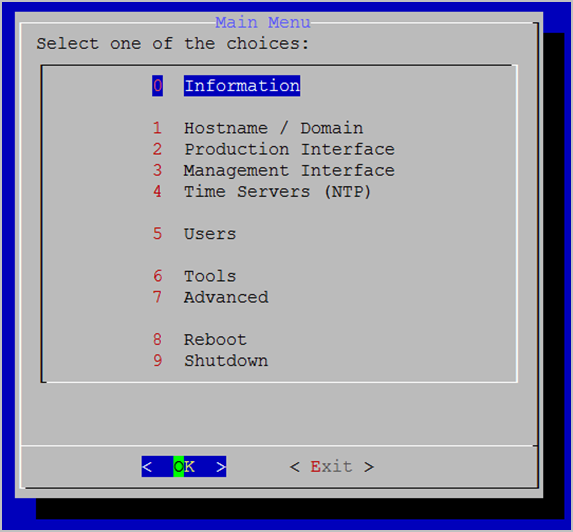
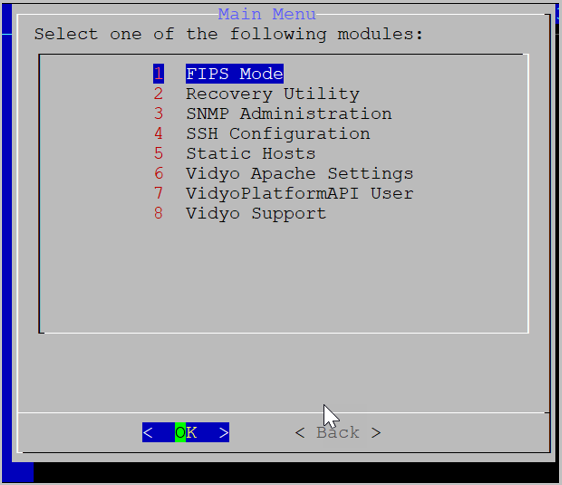
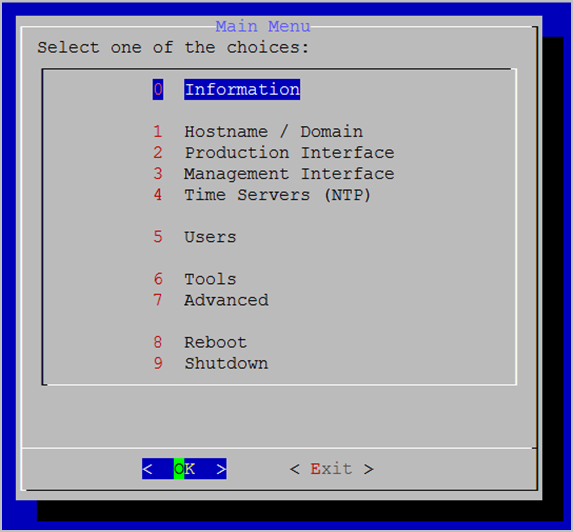
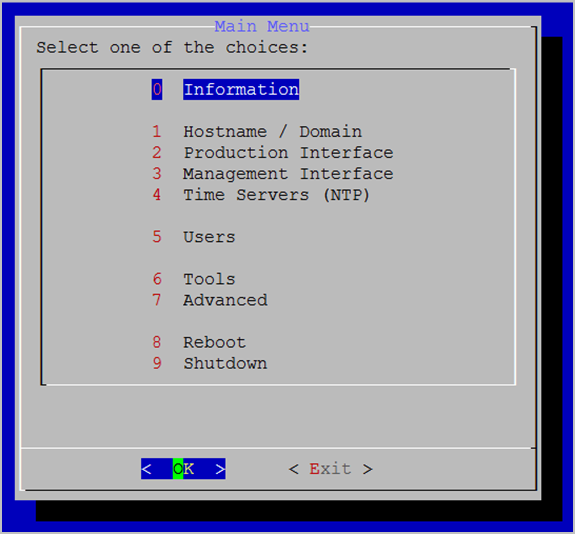
3. Configure your server via the System Console
Immediately after you have installed VidyoGateway or VidyoGateway VE, you must configure it using the VidyoGateway System Administrator Console (also known as the System Console).
As you begin the configuration, keep the following deployment guidelines in mind:
- Vidyo utilizes SSH to provide remote access to the System Console on your Vidyo server over port 22 or 2222. In addition, Vidyo Customer Support may request access to your Vidyo server over this same port to assist in troubleshooting any of your customer issues.
- When setting up your VidyoGateway server, always be sure to configure your firewall to only permit SSH access from authorized networks and users. You can restrict Vidyo Customer Support SSH access by configuring your firewall or contact Vidyo Customer Support for other options.
- Restrict access to your VidyoGateway Admin portal by performing one of the following:
- Block HTTP/HTTPS access from untrusted networks including the Internet.
- Move the VidyoGateway Admin portal to the Management Interface (if you have not yet configured your Management Interface, it must be configured at this time). For more information, see Configure your Vidyo server’s Management Interface and port.
- Change your VidyoGateway System Administrator Console default password. This must be changed after the first log in. For more information, see the following procedure.
- Configure the network settings at the System Console. You can view the settings (read-only) in the VidyoGateway Admin pages.
|
Note The screenshots in this section show the System Console (also known as the Shell menu or the Admin Console) as seen after logging in via the terminal. The menu may look slightly different depending on how you connect and what tool you use for your connection. |
Log in to the System Console and change the default password
The very first time you log into your VidyoGateway server, you are required to change the default System Console password to one that is more secure. This System Console account is also the same one used when accessing the VidyoGateway Admin portal.
To log in to the System Console and change the default password:
- Log in using the default Administrator account:
- User Name: admin
- Password: password (case sensitive)
- Enter admin at the “login” prompt.
- Enter password at the “(current) UNIX Password” prompt. The password is case sensitive. You’ll be prompted to enter a new password and asked to enter it again.
- Type a new password at the “Password” prompt. When selecting a new password, follow these guidelines:
- The password should not be too similar to the old password. The default setting is at least three characters and should be different from the old password.
- The password should not be too simple or too short. The algorithm here is a point system to satisfy the minimum password length (the default is length eight characters). The password gets extra points if it contains a number, upper case, lower case, or special character. Each point is equivalent to one character.
- The password should not be a case change only of the old password or should not be the reverse of the old password.
- Type your new password again at the “Retype new UNIX password” prompt. If the passwords don’t match, you’ll be prompted to try again. If the passwords match, the System Console Main Menu opens immediately.
|
Note If you need to reset the password, see Change user passwords. |
View application and system information
You can use the System Console to view which Vidyo applications and versions you have as well as to view the system time and disk space.
View application information
To view application information:
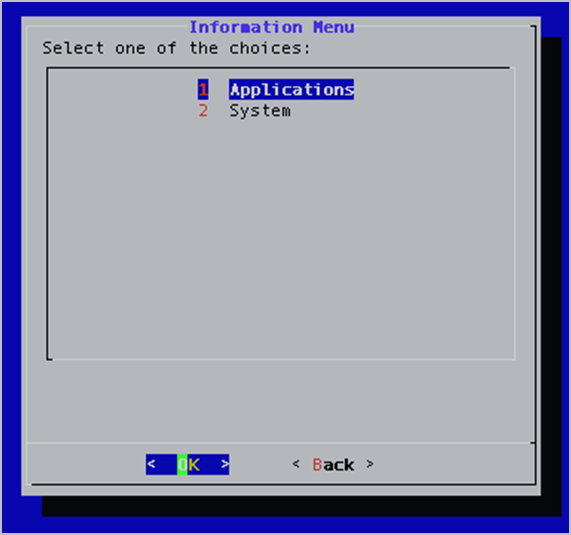
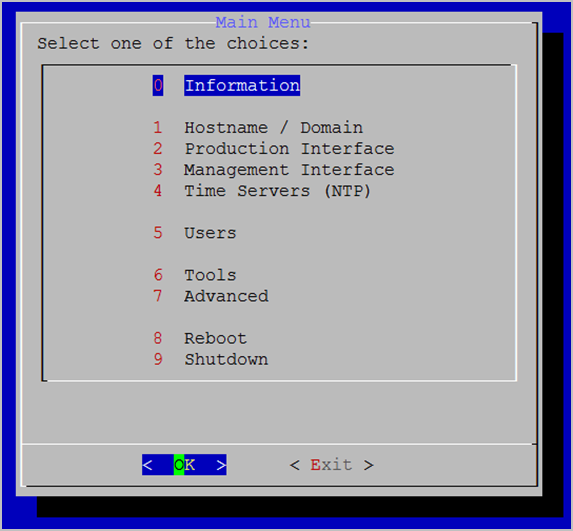
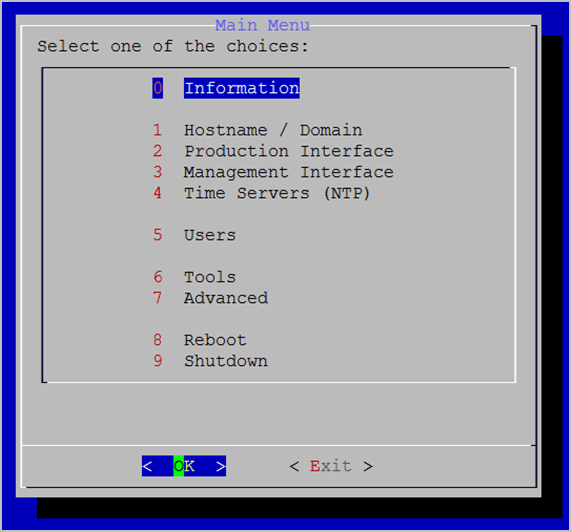
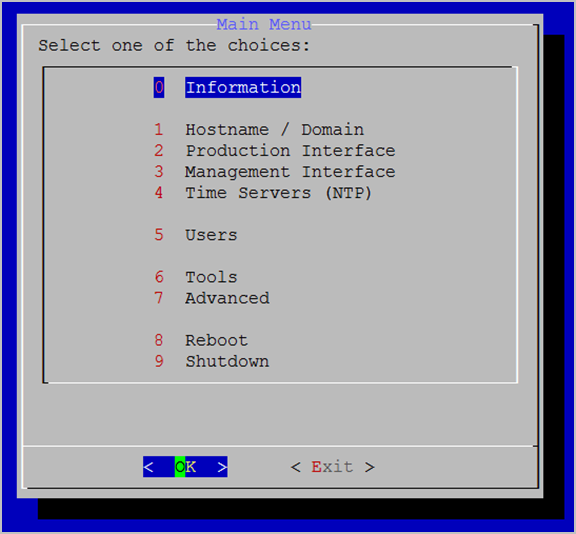
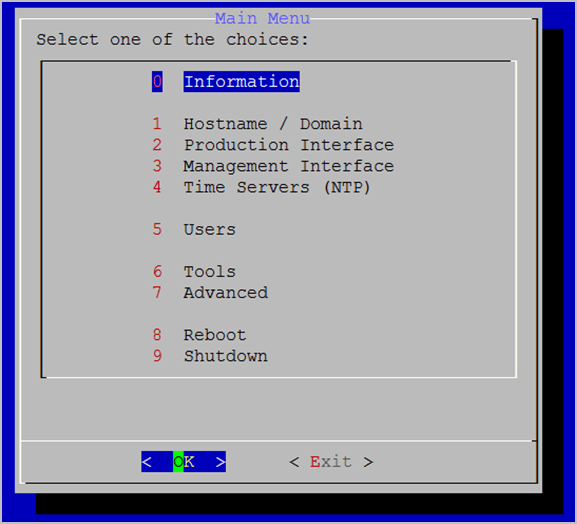
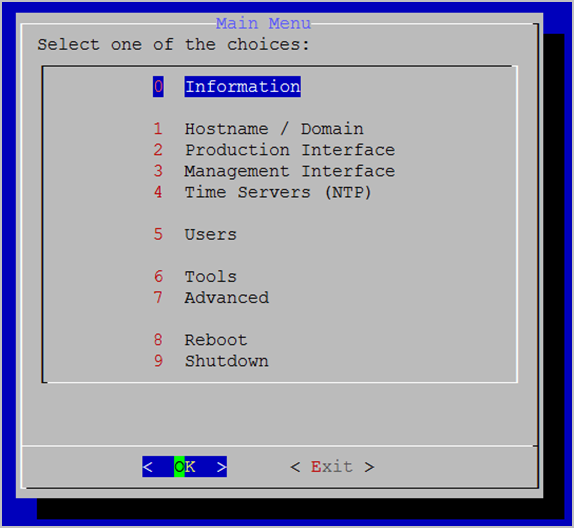
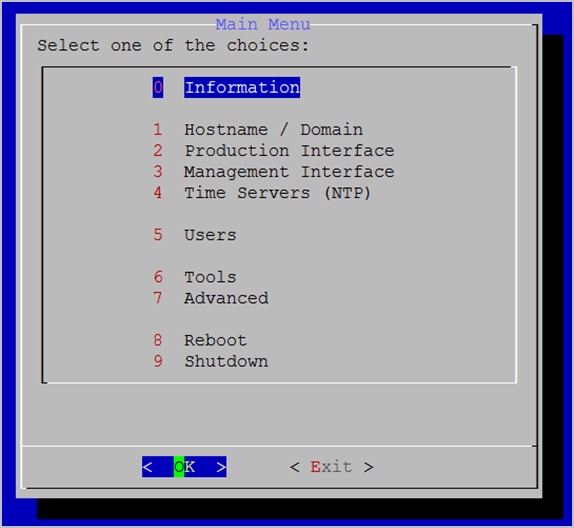
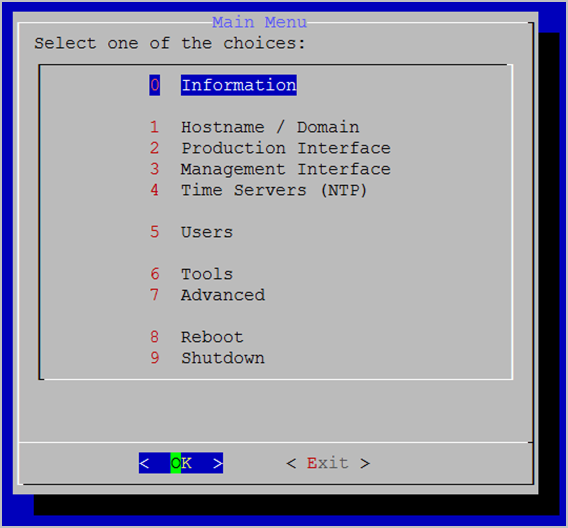
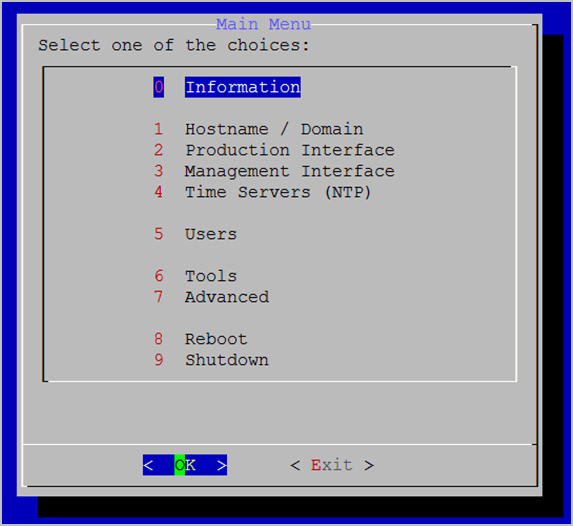
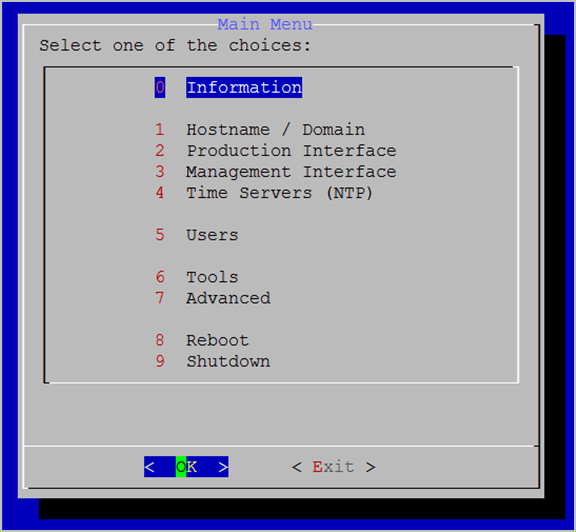
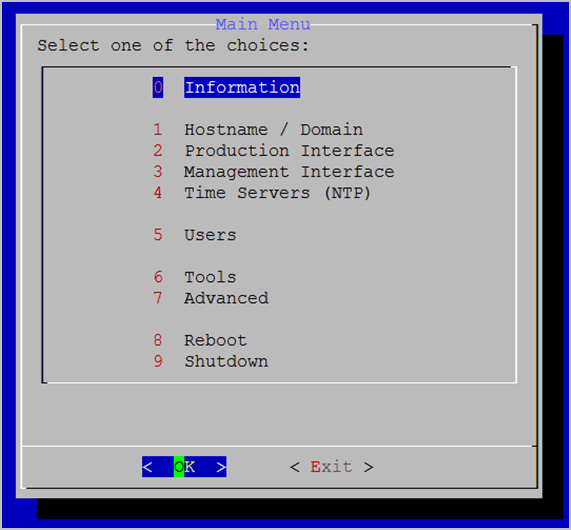
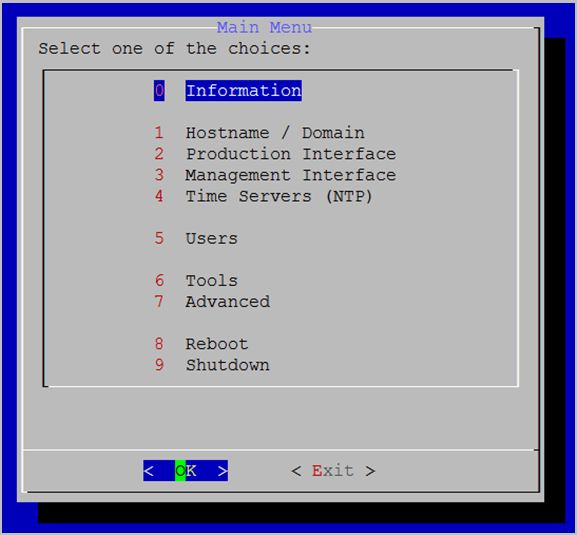
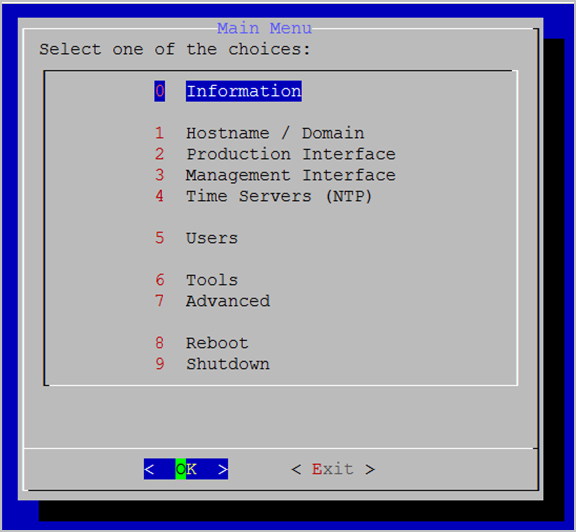
- Log in to the System Console. The Main Menu displays.
- Enter 0 to select the Information option.
- Press the Enter key to select OK. The Information Menu displays.
- Enter 1 to select the Applications option.
- Press the Enter key to select OK. The Modules window displays.
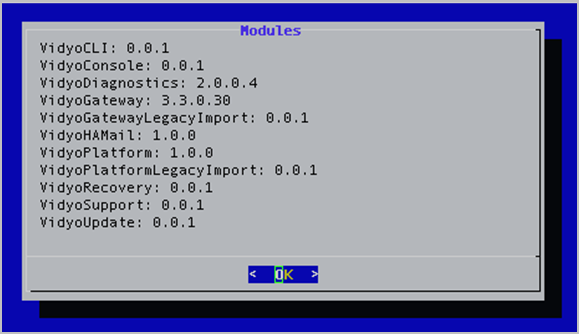
This window displays the list of the platform applications and the version number of each one. This information is useful for troubleshooting by the Vidyo Customer Support team.
View system information
To view system information:
- Log in to the System Console. The Main Menu displays.

- Enter 0 to select the Information option.
- Press the Enter key to select OK. The Information Menu displays.
- Enter 2 to select the System option.
- Press the Enter key to select OK. The System window displays.
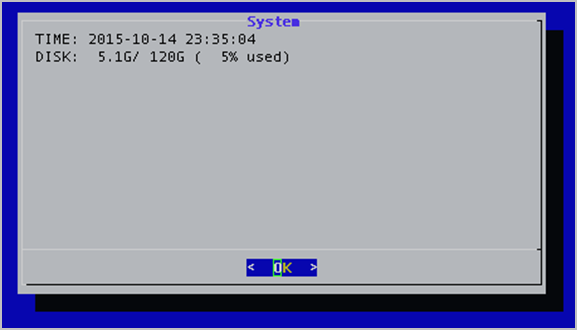
This window displays the system time, the used disk space, the available disk space, and the percentage used.
Set the hostname and the domain
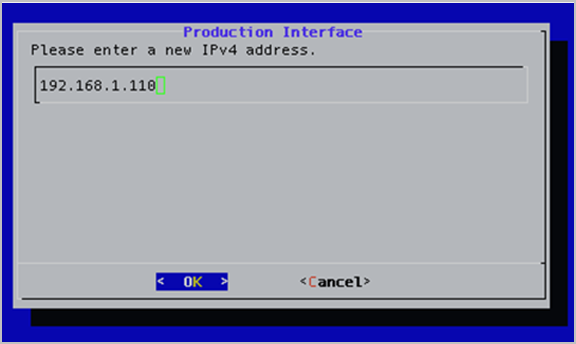
Your Vidyo server default IP is 192.168.1.110 and should be changed to align with your local area network.
|
Note A network setup must be performed for each of your Vidyo servers. |
To set the hostname and the domain:
- Log in to the System Console. The Main Menu displays.

- Enter 1 to select the Hostname/Domain option.
- Press the Enter key to select OK. The Hostname window displays.
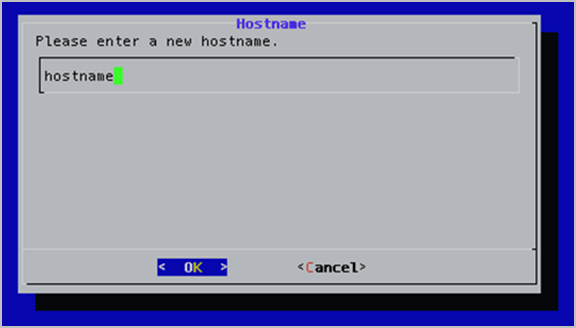
- Enter the hostname.
- Press the Enter key to select OK. The Domain window displays.

- Enter the domain.
- Press the Enter key to select OK. The Confirm window displays.
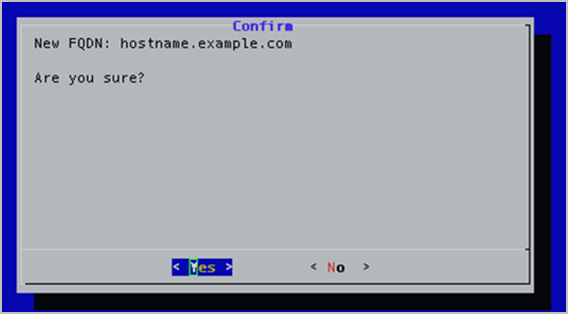
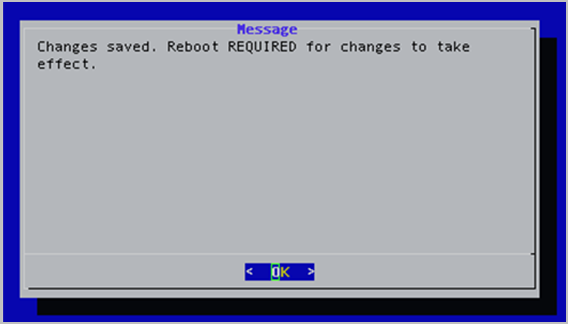
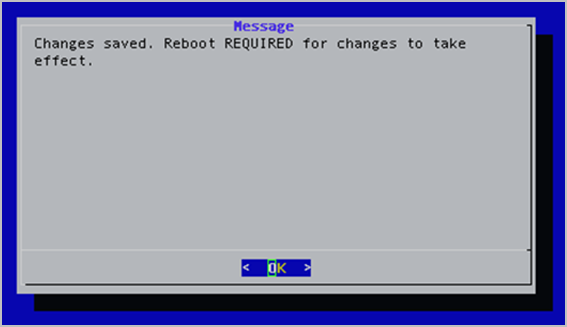
- Press the Enter key to select Yes. A message displays stating “Changes saved. Reboot REQUIRED for changes to take effect.”
- Press the Enter key to select OK.
Configure the Production Interface
Static routes are used in deployments where Vidyo servers are in a DMZ between two segregated firewalls with no route for either internal or external traffic. Network Routes are also used when the Management Interface is enabled and you want to route traffic across that network.
|
Note We recommend that you add a proper network router to your DMZ to handle the subnet routes. A static route setup can lead to security vulnerabilities and should only be configured by advanced network administrators. Vidyo is not responsible for any possible security risk resulting from static route configurations. |
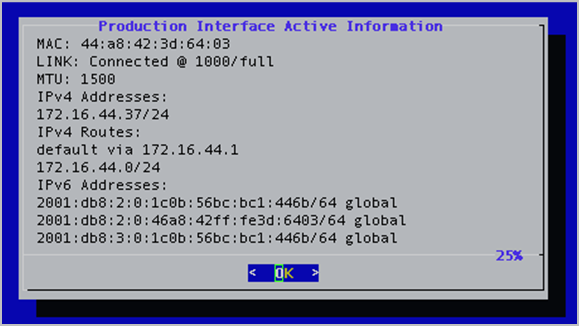
View the Production Interface active information
The Production Interface Active Information page provides important information about the Production Interface, such as the currently configured IP address, link status, and duplex settings.
To view the Production Interface active information:
- Log in to the System Console. The Main Menu displays.

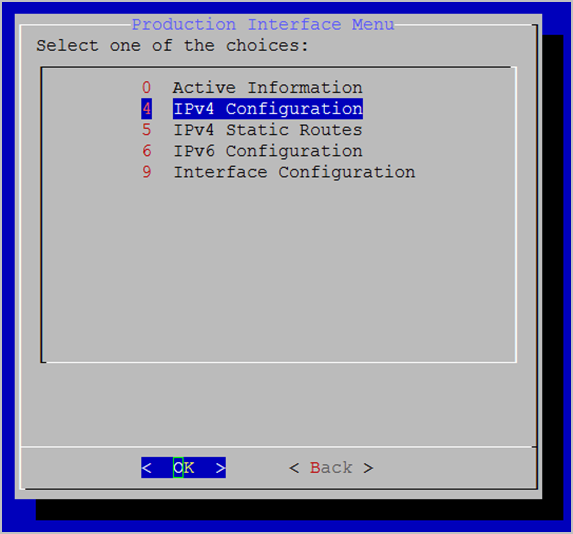
- Enter 2 to select the Production Interface option.
- Press the Enter key to select OK. The Production Interface Menu displays.
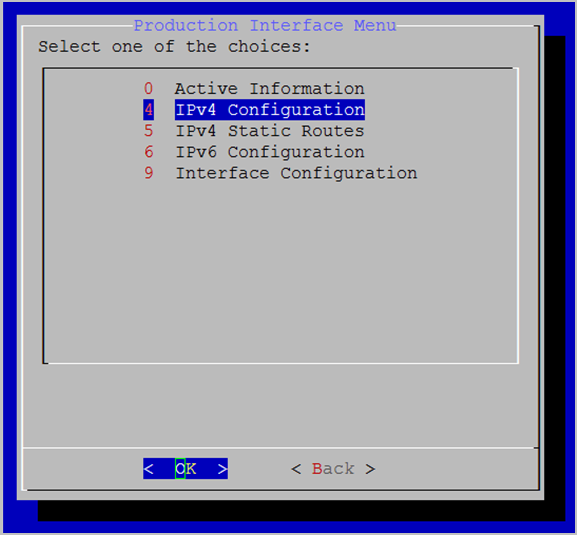
- Enter 0 to select the Active Information option.
- Press the Enter key to select OK. The Product Interface Active Information window displays.
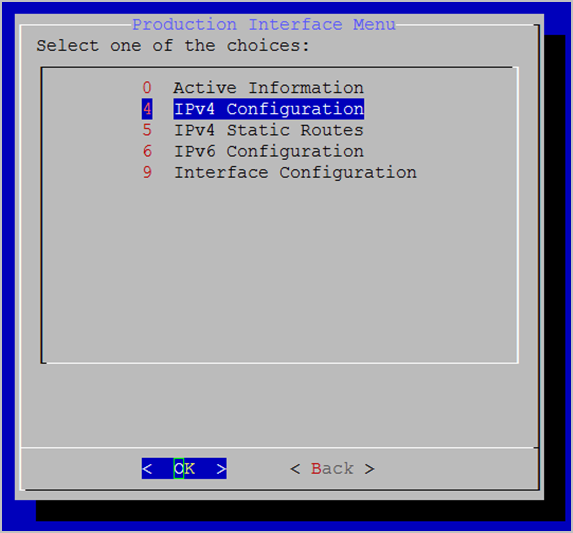
Configure the IPv4 Production Interface
This section describes how to manually enable and disable the IPv4 Production Interface, how to configure IPv4 static and dynamic routes, and how to add and remove static routes.
Manually disable and enable the IPv4 Production Interface
To manually disable or enable the IPv4 Production Interface:
- Log in to the System Console. The Main Menu displays.
- Enter 2 to select the Production Interface option.
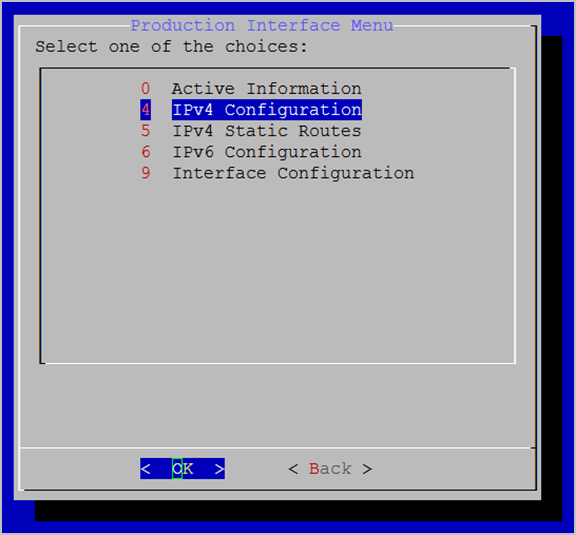
- Press the Enter key to select OK. The Production Interface Menu displays.
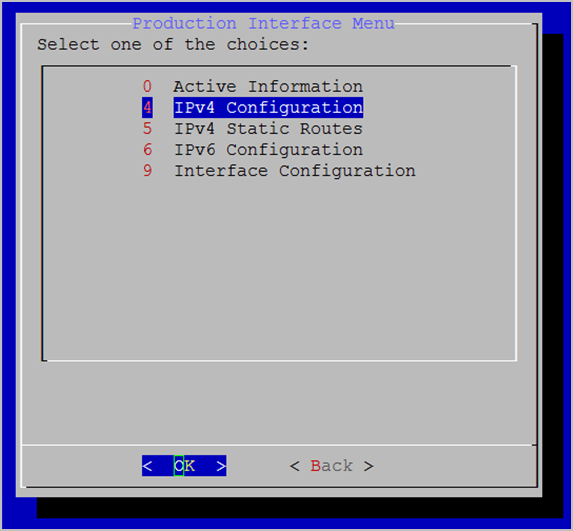
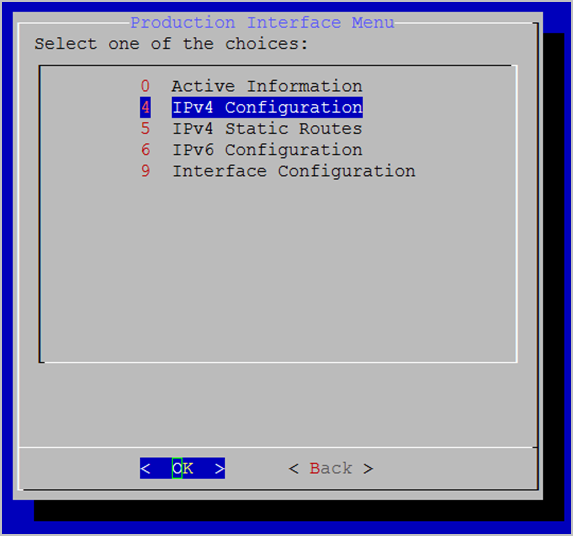
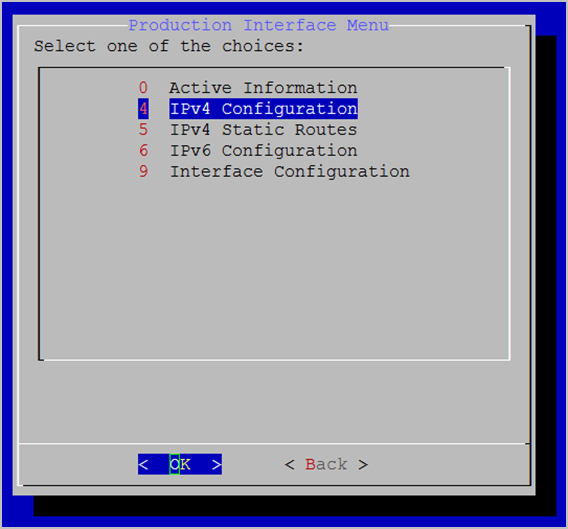
- Enter 4 to select the IPv4 Configuration option.
- Press the Enter key to select OK.
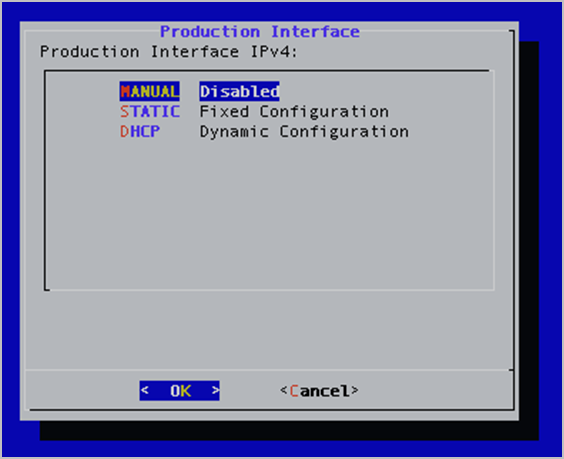
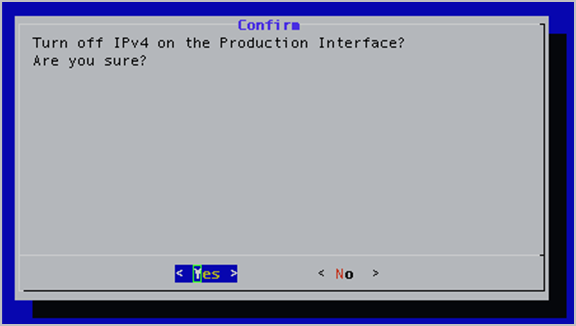
- Enter M to select the MANUAL option.
- Press the Enter key to select OK.
If the current state of the Production Interface is enabled, you are asked to confirm if you want to disable it. If the current state of the Production Interface is disabled, you are asked to confirm if you want to enable it.
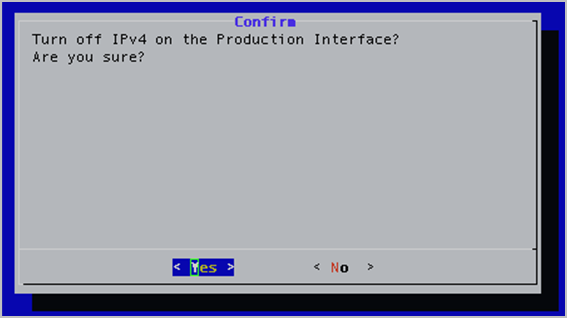
- Press the Enter key to select Yes. A message displays stating “Changes saved. Reboot REQUIRED for changes to take effect.”
- Press the Enter key to select OK.
Configure an IPv4 Static Production Interface
To configure an IPv4 Production Interface:
- Log in to the System Console. The Main Menu displays.
- Enter 2 to select the Production Interface option.
- Press the Enter key to select OK. The Production Interface Menu displays.
- Enter 4 to select the IPv4 Configuration option.
- Press the Enter key to select OK.
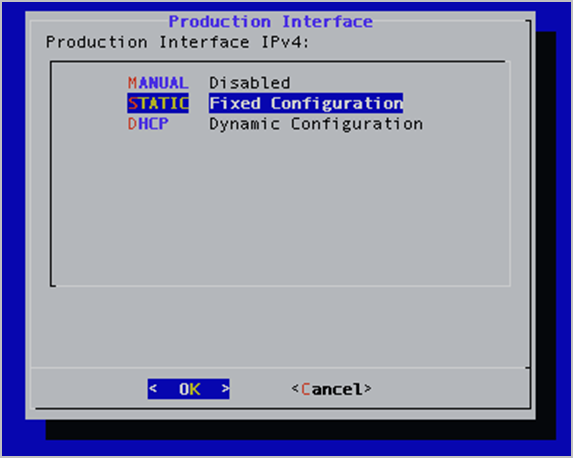
- Enter S to select the STATIC option.
- Press the Enter key to select OK.
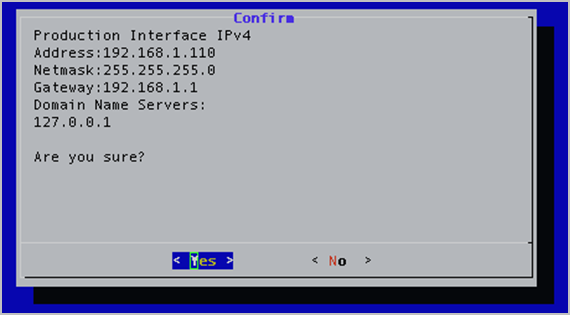
- Delete the existing IPv4 address and enter a new one.
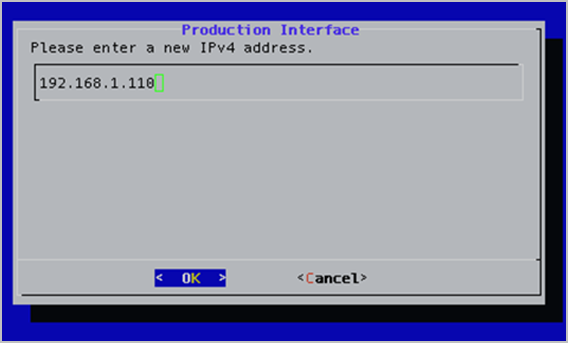
- Press the Enter key to select OK.
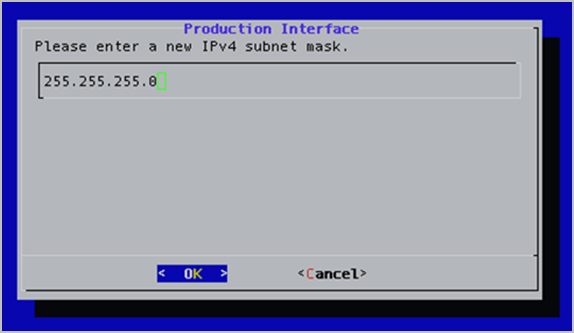
- Delete the existing IPv4 subnet mask and enter a new one.
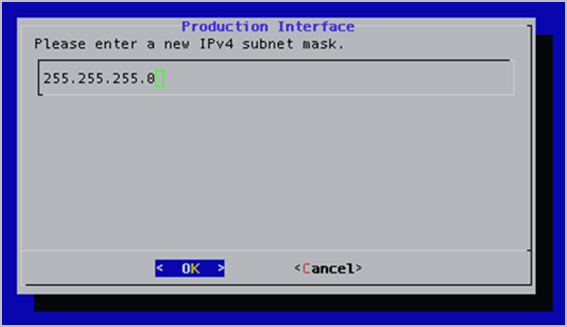
- Press the Enter key to select OK.
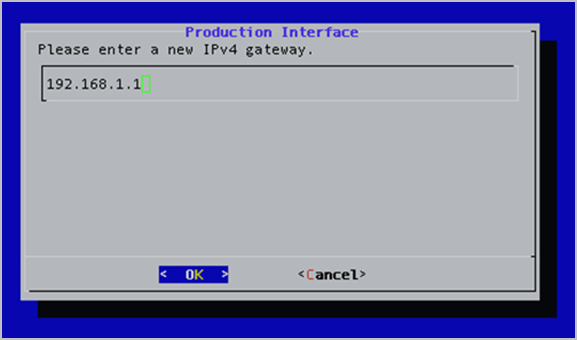
- Delete the existing IPv4 gateway and enter a new one.
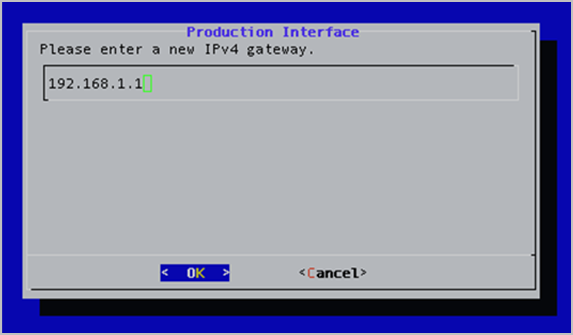
- Press the Enter key to select OK.
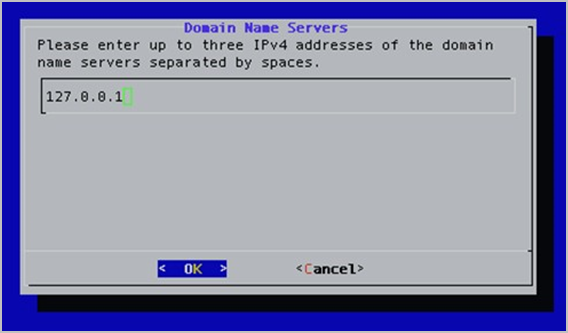
- Delete the existing Domain Name Server and enter up to three.

- Press the Enter key to select OK. The Confirm window displays.
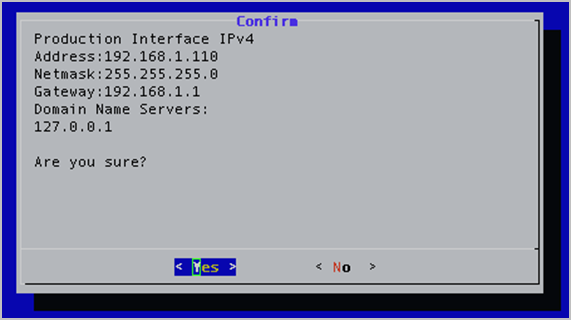
- Press the Enter key to select Yes. A message displays stating “Changes saved. Reboot REQUIRED for changes to take effect.”
- Press the Enter key to select OK. For more information about configuring the Production and Management interfaces, see Configure the Production Interface and Configure the Management Interface.
Configure an IPv4 DHCP Production Interface
To configure an IPv4 DHCP Production Interface:
- Log in to the System Console. The Main Menu displays.
- Enter 2 to select the Production Interface option.
- Press the Enter key to select OK. The Production Interface Menu displays.

- Enter 4 to select the IPv4 Configuration option.
- Press the Enter key to select OK.
- Enter D to select the DHCP option.
- Press the Enter key to select OK. The Confirm window displays.

- Press the Enter key to select Yes. A message displays stating “Changes saved. Reboot REQUIRED for changes to take effect.”
- Press the Enter key to select OK.
Configure IPv4 Static routes
This section describes how to add and remove IPv4 static routes.
The VidyoGateway system supports IPv4 only or IPv6 only mode. Dual stack mode is not supported.
Add IPv4 Static routes
To add IPv4 Static routes:
- Log in to the System Console. The Main Menu displays.

- Enter 2 to select the Production Interface option.
- Press the Enter key to select OK. The Production Interface Menu displays.
- Enter 5 to select the IPv4 Static Routes option.
- Press the Enter key to select OK. The IPv4 Static Routes window displays.
- Enter A to select the Add option.
- Press the Enter key to select OK.
- Delete the existing IPv4 address and enter a new one.
- Press the Enter key to select OK.
- Delete the existing IPv4 subnet mask and enter a new one.
- Press the Enter key to select OK.
- Delete the existing IPv4 gateway and enter a new one.
- Press the Enter key to select OK.
- Delete the existing Domain Name Server and enter up to three.
- Press the Enter key to select OK. The Confirm window displays.
- Press the Enter key to select Yes. A message displays stating “Changes saved. Reboot REQUIRED for changes to take effect.”
- Press the Enter key to select OK. For more information about configuring the Production and Management interfaces, see Configure the Production Interface and Configure the Management Interface.
Remove IPv4 Static routes
To remove IPv4 static routes:
- Log in to the System Console. The Main Menu displays.
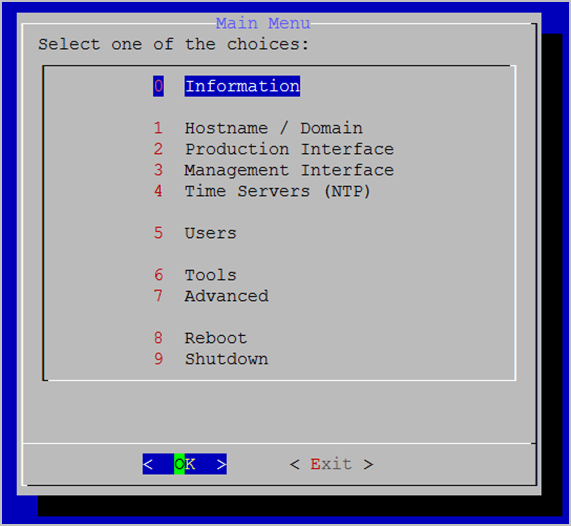
- Enter 2 to select the Production Interface option.
- Press the Enter key to select OK. The Production Interface Menu displays.
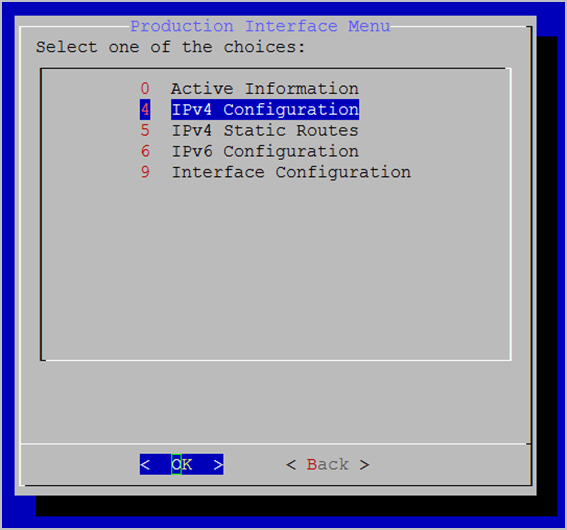
- Enter 5 to select the IPv4 Static Routes option.
- Press the Enter key to select OK. The IPv4 Static Routes window displays.
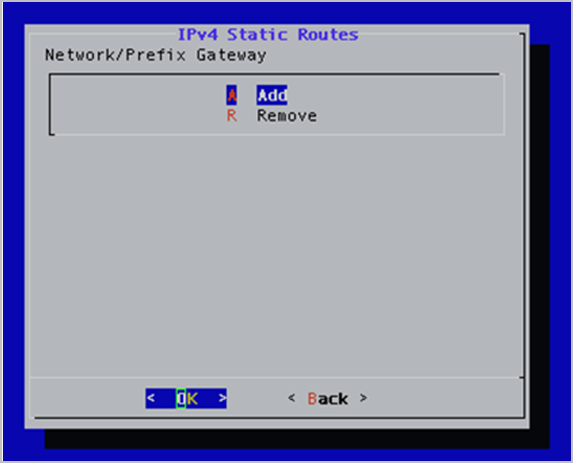
- Enter R to select the Remove option.
- Press the Enter key to select OK. The IPv4 Static Routes window displays.
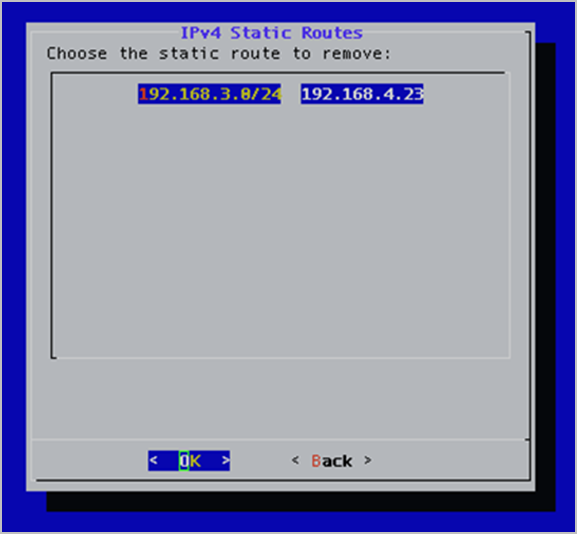
- Select the static route to remove.
- Press the Enter key to select OK. A message displays stating “Changes saved. Reboot REQUIRED for changes to take effect.”
- Press the Enter key to select OK.
Configure the IPv6 Production Interface
This section describes how to manually enable and disable the IPv6 Production Interface, how to configure IPv6 static and dynamic routes, and how to add and remove static routes.
Manually disable and enable the IPv6 Production Interface
To manually disable or enable the IPv6 Production Interface:
- Log in to the System Console. The Main Menu displays.
- Enter 2 to select the Production Interface option.
- Press the Enter key to select OK. The Production Interface Menu displays.
- Enter 6 to select the IPv6 Configuration option.
- Press the Enter key to select OK.

- Enter M to select the MANUAL option.
- Press the Enter key to select OK.
If the current state of the Production Interface is enabled, you are asked to confirm if you want to disable it. If the current state of the Production Interface is disabled, you are asked to confirm if you want to enable it.
- Press the Enter key to select Yes. A message displays stating “Changes saved. Reboot REQUIRED for changes to take effect.”
- Press the Enter key to select OK.
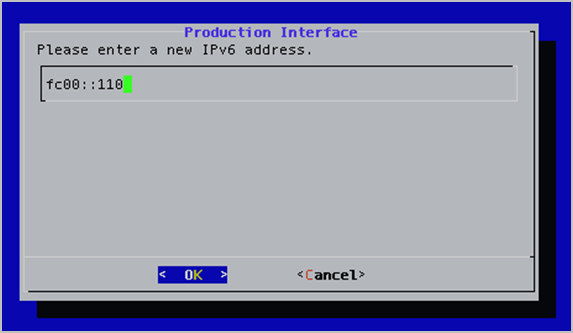
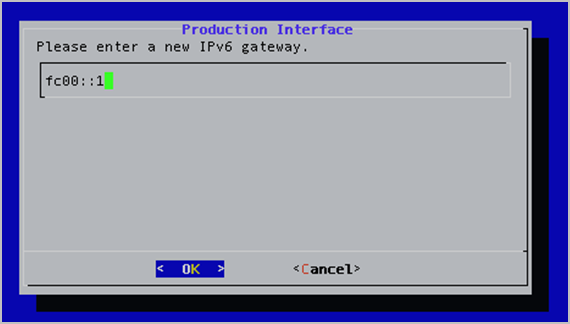
Configure an IPv6 Static Production Interface
To configure an IPv6 static Production Interface:
- Log in to the System Console. The Main Menu displays.

- Enter 2 to select the Production Interface option.
- Press the Enter key to select OK. The Production Interface Menu displays.
- Enter 6 to select the IPv6 Configuration option.
- Press the Enter key to select OK.

- Enter S to select the STATIC option.
- Press the Enter key to select OK.
- Delete the existing IPv6 address and enter a new one.
- Press the Enter key to select OK.
- Delete the existing IPv6 address and enter a new one.
- Press the Enter key to select OK.
- Delete the existing IPv6 gateway and enter a new one.
- Press the Enter key to select OK.
- Delete the existing Domain Name Server and enter up to three.
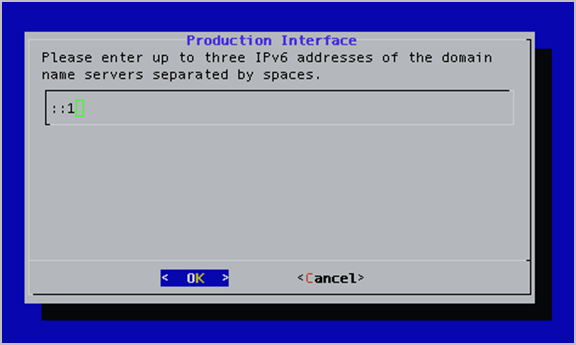
- Press the Enter key to select OK. The Confirm window displays.
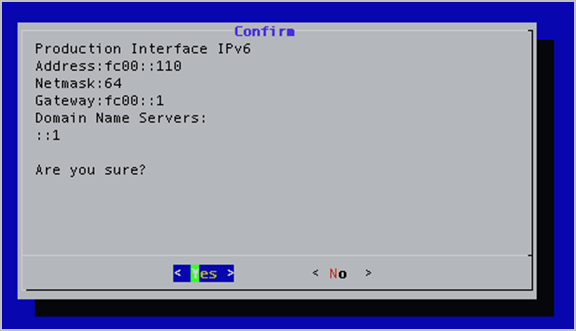
- Press the Enter key to select Yes. A message displays stating “Changes saved. Reboot REQUIRED for changes to take effect.”
- Press the Enter key to select OK. For more information about configuring the Production and Management interfaces, see Configure the Production Interface and Configure the Management Interface.
Configure stateless automatic configuration
To configure stateless automatic configuration:
- Log in to the System Console. The Main Menu displays.
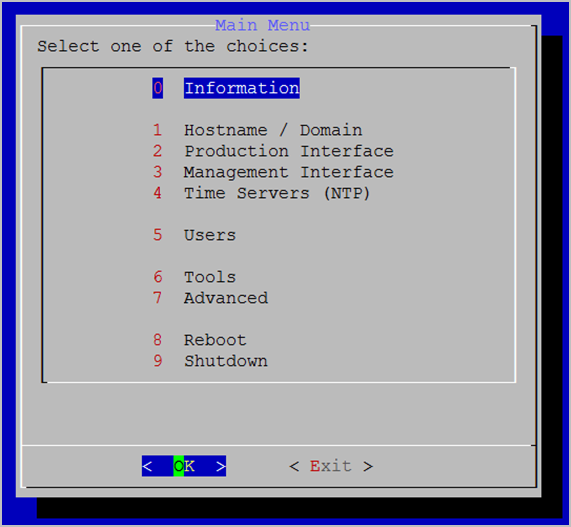
- Enter 2 to select the Production Interface option.
- Press the Enter key to select OK. The Production Interface Menu displays.

- Enter 6 to select the IPv6 Configuration option.
- Press the Enter key to select OK.
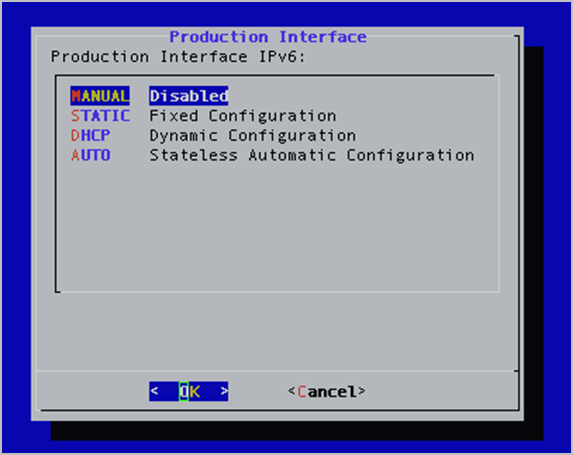
- Enter A to select the AUTO option.
- Press the Enter key to select OK. The Confirm window displays.
- Press the Enter key to select Yes. A message displays stating “Changes saved. Reboot REQUIRED for changes to take effect.”
- Press the Enter key to select OK.
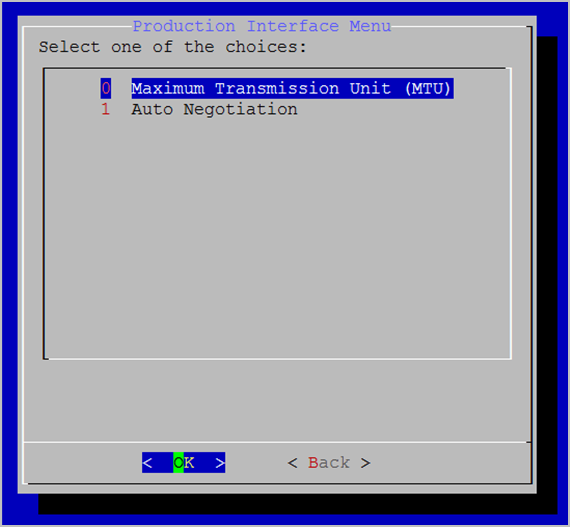
Configure the MTU and auto negotiation for the Production Interface
This section describes how to configure the Maximum Transmission Unit (MTU) of the network and how to configure auto negotiation for the Production Interface.
Configure the Maximum Transmission Unit (MTU)
To configure the Maximum Transmittion Unit (MTU):
- Log in to the System Console. The Main Menu displays.

- Enter 2 to select the Production Interface option.
- Press the Enter key to select OK. The Production Interface Menu displays.
- Enter 9 to select the Interface Configuration option.
- Press the Enter key to select OK. The Production Interface Menu displays.

- Enter 0 to select the Maximum Transmission Unit (MTU) option.
- Enter the MTU of the networks in bytes.

- Press the Enter key to select OK. A Confirm window displays.
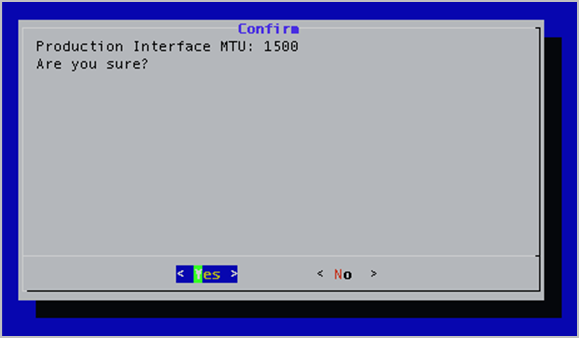
- Press the Enter key to select Yes. A message displays stating “Changes saved. Reboot REQUIRED for changes to take effect.”
- Press the Enter key to select OK.
Configure auto negotiation
To configure auto negotiation:
- Log in to the System Console. The Main Menu displays.

- Enter 2 to select the Production Interface option.
- Press the Enter key to select OK. The Production Interface Menu displays.
- Enter 9 to select the Interface Configuration option.
- Press the Enter key to select OK.
- Enter 1 to select the Auto Negotiation option.
- Press the Enter key to select OK.
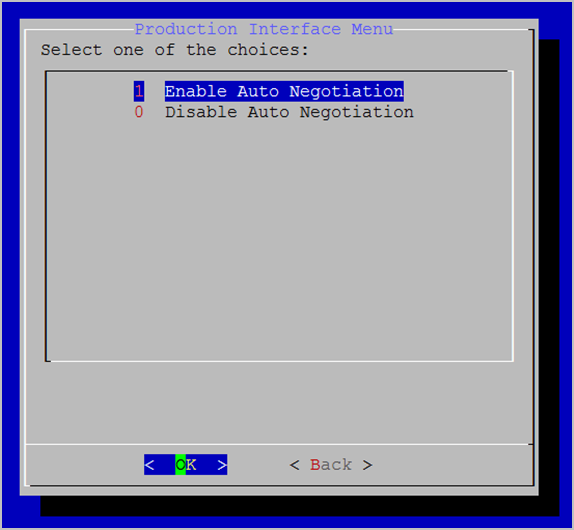
- Enter 1 to enable Auto Negotiation or enter 0 to disable Auto Negotiation.
- Press the Enter key to select OK. A Confirm window displays.
- Press the Enter key to select Yes.
A message displays stating “Changes saved. Reboot REQUIRED for changes to take effect.” - Press the Enter key to select OK.
Configure the Management Interface
Static routes are used in deployments where Vidyo servers are in a DMZ between two segregated firewalls with no route for either internal or external traffic. Network Routes are also used when the Management Interface is enabled and you want to route traffic across that network
|
Note We recommend that you add a network router to your DMZ to handle the proper subnet routes. Static route setup can lead to security vulnerabilities and should only be configured by advanced network administrators. Vidyo is not responsible for any possible security risk resulting from static route configurations. Currently, you can only add a static route for one host at a time. Adding static routes for a range of IP addresses (or subnet) is not supported at this time. |
The Management Interface should not be used to transfer any media.
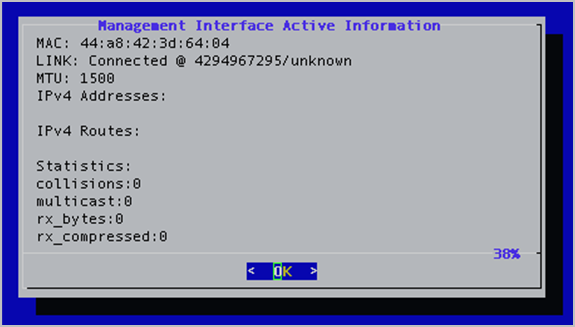
View the Management Interface active information
The Management Interface Active Information page provides important information about the Management Interface, such as the currently configured IP address and the link status.
To view the Management Interface active information:
- Log in to the System Console. The Main Menu displays.
- Enter 3 to select the Management Interface option.
- Press the Enter key to select OK. The Management Interface Menu displays.
- Enter 0 to select the Active Information option.
- Press the Enter key to select OK. The Management Interface Active Information window displays.
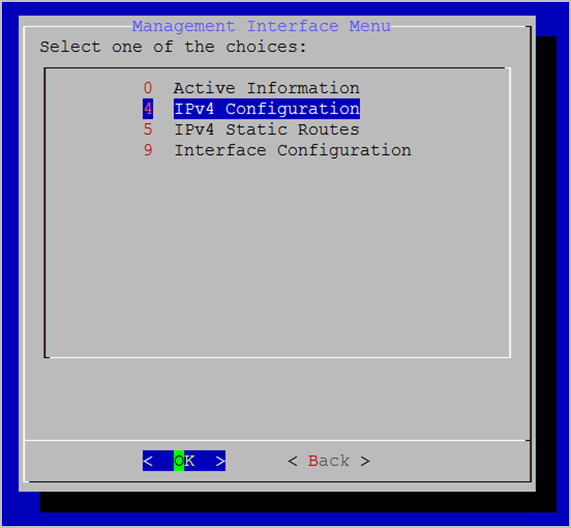
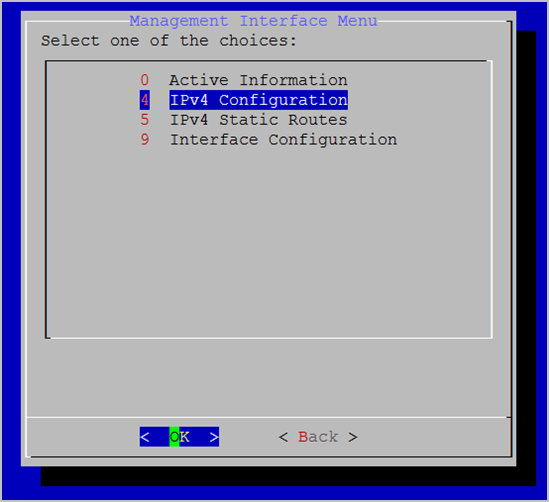
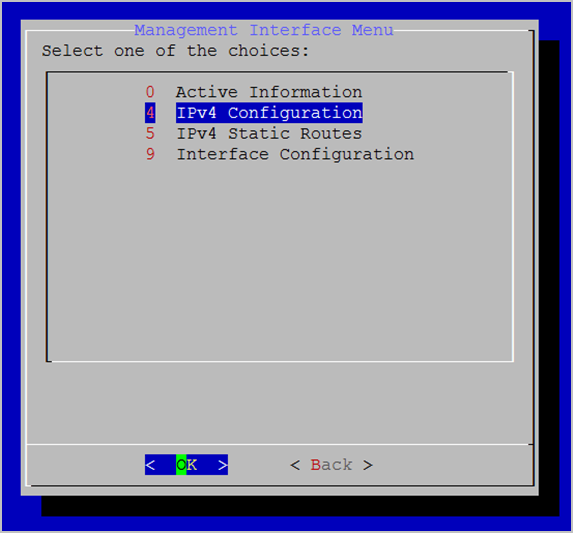
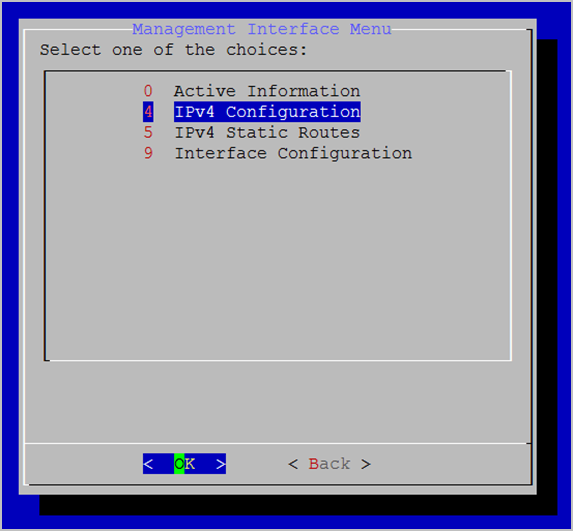
Configure the IPv4 Management Interface
This section describes how to manually enable and disable the IPv4 Production Interface, how to configure IPv4 static and dynamic routes, and how to add and remove static routes.
Manually disable and enable the IPv4 Management Interface
To manually disable or enable the IPv4 Management Interface:
- Log in to the System Console. The Main Menu displays.

- Enter 3 to select the Management Interface option.
- Press the Enter key to select OK. The Management Interface Menu displays.
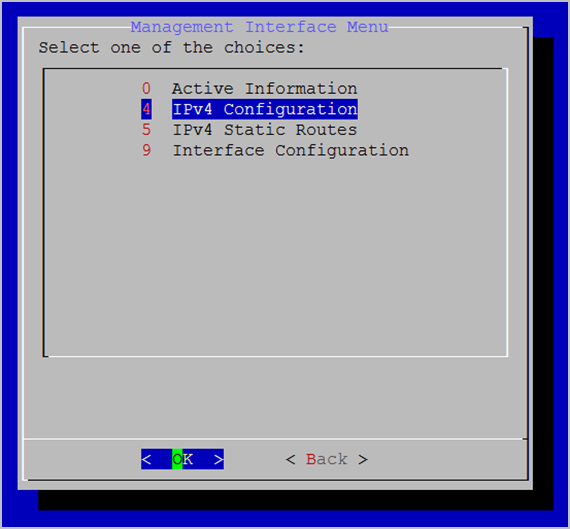
- Enter 4 to select the IPv4 Configuration option.
- Press the Enter key to select OK.

- Enter M to select the MANUAL option.
- Press the Enter key to select OK.
If the current state of the Management Interface is enabled, you are asked to confirm if you want to disable it; if the current state of the Management Interface is disabled, you are asked to confirm if you want to enable it.
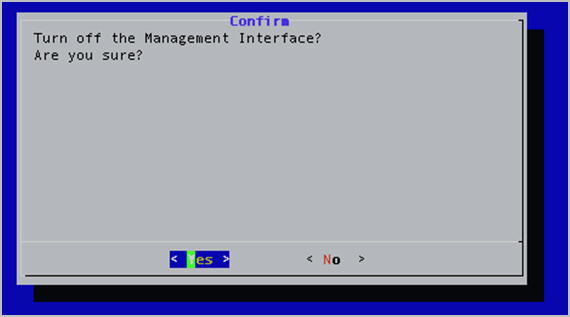
- Press the Enter key to select Yes. A message displays stating “Changes saved. Reboot REQUIRED for changes to take effect.”
- Press the Enter key to select OK.
Configure an IPv4 Static Management Interface
To configure an IPv4 static Management Interface:
- Log in to the System Console. The Main Menu displays.

- Enter 3 to select the Management Interface option.
- Press the Enter key to select OK. The Management Interface Menu displays.
- Enter 4 to select the IPv4 Configuration option.
- Press the Enter key to select OK.
- Enter S to select the STATIC option.

- Press the Enter key to select OK.
- Delete the existing IPv4 address and enter a new one.
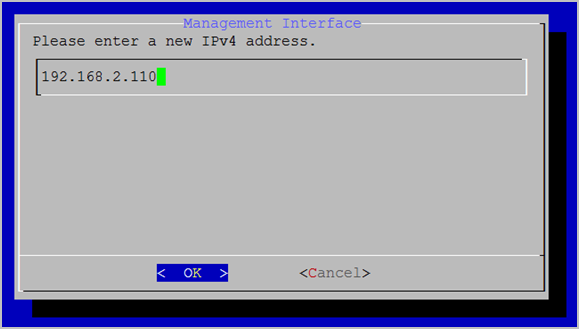
- Press the Enter key to select OK.
- Delete the existing IPv4 subnet mask and enter a new one.
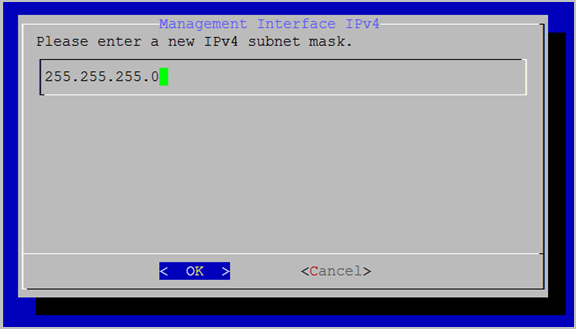
- Press the Enter key to select OK. The Confirm window displays.
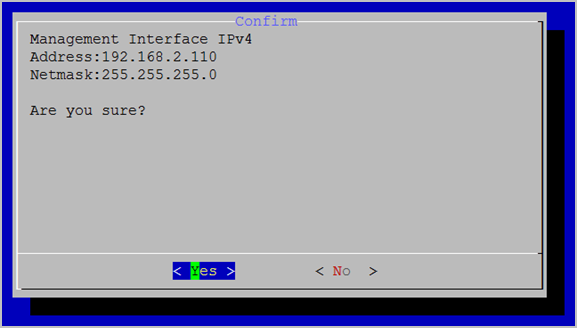
- Press the Enter key to select Yes. A message displays stating “Changes saved. Reboot REQUIRED for changes to take effect.”
- Press the Enter key to select OK.For more information about configuring the Production and Management interfaces, see Configure the Production Interface and Configure the Management Interface.
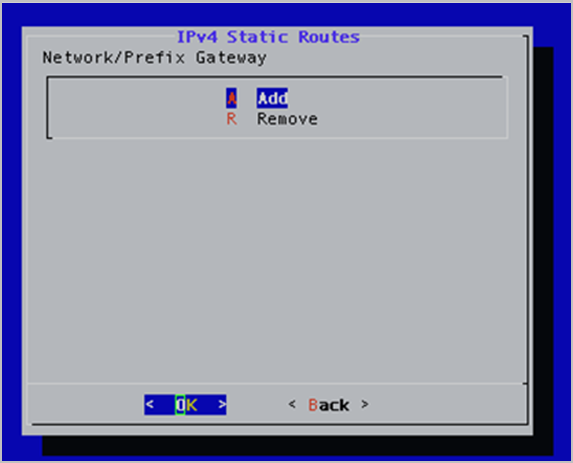
Configure IPv4 Static Routes
To add IPv4 Static Routes:
- Log in to the System Console. The Main Menu displays.
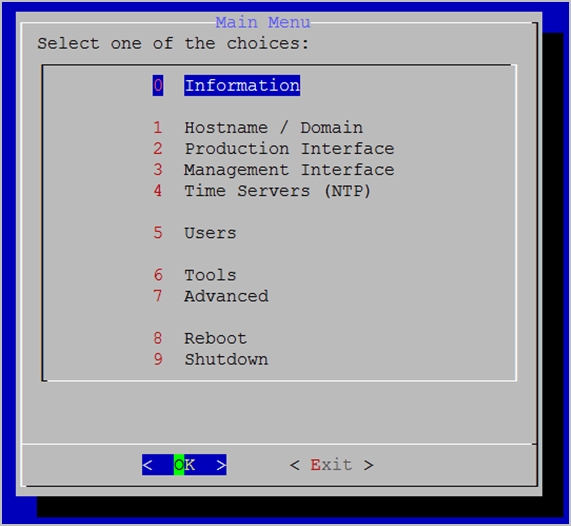
- Enter 3 to select the Management Interface option.
- Press the Enter key to select OK. The Management Interface Menu displays.
- Enter 5 to select the IPv4 Static Routes option.
- Press the Enter key to select OK. The IPv4 Static Routes window displays.
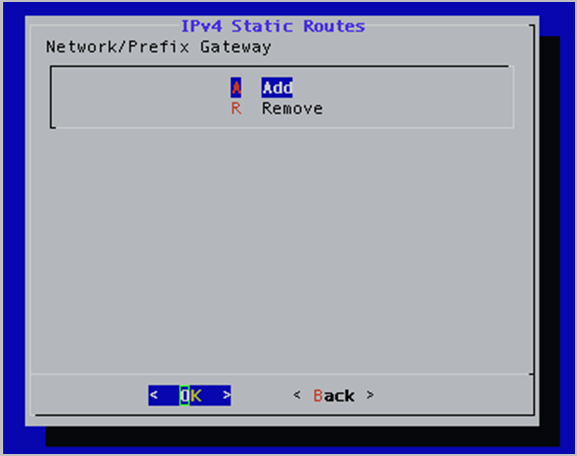
- Enter A to select the Add option.
- Press the Enter key to select OK. The IPv4 Static Routes window displays.
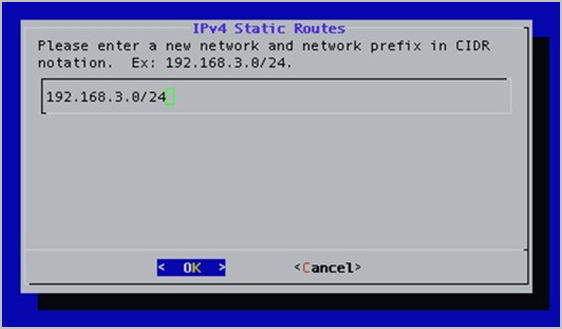
- Enter a new network with the prefix in CIDR notation (for example, 192.168.3.0/24).
- Press the Enter key to select OK.
- Enter a new network gateway.

- Press the Enter key to select OK. The Confirm window displays.
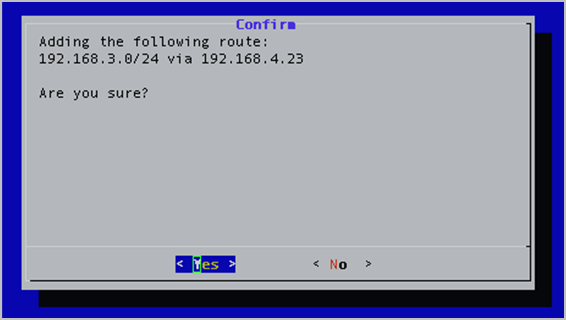
- Press the Enter key to select Yes. A message displays stating “Changes saved. Reboot REQUIRED for changes to take effect.”
- Press the Enter key to select OK.
Remove IPv4 Static Routes
To remove IPv4 static routes:
- Log in to the System Console. The Main Menu displays.

- Enter 3 to select the Management Interface option.
- Press the Enter key to select OK. The Management Interface Menu displays.
- Enter 5 to the IPv4 Static Routes option.
- Press the Enter key to select OK. The IPv4 Static Routes window displays.
- Enter R to select the Remove option.
- Press the Enter key to select OK. The IPv4 Static Routes window displays.
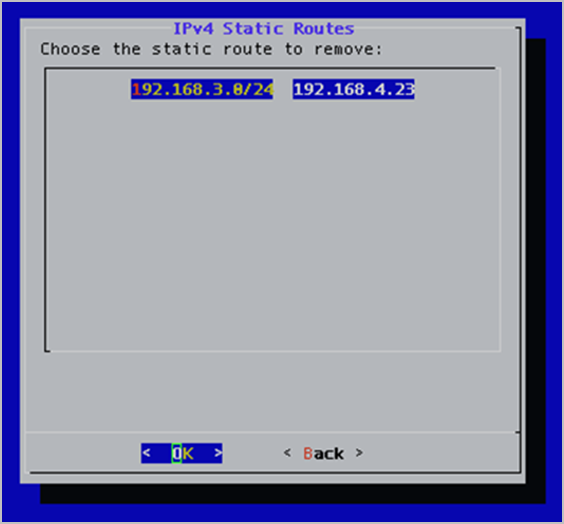
- Select the static route to remove.
- Press the Enter key to select OK. The Confirm window displays.
- Press the Enter key to select Yes. A message displays stating “Changes saved. Reboot REQUIRED for changes to take effect.”
- Press the Enter key to select OK.
Configure the MTU and auto negotiation for the Management Interface
This section describes how to configure the Maximum Transmission Unit (MTU) of the network and how to configure auto negotiation for the Management Interface.
Configure the Maximum Transmission Unit (MTU)
To configure the Maximum Transmittion Unit (MTU):
- Log in to the System Console. The Main Menu displays.
- Enter 3 to select the Management Interface option.
- Press the Enter key to select OK. The Management Interface Menu displays.

- Enter 9 to select the Interface Configuration option.
- Press the Enter key to select OK.
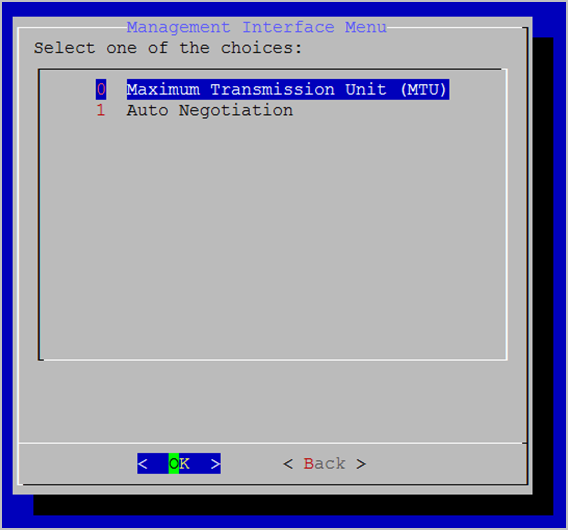
- Enter 0 to select the Maximum Transmission Unit (MTU) option.
- Press the Enter key to select OK.
- Enter the MTU of the networks in bytes.
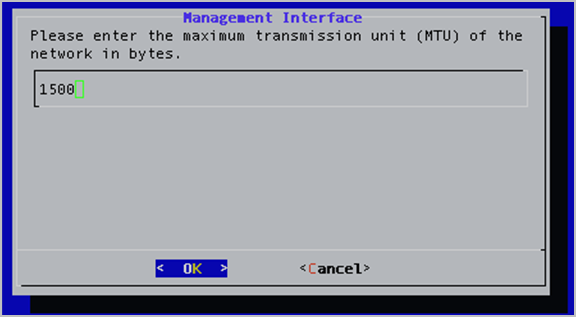
- Press the Enter key to select OK. A Confirm window displays.
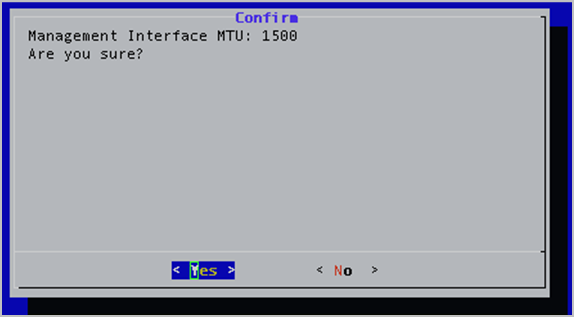
- Press the Enter key to select Yes. A message displays stating “Changes saved. Reboot REQUIRED for changes to take effect.”
- Press the Enter key to select OK.
Configure auto negotiation
To configure auto negotiation:
- Log in to the System Console. The Main Menu displays.
- Enter 3 to select the Management Interface option.
- Press the Enter key to select OK. The Management Interface Menu displays.
- Enter 9 to select the Interface Configuration option.
- Press the Enter key to select OK.
- Enter 1 to select the Auto Negotiation option.
- Press the Enter key to select OK.
- Enter 1 to enable Auto Negotiation or enter 0 to disable Auto Negotiation. A Confirm window displays.
- Press the Enter key to select Yes. A message displays stating “Changes saved. Reboot REQUIRED for changes to take effect.”
- Press the Enter key to select OK.
Configure time servers (NTP)
To configure time servers (NTP):
- Log in to the System Console. The Main Menu displays.
- Enter 4 to select the Time Servers (NTP) option.
- Press the Enter key to select OK. If you have DHCP configured, a message displays stating “The nameservers configured by DHCP take priority over the values configured here” and you must press the Enter key to select OK.
- Enter up to three network time servers separated by a space (for example, pool.ntp.org).
- Press the Enter key to select OK. A Confirm window displays.

- Press the Enter key to select Yes. A message displays stating “Sync time with timeservers now? Timeservers must be reachable. Are you sure?”
- Press the Enter key to select OK. A message displays stating “System time updated.”
Configure users
System Console user accounts can be used on the VidyoPortal, the VidyoRouter, and the VidyoGateway.
The System Console allows for the creation of up to ten System Console user accounts.
|
Note In addition to accessing the System Console menu, the ten System Console accounts can also access the VidyoGateway Admin Pages. Each new System Console account has a default password of password, which is case sensitive. The System Console accounts force a password change on first login. To prevent the use of default passwords, each new System Console user must be present at the local console during account creation. That user must log in and change their password and it must meet password complexity requirements. |
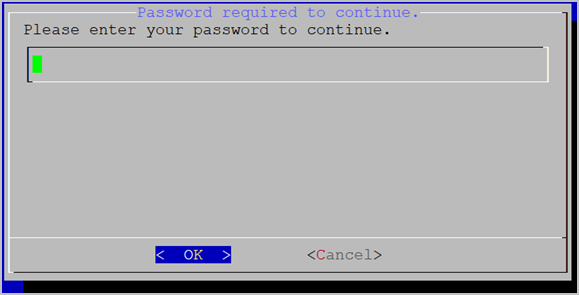
View active user information
To view active user information:
- Log in to the System Console. The Main Menu displays.
- Enter 5 to select the Users option.
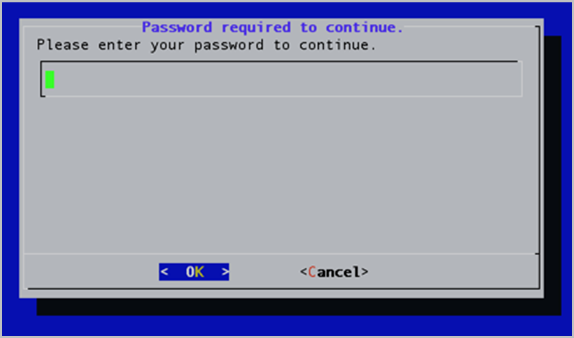
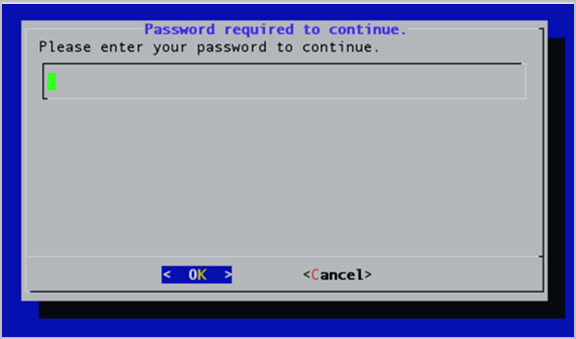
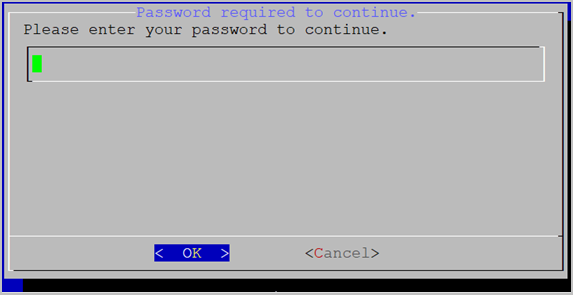
- Press the Enter key to select OK. The Password required to continue window displays.
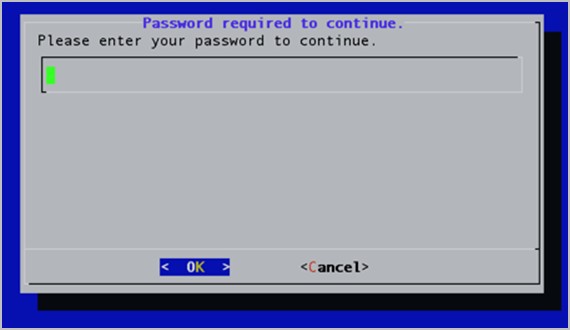
- Enter your password.
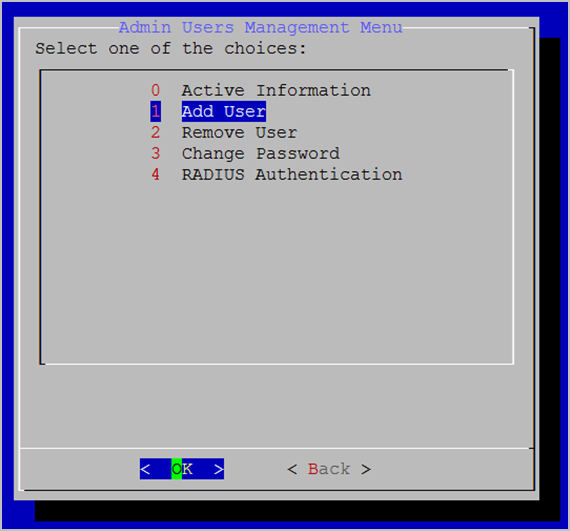
- Press the Enter key to select OK. The Admin Users Management Menu displays.

- Enter 0 to select the Active Information option.
- Press the Enter key to select OK. The Users Active Information window displays.
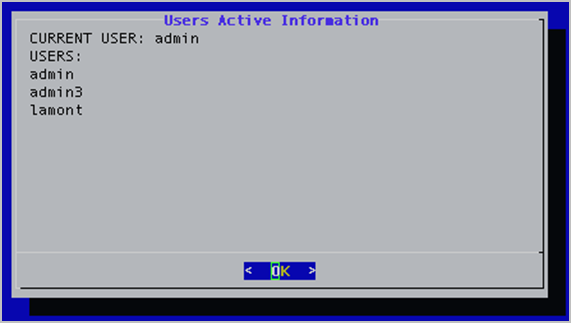
- Press the Enter key to select OK.
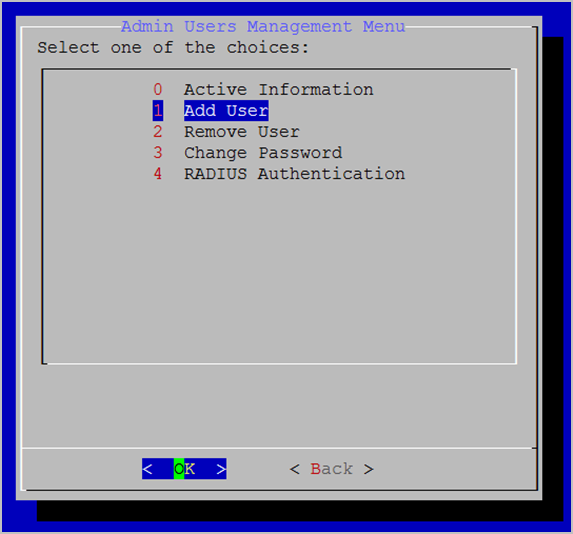
Add users
To add users:
- Log in to the System Console. The Main Menu displays.

- Enter 5 to select the Users option.
- Press the Enter key to select OK. The Password required to continue window displays.
- Enter your password.
- Press the Enter key to select OK. The Admin Users Management Menu displays.
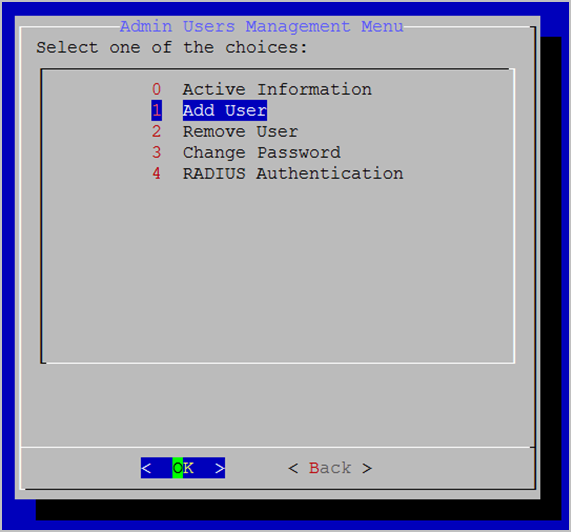
- Enter 1 to select the Add Users option.
- Press the Enter key to select OK.
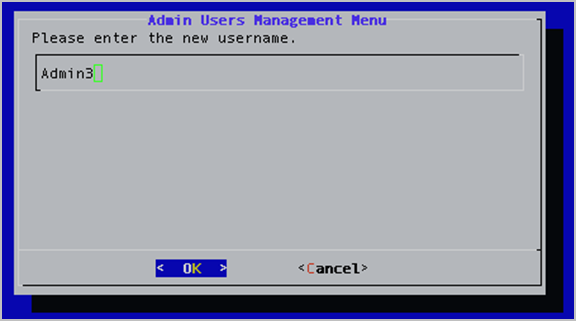
- Enter the username of the user you are adding.
- Press the Enter key to select OK.
- Enter 0 to select the Local option.
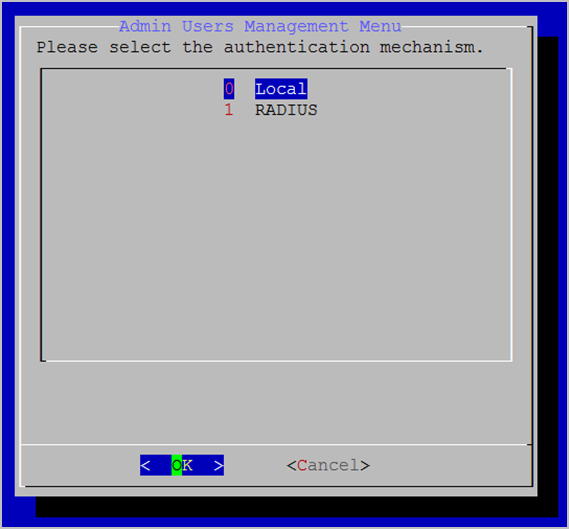
- Press the Enter key to select OK.
- Enter the password of the user you are adding.
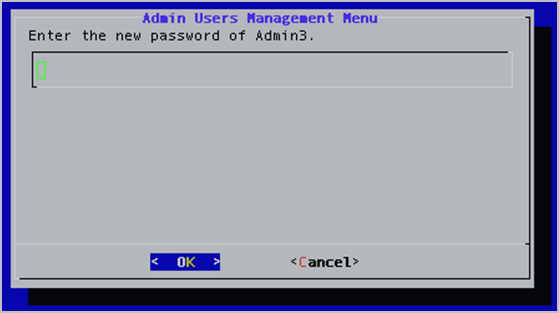
Enter a unique password that follows these password complexity requirements:- The password should not be based on the dictionary.
- The password should not be too like the old password.
The default setting is at least three characters should be different from the old password. - The password should not be too simple or too short.
The algorithm here is a point system to satisfy the minimum password length (the default is length eight characters). The password gets extra points if it contains a number, upper case, lower case, or special character. Each point is equivalent to one character. - The password should not be a case change of the old password or should not be the reverse of the old password.
- Press the Enter key to select OK.
- Enter the password again to confirm it.
- Press the Enter key to select OK. A message displays stating “[User] has been added.”
- Press the Enter key to select OK.
If the passwords don’t match, you’ll be prompted to try again. If the passwords match, the System Console menu opens immediately.
|
Note When you need to reset the password, use option 3. Change Password. This functionality is only available for local admin accounts. For more information, see Change user passwords. |
Remove users
To remove users:
- Log in to the System Console. The Main Menu displays.

- Enter 5 to select the Users option.
- Press the Enter key to select OK. The Password required to continue window displays.
- Enter your password.
- Press the Enter key to select OK. The Admin Users Management Menu displays.
- Enter 2 to select the Remove User option.
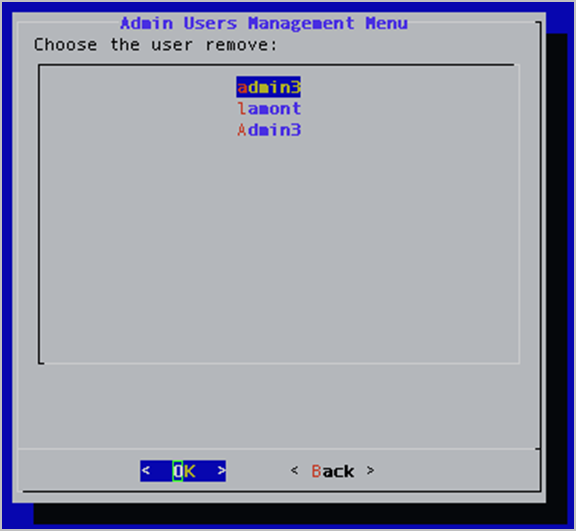
- Select the user you want to remove.
- Press the Enter key to select OK. The Confirm window displays.
- Press the Enter key to select Yes. A message displays stating “[User] has been removed.”
- Press the Enter key to select OK.
Change user passwords
To change user passwords:
- Log in to the System Console. The Main Menu displays.

- Enter 5 to select the Users option.
- Press the Enter key to select OK. The Password required to continue window displays.
- Enter your password.
- Press the Enter key to select OK. The Admin Users Management Menu displays.
- Enter 3 to select the Change Password option.
- Press the Enter key to select OK.
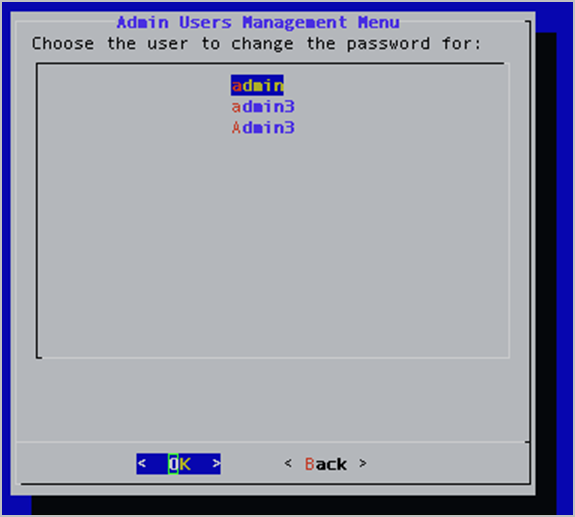
- Select the user whose password you want to change.
- Press the Enter key to select OK. The Confirm window displays.
- Press the Enter key to select Yes.
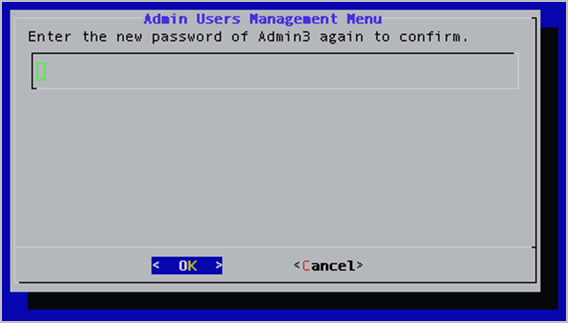
- Enter the new password for the user.
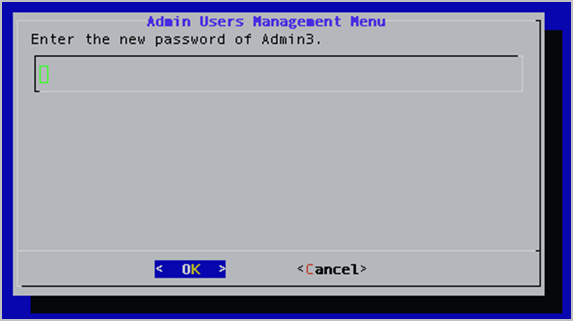
- Press the Enter key to select OK.
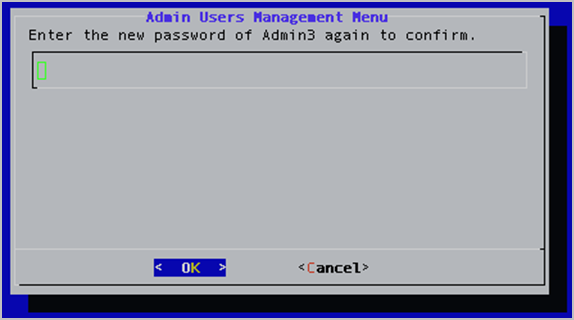
- Enter the password again to confirm it.
- Press the Enter key to select OK. A message displays stating “Password changed for [user].”
- Press the Enter key to select OK.
Configure RADIUS authentication
For additional information, see 4. Configure RADIUS.
Access tools
The Tools menu enables you to access the Ping, DNS Lookup, and Traceroute tools.
To access tools:
- Log in to the System Console. The Main Menu displays.
- Enter 6 to select the Tools option.
- Press the Enter key to select OK. The Tools menu displays.
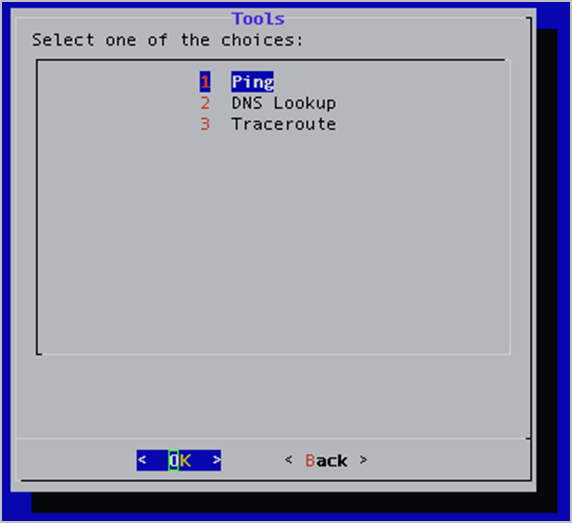
- Do any of the following:
- Enter 1 to test connectivity to an IP address.
- Enter 2 to perform a DNS lookup.
- Enter 3 to perform a traceroute.
- Press the Enter key to select OK.
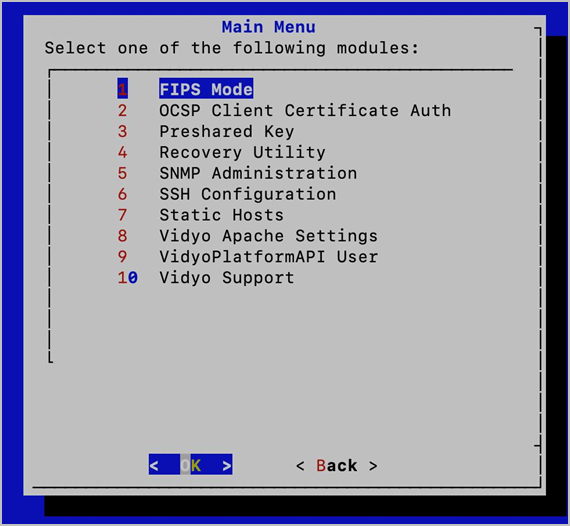
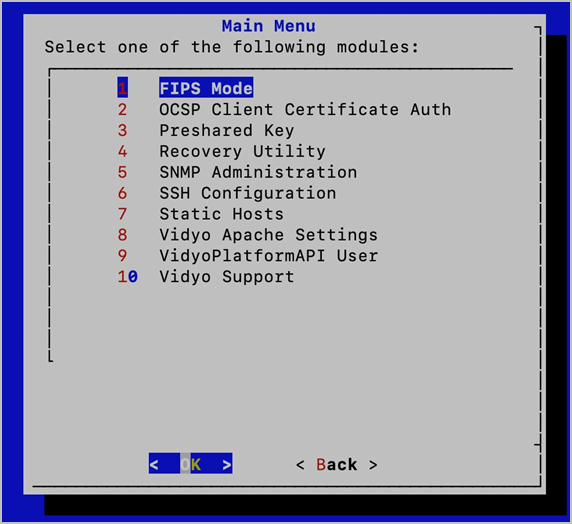
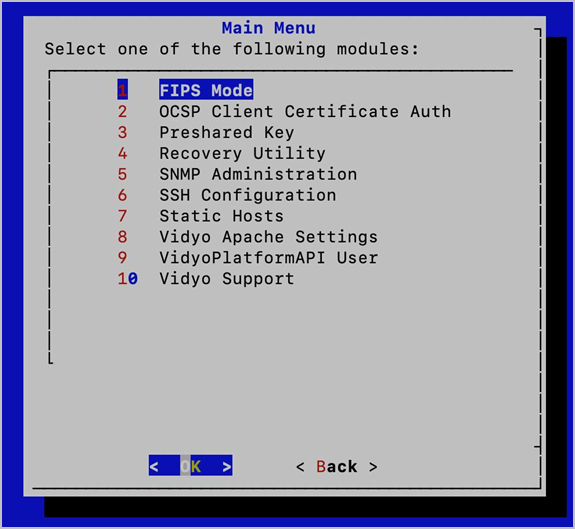
Perform advanced configuration
The Advanced screen allows administrators to perform more advanced configuration functions, such as setting SNMP, taking backups of the system, and reconfiguring SSH ports among others.
Configure FIPS
FIPS is the Federal Information Processing Standard 140-2. By default, FIPS mode is disabled on your Vidyo server.
FIPS Certified Modules include the following:
- Vidyo’s SDK has been FIPS 140-2 validated: http://csrc.nist.gov/groups/STM/cmvp/documents/140-1/1401val2012.htm
- Third-party applications (Apache, Net-SNMP, OpenSSH, and OpenSSL) have been built using the FIPS-validated OpenSSL module.
The following steps show you how to enable or disable FIPS mode from the System Console.
To configure FIPS:
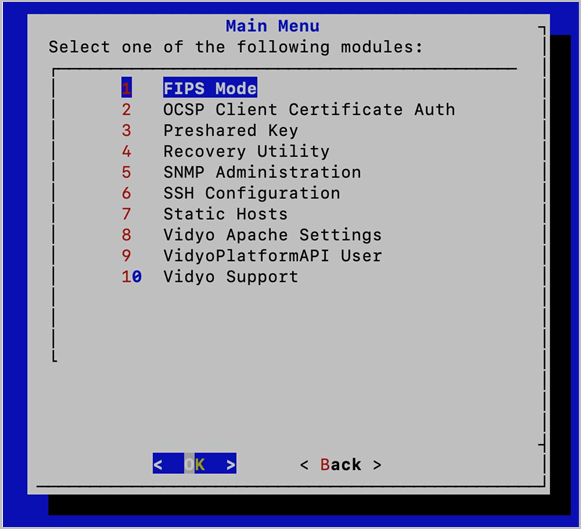
- Log in to the System Console. The Main Menu displays.

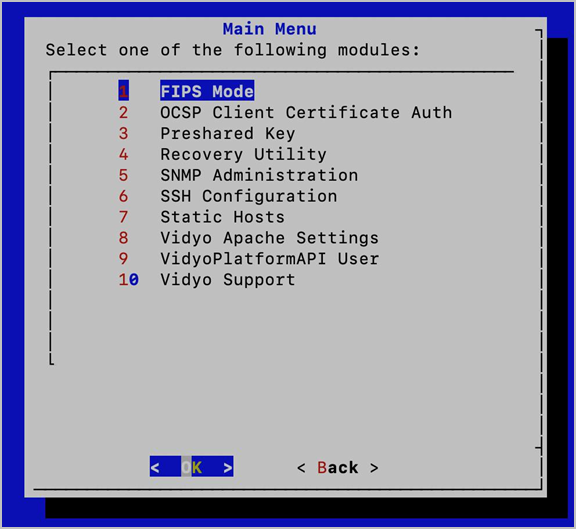
- Enter 7 to select the Advanced option.
- Press the Enter key to select OK. The Main Menu for the Advanced configuration displays.

- Enter 1 to select the FIPS Mode option.
- Press the Enter key to select OK. The FIPS Mode window displays.
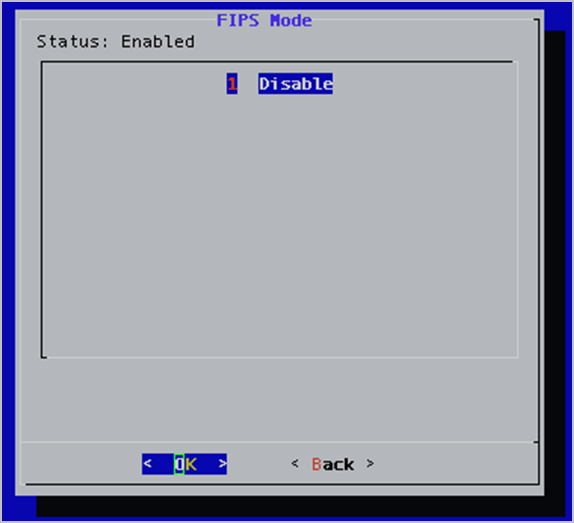
The administrator can view the status of FIPS mode in the system and toggle the state. If FIPS is enabled, the window includes the Disable option only; if FIPS is disabled, the window includes the Enable option only. - Enter 1 to select Disable or enter 2 to select Enable.
- Press the Enter key to select OK.
When your system comes back online, FIPS is then disabled (or enabled) on your Vidyo server.Note
When FIPS is enabled, the SIP tab in the VidyoGateway Admin Portal contains Address and Port fields. However, when FIPS is disabled, the SIP tab contains Address, Port, Username, Password, and Confirm Password fields. For more information, see Configure SIP settings.
Maintain pre-shared keys
An encrypted communication channel is established between the active cluster controller and each node on port 49999. The channel is authenticated using a pre-shared key. Your system comes with a default pre-shared key but allows you to generate a unique pre-shared key for your cluster if desired.
Use the following steps to configure the pre-shared key in a VidyoGateways cluster configuration:
- Generate the pre-shared key from the Active Controller. For more information, see Generate a pre-shared key.
- Export the pre-shared key from the Active Controller. For more information, see Export a pre-shared key.
- Import the pre-shared key to the Standby Controller and Cluster Nodes. For more information, see Import a pre-shared key. After generating and exporting the pre-shared key from the Active Controller in your VidyoGateway cluster configuration, you then import the key to your Standby Controller and Cluster Nodes.
Generate a pre-shared key
When initially setting up a VidyoGateway cluster, we recommend generating a unique pre- shared key from your Active Controller.
To generate a pre-shared key:
- Log in to the System Console. The Main Menu displays.

- Enter 7 to select the Advanced option.
- Press the Enter key to select OK. The Main Menu for the Advanced configuration displays.

- Enter 3 to select the Preshared Key option.
- Press the Enter key to select OK.
- The Preshared Key Menu displays.
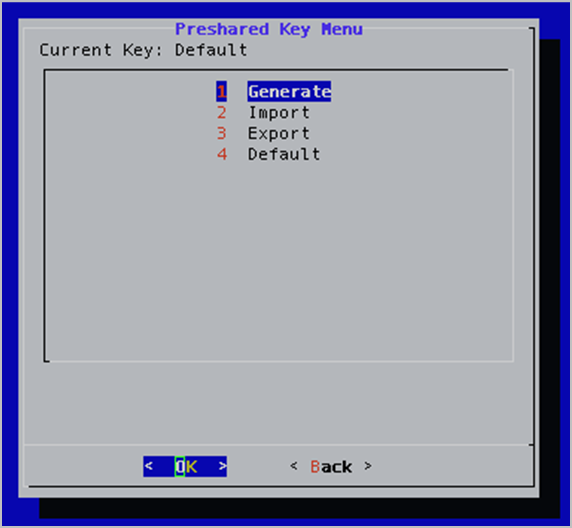
- Enter 1 to select the Generate option.
- Press the Enter key to select OK. The Confirm window displays.
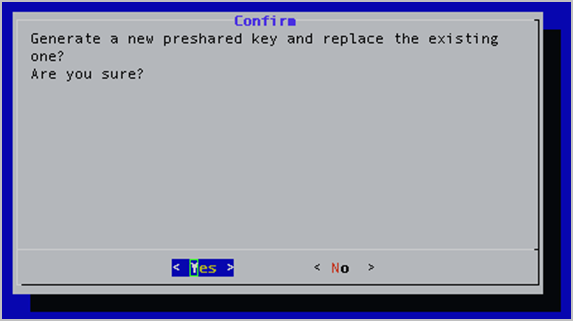
- Press the Enter key to select Yes. A message displays stating “New preshared key generated. Hash: [key].”
- Press the Enter key to select OK. You can now export the pre-shared key.
Export a pre-shared key
After generating the pre-shared key on the Active Controller in your VidyoGateway cluster configuration, you then export the key from the same server. For more information about clusters, see Configure access control settings.
To export a pre-shared key:
- Log in to the System Console. The Main Menu displays.
- Enter 7 to select the Advanced option.
- Press the Enter key to select OK. The Main Menu for the Advanced configuration displays.

- Enter 3 to select the Preshared Key option.
- Press the Enter key to select OK. The Preshared Key Menu displays.
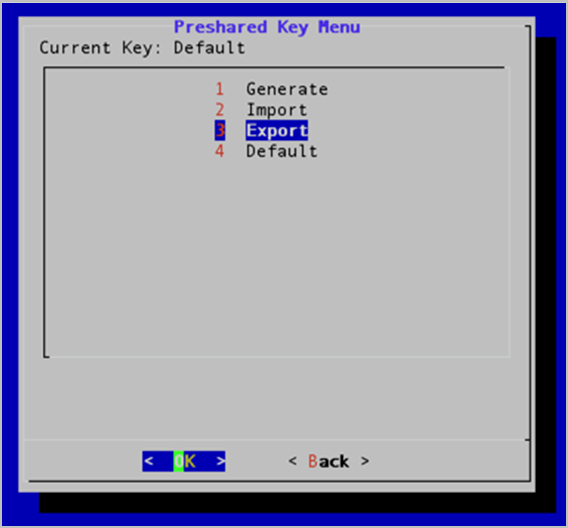
- Enter 3 to select the Export option.
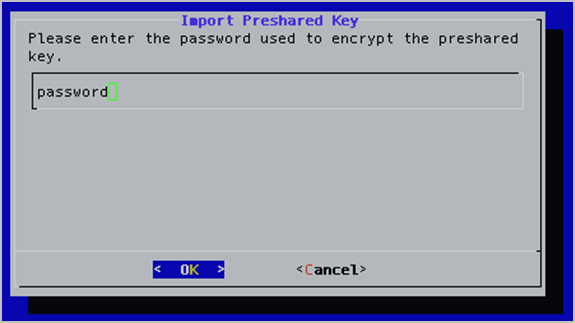
- Press the Enter key to select OK. The Export Preshared Key window displays.
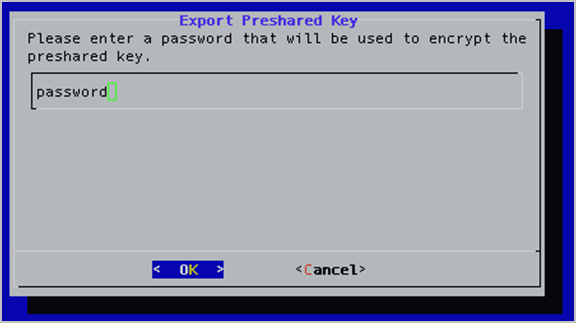
- Enter a password to encrypt the preshared key. Your encrypted pre-shared key displays on the screen.

Import a pre-shared key
After generating and exporting the pre-shared key from the Active Controller in your VidyoGateway cluster configuration, you then import the key to your Standby Controller and Cluster Nodes. For more information about clusters, see Configure access control settings.
To import a pre-shared key:
- Log in to the System Console. The Main Menu displays.

- Enter 7 to select the Advanced option.
- Press the Enter key to select OK. The Main Menu for the Advanced configuration displays.

- Enter 3 to select the Preshared Key option.
- Press the Enter key to select OK. The Preshared Key Menu displays.
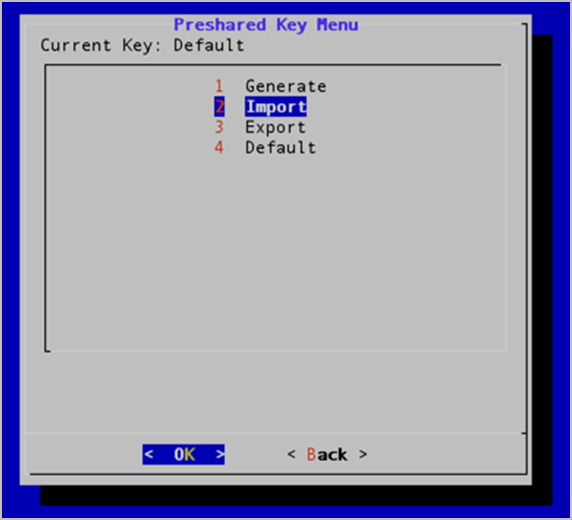
- Enter 2 to select the Import option.
- Press the Enter key to select OK. The Confirm window displays.
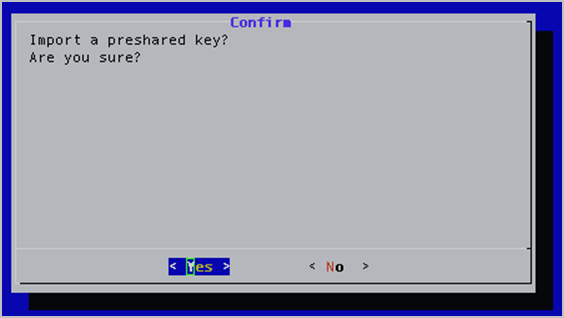
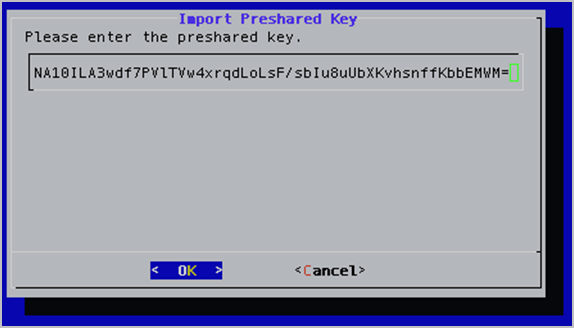
- Press the Enter key to select Yes.
- Enter the preshared key that you previously generated.
For information about how to generate a pre-shared key, see Generate a pre-shared key.
- Press the Enter key to select OK.
- Enter the same password previously used to encrypt the pre-shared key.
- Press the Enter key to select OK. A message displays stating “Preshared key successfully imported. Hash: [key].”
- Press the Enter key to select OK.
- Your system is now using the pre-shared key you just imported.
|
Note Until a pre-shared key is exported from your Active Controller and imported to your Standby Controller and Cluster Nodes, calls on your Standby Controller or Cluster Nodes will not be visible from the Status tab in your Active Controller. For more information, see Check the status of your VidyoGateway. |
Select the default pre-shared key
The default key is automatically used on your system when configuring your VidyoGateway as a cluster. Therefore, you only need to select the default pre-shared key if you have previously generated or imported one and now want to revert to the default.
To select the default pre-shared key:
- Log in to the System Console. The Main Menu displays.

- Enter 7 to select the Advanced option.
- Press the Enter key to select OK. The Main Menu for the Advanced configuration displays.

- Enter 3 to select the Pre-shared Key option.
- Press the Enter key to select OK. The Pre-shared Key Menu displays.

- Enter 4 to select the Default option.
- Press the Enter key to select OK. The Confirm window displays.
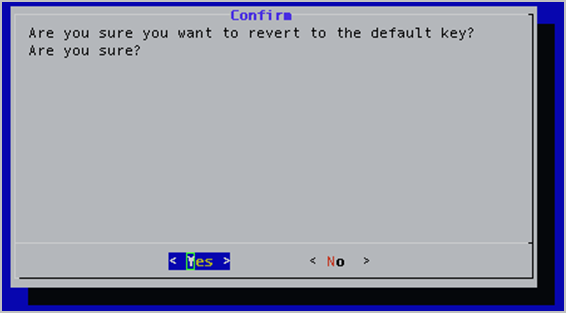
- Press the Enter key to select Yes.
Run the recovery utility
The recovery utility enables you to take snapshots of your system, restore the snapshots, delete the snapshots, and restore the factory default.
Taking snapshots
A maximum of two user snapshots are allowed. This limitation does not include snapshots that are automatically generated upon upgrading your VidyoGateway (for example, VidyoUpdate). When two user snapshots already exist and the user attempts to take a new one, the following message will display:
For more information about deleting snapshots, see Delete snapshots.
To take snapshots:
- Log in to the System Console. The Main Menu displays.
- Enter 7 to select the Advanced option.
- Press the Enter key to select OK. The Main Menu for the Advanced configuration displays.

- Enter 4 to select the Recovery Utility option.
- Press the Enter key to select OK. The Recover Utility Main Menu displays.
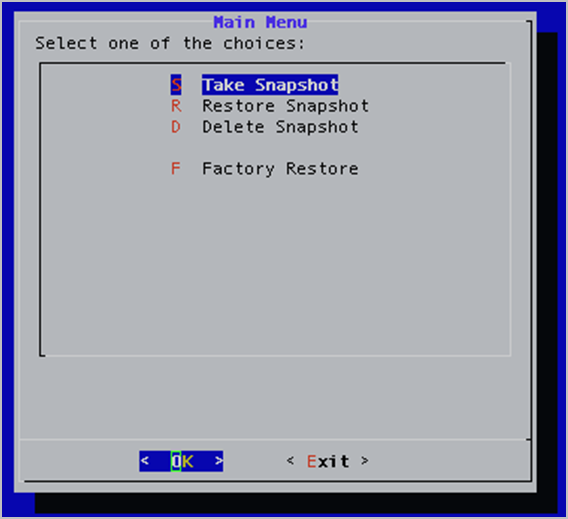
- Enter S to select the Take Snapshot option.
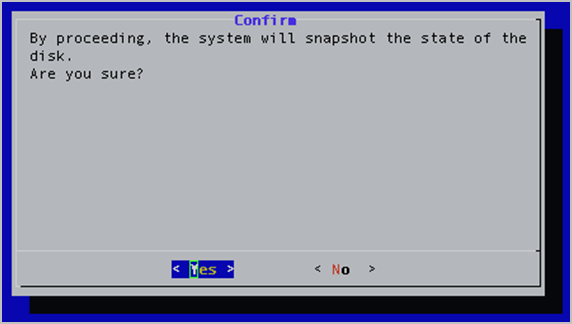
- Press the Enter key to select OK. The Confirm window displays.
- Press the Enter key to select Yes. The Name window displays.
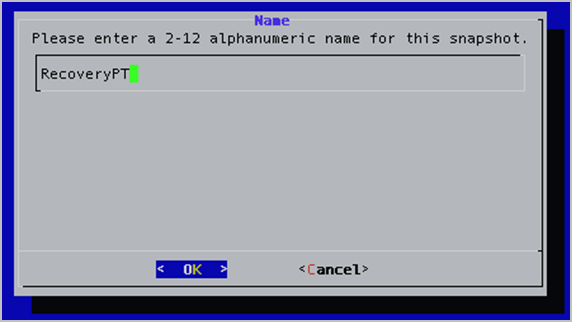
- Enter a name for the snapshot. The name must be from two to twelve alphanumeric characters in length.
- Press the Enter key to select OK. The Description window displays.
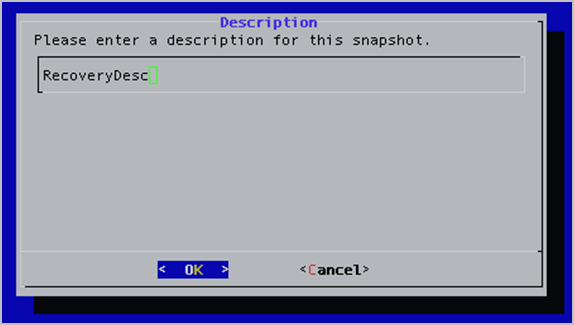
- Enter a description for the snapshot.
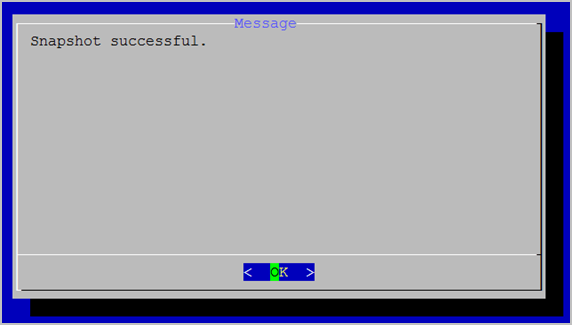
- Press the Enter key to select OK. A message displays stating “Snapshot successful.”
- Press the Enter key to select OK.
Restore snapshots
To restore snapshots:
- Log in to the System Console. The Main Menu displays.
- Enter 7 to select the Advanced option.
- Press the Enter key to select OK. The Main Menu for the Advanced configuration displays.

- Enter 4 to select the Recovery Utility option.
- Press the Enter key to select OK. The Recover Utility Main Menu displays.
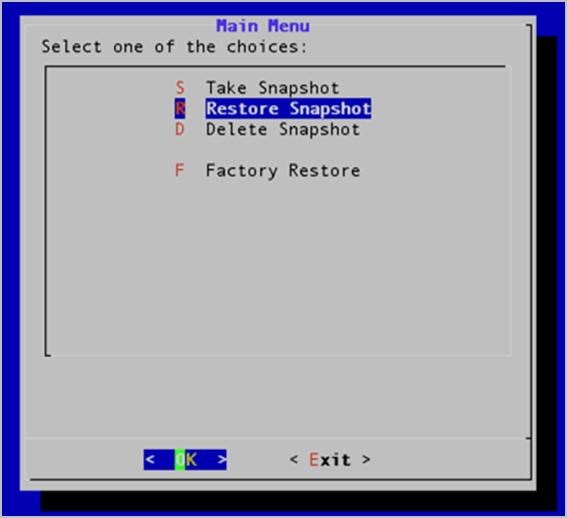
- Enter R to select the Restore Snapshot option.
- Press the Enter key to select OK. The Restore Snapshot window displays.

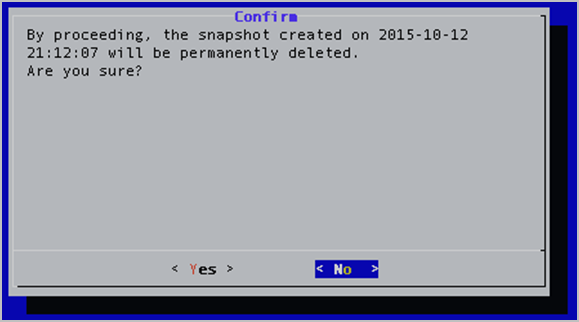
- Select the snapshot you want to restore.
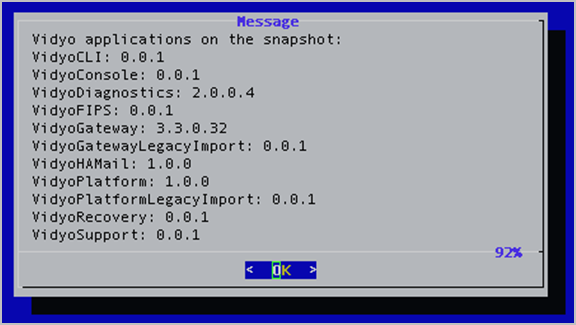
- Press the Enter key to select OK. To ensure that you have selected the correct snapshot, a message displays stating “Description of the snapshot: [snapshot description].”
- Press the Enter key to select OK. A Message window displays listing the Vidyo applications on the snapshot as well as the version number of each application.
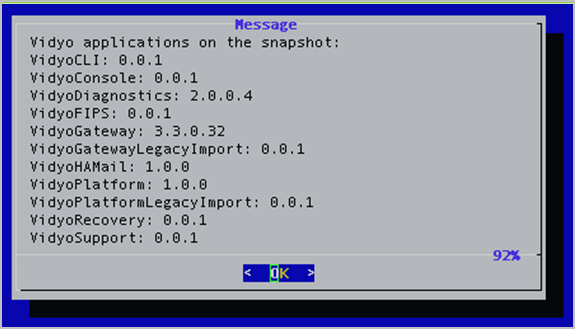
- Press the Enter key to select OK. The Confirm window displays.
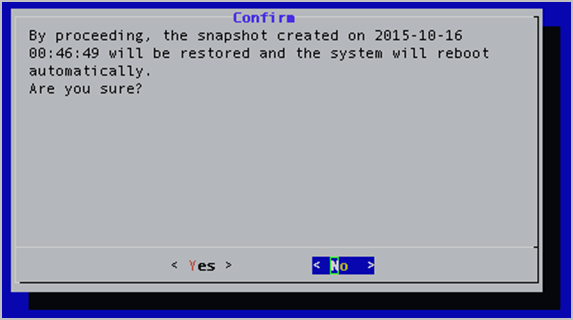
- Press the Enter key to select Yes.
Delete snapshots
To delete snaphots:
- Log in to the System Console. The Main Menu displays.
- Enter 7 to select the Advanced option.
- Press the Enter key to select OK. The Main Menu for the Advanced configuration displays.
- Enter 4 to select the Recovery Utility option.
- Press the Enter key to select OK. The Recover Utility Main Menu displays.
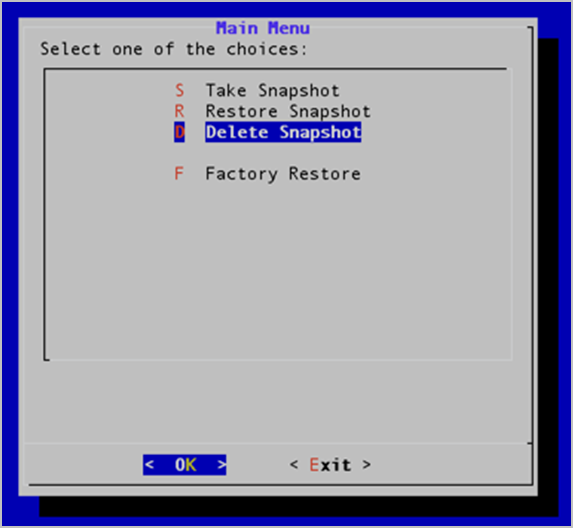
- Enter D to select the Delete Snapshot option.
- Press the Enter key to select OK. The Delete Snapshot window displays.
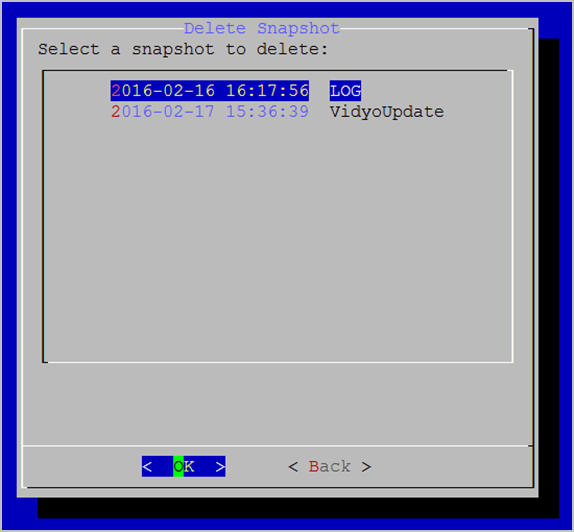
- Select the snapshot you want to delete.
- Press the Enter key to select OK. To ensure that you have selected the correct snapshot, a message displays stating “Description of the snapshot: [snapshot description].”
- Press the Enter key to select OK. A Message window displays listing the Vidyo applications on the snapshot as well as the version number of each application.
- Press the Enter key to select OK. The Confirm window displays.
- Press the Enter key to select Yes. A message displays stating “Snapshot successfully deleted.”
- Press the Enter key to select OK.
Perform a factory restore
To perform a factory restore:
- Log in to the System Console. The Main Menu displays.
- Enter 7 to select the Advanced option.
- Press the Enter key to select OK. The Main Menu for the Advanced configuration displays.
- Enter 4 to select the Recovery Utility option. The Recover Utility Main Menu displays.
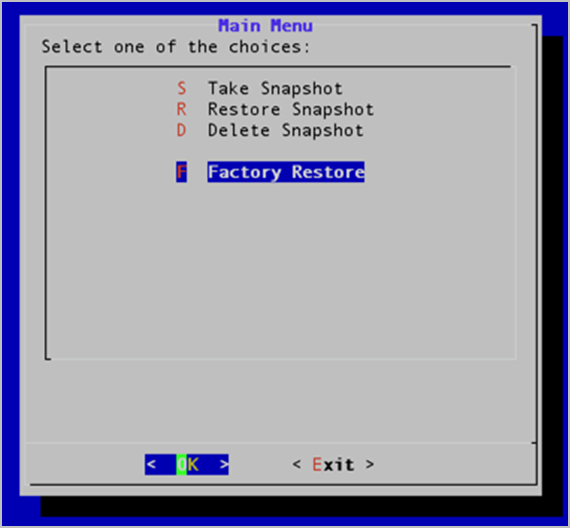
- Enter F to select the Factory Restore option.
- Press the Enter key to select OK. The Confirm window displays.
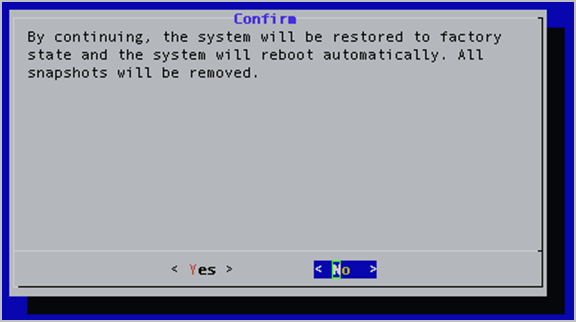
- Press the Enter key to select Yes.
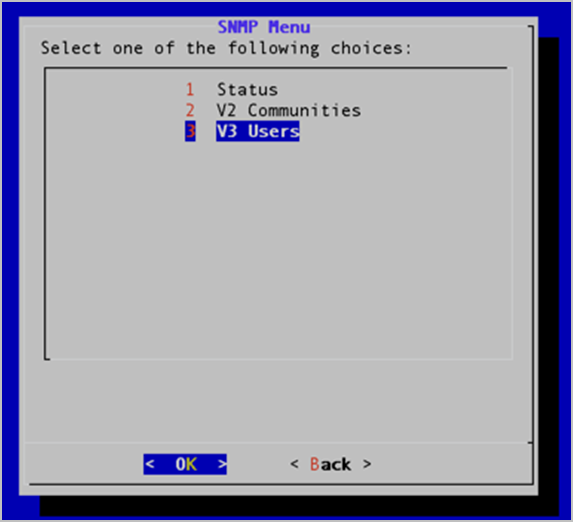
Configure SNMP
You can use SNMP (Simple Network Management Protocol) to manage and monitor the components over your entire Vidyo network. You can configure notifications or traps and send them to your network management server via SNMPv2 community strings or SNMPv3 users.
The VidyoGateway traps include the following object identifiers (OIDs):
- vidyoGatewayNodeLegacyMediaQualityThresholdAlert
- This trap provides an indication that the MediaQuality threshold for a H.323/SIP call has been reached on the H.323/SIP side.
- This trap can be turned on and off by setting the notification from the System Console and a specific threshold can be set from the SNMP manager. The jitter is measured in milliseconds and the default time setting is 0.
- This trap repeats every 10 seconds if the condition persists.
- vidyoGatewayNodeLegacyPacketLossThresholdAlert
- This trap provides an indication that the PacketLoss threshold for a H.323/SIP call has been reached on the H.323/SIP side.
- This trap can be turned on and off by setting the notification from the System Console and specific threshold can be set from the SNMP manager. The packet loss is measured in percentage and the default time setting is 0.
- This trap repeats every 10 seconds if the condition persists.
- vidyoGatewayControllerJoinedClusterAlert
- This trap provides an indication that a new VidyoGateway has joined the cluster.
- When a VidyoGateway node is added to the cluster, this trap can be turned on and off by setting the notification from the System Console.
- There is no notification frequency setting for this trap.
- vidyoGatewayControllerLeftClusterAlert
- This trap provides an indication that an existing VidyoGateway has been removed from the cluster.
- When a VidyoGateway node is removed from the cluster, this trap can be turned on and off by setting the notification from the System Console.
- There is no notification frequency setting for this trap.
- vidyoGatewayControllerVmConnEstablishedAlert
- This trap provides an indication that VidyoGateway has established a connection with the VidyoManager.
- There are no configuration settings for this trap.
- There is no notification frequency setting for this trap.
- vidyoGatewayControllerVmConnLostAlert
- This trap provides an indication that VidyoGateway has lost its connection with the VidyoManager.
- There are no configuration settings for this trap.
- There is no notification frequency setting for this trap.
- vidyoGatewayControllerIPAddedToBlackListAlert
- This trap is triggered when a new IP Address is automatically blacklisted when Access Control is operated in the “Automatically block IP addresses with whitelist and blacklist overrides” mode.
- vidyoGatewayControllerClusterRoleAlert
- This trap is triggered when failover occurs.
- An instance of this occurrence is when the Active Controller goes offline or the Standby Controller becomes active.
- vidyoGatewayControllerCallRejectedAlert
- This trap is triggered when the VidyoGateway rejects a call because the cluster or standalone VidyoGateway capacity is fully utilized.
|
Note Some un-configurable object identifiers (OIDs) are standard on all Vidyo servers. With SNMP traps enabled, they provide notifications if the CPU, disk, or memory utilization has reached its threshold (~80% utilization). The specific OIDs are cpuLoadReachedThreshold, diskReachedThreshold, and memoryReachedThreshold. For more information about Vidyo enterprise notifications, as well as Get, and Set Polling OIDs, download the Vidyo MIB file from the Vidyo Support Centre. If your VidyoGateway system uses the Hot Standby option and you are not using your management interface, your SNMP notifications will source from the shared IP address. We recommend configuring your VidyoGateways using a management interface so your SNMP notifications can be sourced from unique management interface IP addresses. In this case, your network management system (NMS) should be accessible over your management network. |
Enable, disable, and restart SNMP
Enable SNMP only after configuring SNMP2 community strings or SNMPv3 users and creating notifications or traps.
To enable, disable, or restart SNMP:
- Log in to the System Console. The Main Menu displays.

- Enter 7 to select the Advanced option.
- Press the Enter key to select OK. The Main Menu for the Advanced configuration displays.
- Enter 5 to select the SNMP Administration option.
- Press the Enter key to select OK. The SNMP Menu displays.

- Enter 1 to select the Status option.
- Press the Enter key to select OK. The SNMP Status Menu displays including the current status. If SNMP is enabled, the window includes the Disable option only; if SNMP is disabled, the window includes the Enable option only.
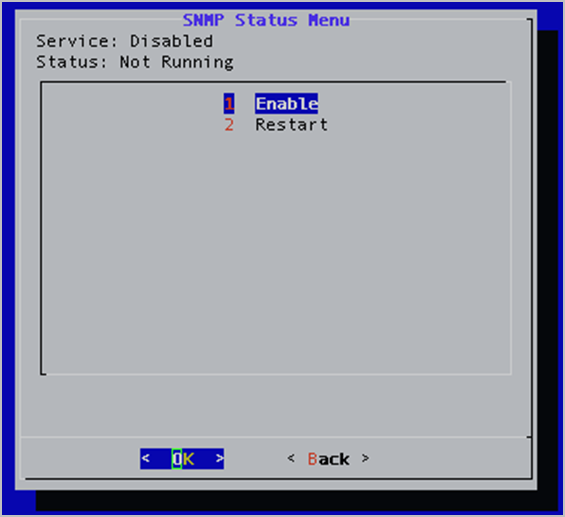
- Enter 1 to select Enable or Disable, or enter 2 to select the Restart option.
- Press the Enter key to select OK. When your system comes back online, SNMP is then enabled (or disabled).
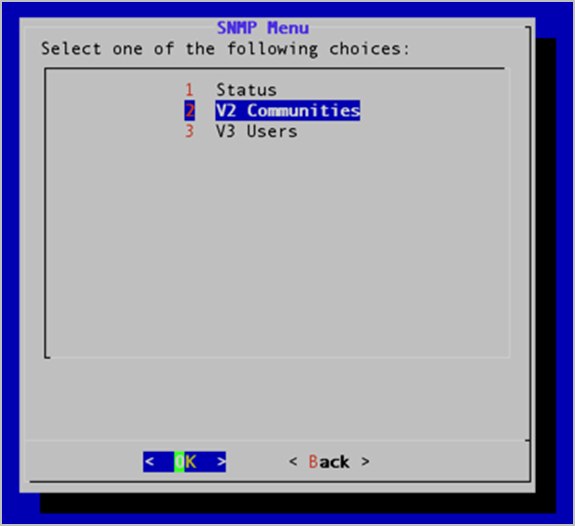
Configure SNMP v2 communities
You can create two SNMP v2 community strings on your system that can access your network management server. One community string has read-only access and the other has read-write access.
List the SNMP v2 communities
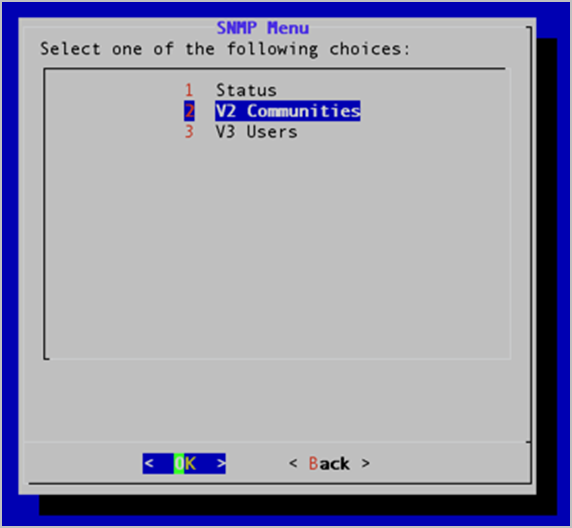
To list the SNMP v2 communities:
- Log in to the System Console. The Main Menu displays.

- Enter 7 to select the Advanced option.
- Press the Enter key to select OK. The Main Menu for the Advanced configuration displays.

- Enter 5 to select the SNMP Administration option.
- Press the Enter key to select OK.The SNMP Menu displays.
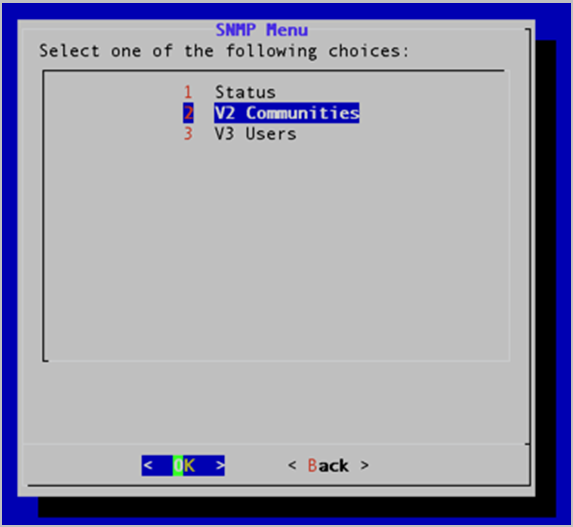
- Enter 2 to select the V2 Communities option.
- Press the Enter key to select OK. The SNMP V2 Community Menu displays.

- Enter 1 to select the List Communities option.
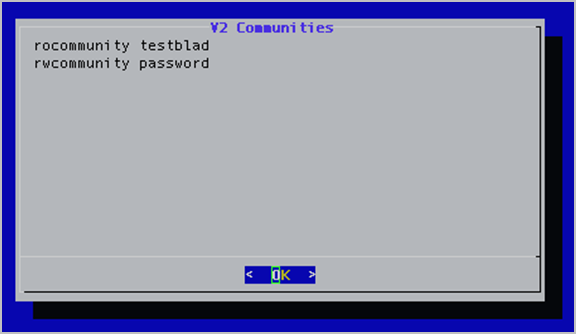
- Press the Enter key to select OK. The V2 Communities window, which lists the current v2 communities, displays.
- Press the Enter key to select OK.
Add SNMP v2 communities
To add SNMP v2 communities:
- Log in to the System Console. The Main Menu displays.

- Enter 7 to select the Advanced option.
- Press the Enter key to select OK. The Main Menu for the Advanced configuration displays.

- Enter 5 to select the SNMP Administration option.
- Press the Enter key to select OK. The SNMP Menu displays.

- Enter 2 to select the V2 Communities option.
- Press the Enter key to select OK. The SNMP V2 Community Menu displays.
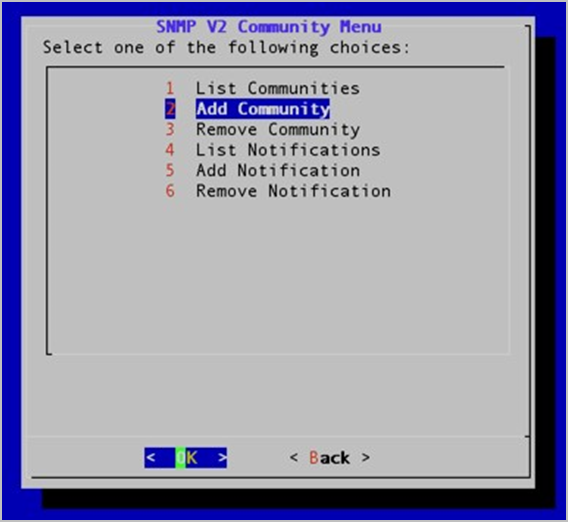
- Enter 2 to select the Add Community option.
- Press the Enter key to select OK. The Add V2 Community window displays.
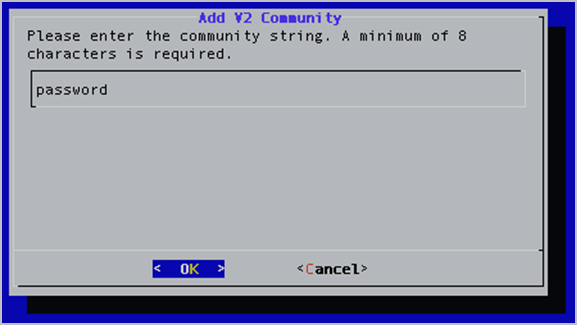
- Enter the community string using no less than eight characters.
- Press the Enter key to select OK. The next Add V2 Community window displays.

- Enter 1 if you want the community access rights to be read only or enter 2 if you want the community access rights to be read and write.
- Press the Enter key to select OK. The next Add V2 Community window displays.
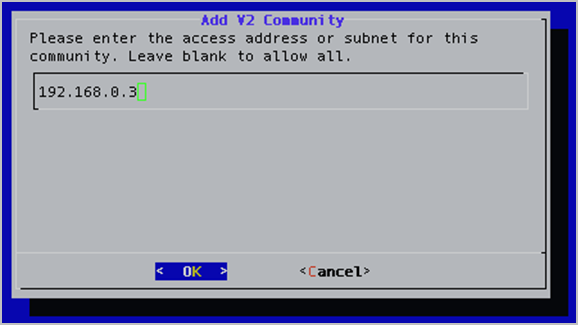
- Enter the IP address or subnet to access this community or leave the text box blank if you want to allow access to all.
- Press the Enter key to select OK.
Remove an SNMP v2 community string
To remove an SNMP v2 community:
- Log in to the System Console. The Main Menu displays.

- Enter 7 to select the Advanced option.
- Press the Enter key to select OK. The Main Menu for the Advanced configuration displays.

- Enter 5 to select the SNMP Administration option.
- Press the Enter key to select OK. The SNMP Menu displays.

- Enter 2 to select the V2 Communities option.
- Press the Enter key to select OK. The SNMP V2 Community Menu displays.
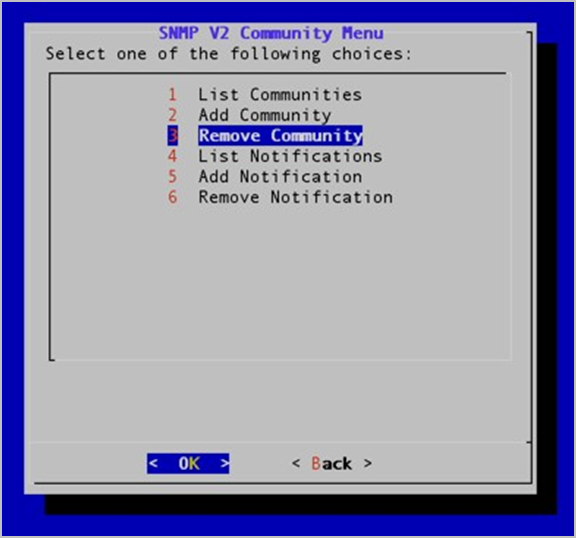
- Enter 3 to select the Remove Community option.
- Press the Enter key to select OK. The Remove V2 Community window displays.
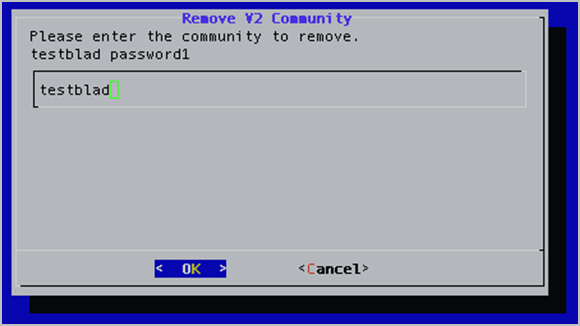
- Enter the community string of the community you want to remove.
- Press the Enter key to select OK. A message displays stating “Successfully removed community.”
- Press the Enter key to select OK.
List SNMP v2 notifications
To list an SNMP v2 notification:
- Log in to the System Console. The Main Menu displays.
- Enter 7 to select the Advanced option.
- Press the Enter key to select OK. The Main Menu for the Advanced configuration displays.

- Enter 5 to select the SNMP Administration option.
- Press the Enter key to select OK. The SNMP Menu displays.
- Enter 2 to select the V2 Communities option.
- Press the Enter key to select OK. The SNMP V2 Community Menu displays.
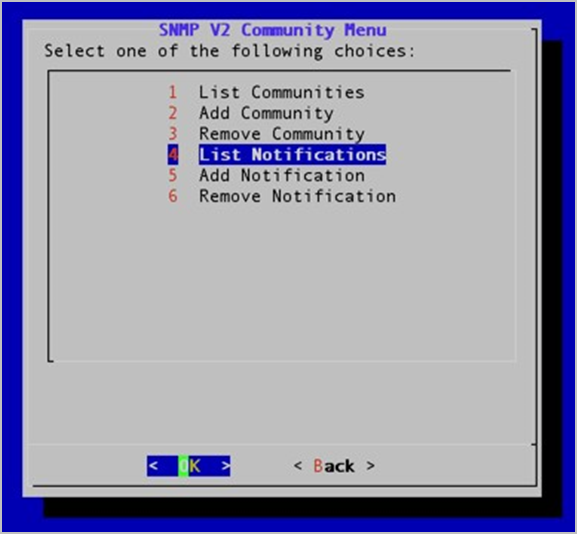
- Enter 4 to select the List Notifications option.
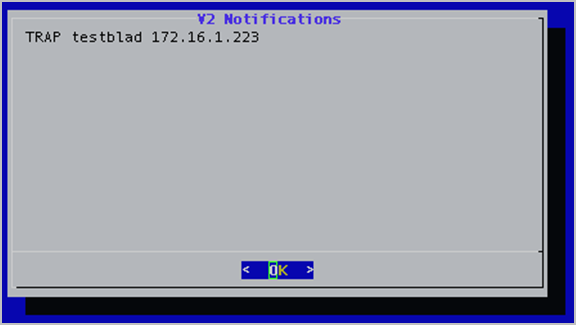
- Press the Enter key to select OK. The V2 Notifications window displays.
- Press the Enter key to select OK.
Add SNMP v2 notifications
To add an SNMP v2 notification:
- Log in to the System Console. The Main Menu displays.

- Enter 7 to select the Advanced option.
- Press the Enter key to select OK. The Main Menu for the Advanced configuration displays.
- Enter 5 to select the SNMP Administration option.
- Press the Enter key to select OK. The SNMP Menu displays.

- Enter 2 to select the V2 Communities option.
- Press the Enter key to select OK. The SNMP V2 Community Menu displays.
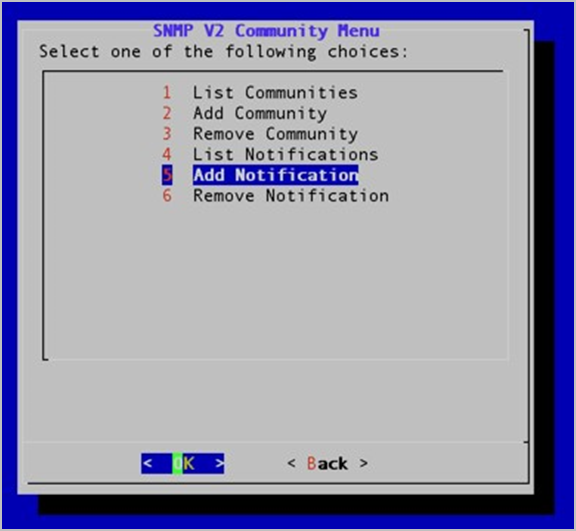
- Enter 5 to select the Add Notifications option.
- Press the Enter key to select OK. The Add V2 Notification window displays.
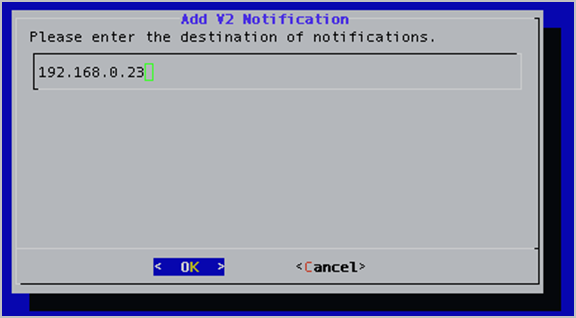
- Enter the IP address of the SNMP notification’s destination.
- Press the Enter key to select OK. The next Add V2 Notification window displays.
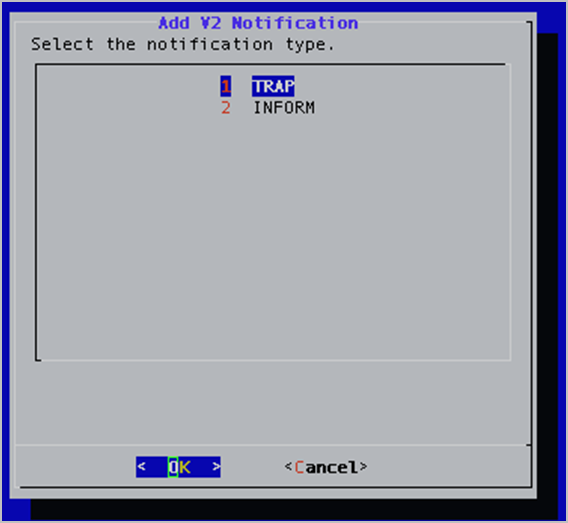
- Enter 1 if the notification type is a TRAP or enter 2 if the notification type is an INFORM.
- Press the Enter key to select OK.

- Enter the password for the community string.
- Press the Enter key to select OK. A message displays stating “Successfully added notification.”
- Press the Enter key to select OK.
Remove SNMP v2 notifications
To remove an SNMP v2 notification:
- Log in to the System Console. The Main Menu displays.

- Enter 7 to select the Advanced option.
- Press the Enter key to select OK. The Main Menu for the Advanced configuration displays.

- Enter 5 to select the SNMP Administration option.
- Press the Enter key to select OK. The SNMP Menu displays.
- Enter 2 to select the V2 Communities option.
- Press the Enter key to select OK. The SNMP V2 Community Menu displays.
- Enter 6 to select the Remove Notification option.
- Press the Enter key to select OK. The Remove V2 Notification window displays.
- Enter the IP address of the notification you want to remove. The list of notifications available for removal is displayed above the text box.
- Press the Enter key to select OK. A message displays stating “Successfully removed notification.”
- Press the Enter key to select OK.
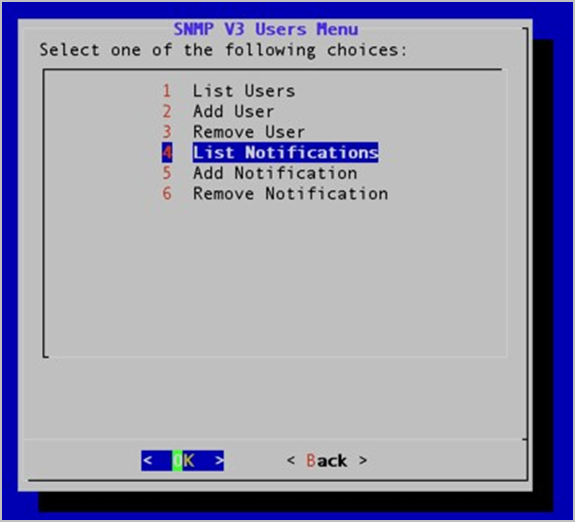
Configure SNMP v3 users
This section describes how to list the SNMP v3 users, add and remove them, and list, add, and remove notifications.
List SNMP v3 users
To list SNMP v3 Users:
- Log in to the System Console. The Main Menu displays.

- Enter 7 to select the Advanced option.
- Press the Enter key to select OK. The Main Menu for the Advanced configuration displays.

- Enter 5 to select the SNMP Administration option.
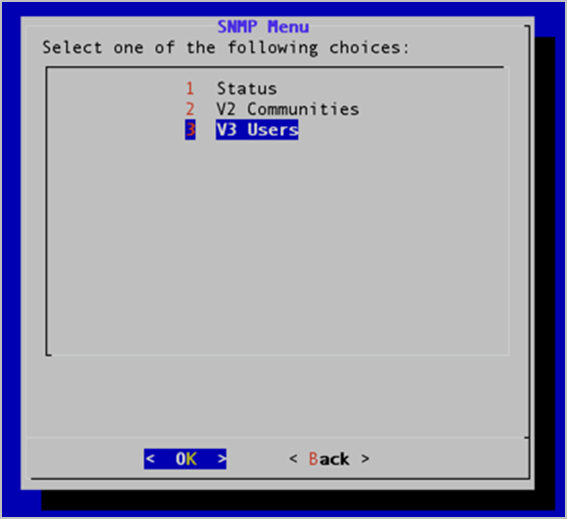
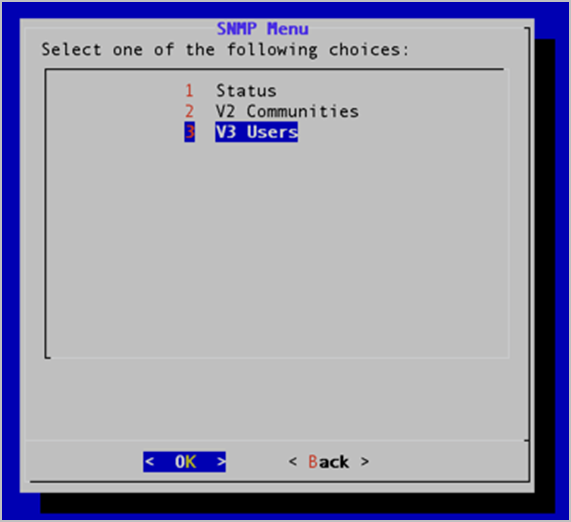
- Press the Enter key to select OK. The SNMP Menu displays.
- Enter 3 to select the V3 Users option.
- Press the Enter key to select OK. The SNMP V3 Community Menu displays.
- Enter 1 to select the List Users option.
- Press the Enter key to select OK. The V3 Users window, which lists all the V3 users, displays.
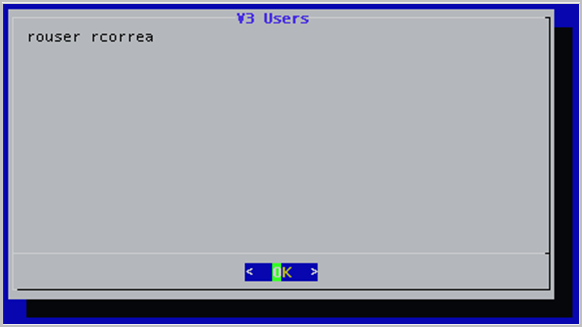
- Press the Enter key to select OK.
Add SNMP v3 users
To add SNMP v3 Users:
- Log in to the System Console. The Main Menu displays.

- Enter 7 to select the Advanced option.
- Press the Enter key to select OK. The Main Menu for the Advanced configuration displays.

- Enter 5 to select the SNMP Administration option.
- Press the Enter key to select OK. The SNMP Menu displays.

- Enter 3 to select the V3 Users option.
- Press the Enter key to select OK. The SNMP V3 Community Menu displays.

- Enter 2 to select the Add User option.
- Press the Enter key to select OK. The Add V3 User window displays.
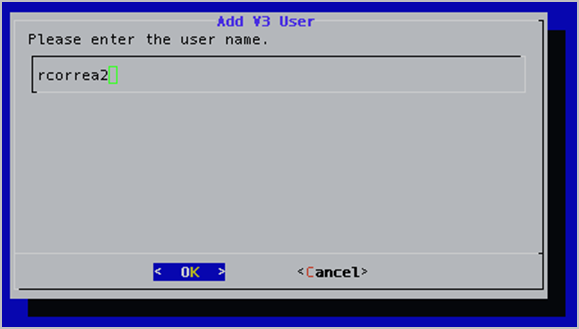
- Enter the username of the v3 user you want to add.
- Press the Enter key to select OK. The next Add V3 User window displays.

- Enter the password for the new V3 user.
- Press the Enter key to select OK. The next Add V3 User window displays.

- Enter 1 if you want the new v3 user’s access rights to be read only or enter 2 if you want the new v3 user’s access rights to be read and write.
- Press the Enter key to select OK.
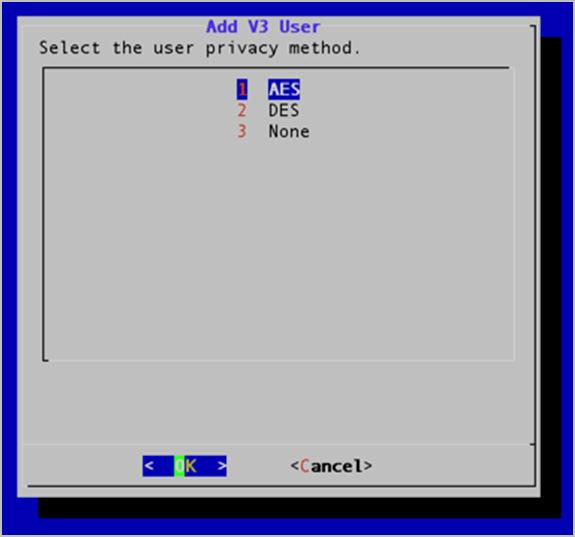
- Select the user privacy method: AES, DES, or None.
- Press the Enter key to select OK.
- Enter the privacy password.
- Press the Enter key to select OK.
Remove an SNMP v3 user
To remove an SNMP v3 user:
- Log in to the System Console. The Main Menu displays.

- Enter 7 to select the Advanced option.
- Press the Enter key to select OK. The Main Menu for the Advanced configuration displays.

- Enter 5 to select the SNMP Administration option.
- Press the Enter key to select OK. The SNMP Menu displays.
- Enter 3 to select the V3 Users option.
- Press the Enter key to select OK. The SNMP V3 Users Menu displays.

- Enter 3 to select the Remove User option.
- Press the Enter key to select OK. The Remove V3 User window displays.
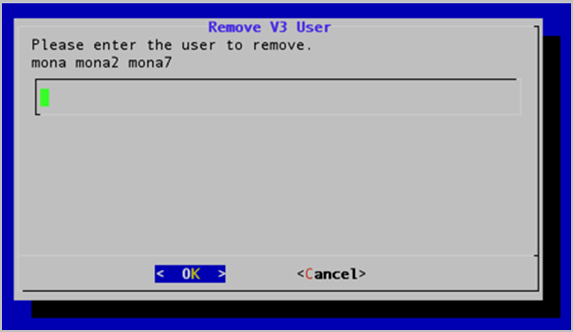
- Press the Enter key to select OK. A message displays stating “Successfully removed user.”
- Press the Enter key to select OK.
List SNMP v3 notifications
To list an SNMP v3 notification:
- Log in to the System Console. The Main Menu displays.

- Enter 7 to select the Advanced option.
- Press the Enter key to select OK. The Main Menu for the Advanced configuration displays.

- Enter 5 to select the SNMP Administration option.
- Press the Enter key to select OK. The SNMP Menu displays.
- Enter 3 to select the V3 Users option.
- Press the Enter key to select OK. The SNMP V3 Users Menu displays.
- Enter 4 to select the List Notifications option.
- Press the Enter key to select OK. The V3 Notifications window displays.
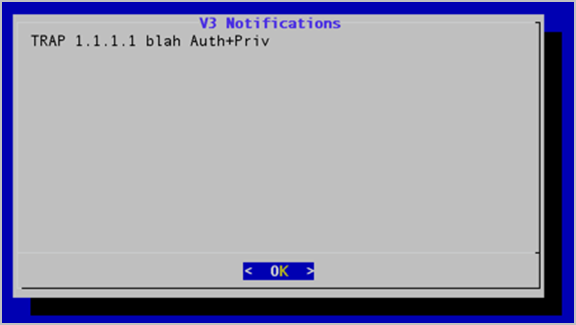
- Press the Enter key to select OK.
Add SNMP v3 notifications
To add an SNMP v3 notification:
- Log in to the System Console. The Main Menu displays.

- Enter 7 to select the Advanced option.
- Press the Enter key to select OK. The Main Menu for the Advanced configuration displays.

- Enter 5 to select the SNMP Administration option.
- Press the Enter key to select OK. The SNMP Menu displays.

- Enter 3 to select the V3 Users option.
- Press the Enter key to select OK. The SNMP V3 Users Menu displays.
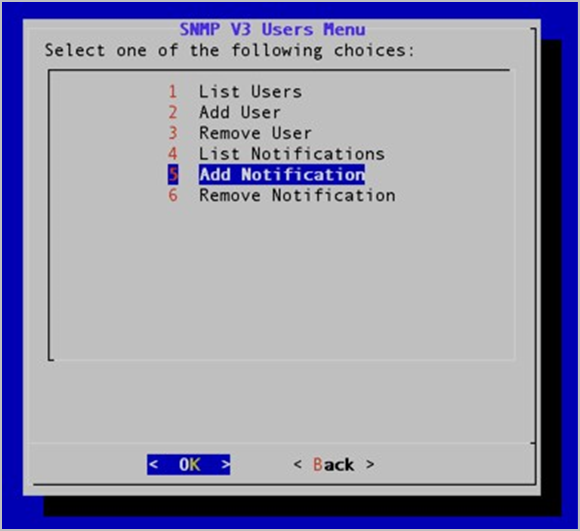
- Enter 5 to select the Add Notification option.
- Press the Enter key to select OK. The Add V3 Notification window displays.
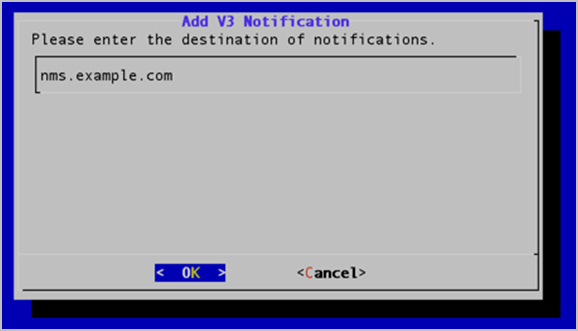
- Enter the IP address or FQDN of the notification’s destination.
- Press the Enter key to select OK.
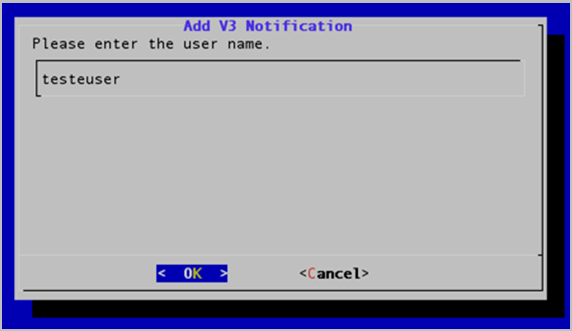
- Enter the username.
- Press the Enter key to select OK.
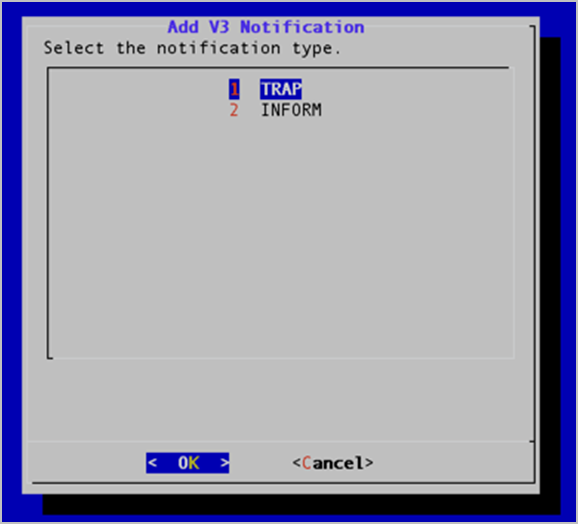
- Enter 1 if the notification type is a TRAP or enter 2 if the notification type is an INFORM.
- Press the Enter key to select OK.
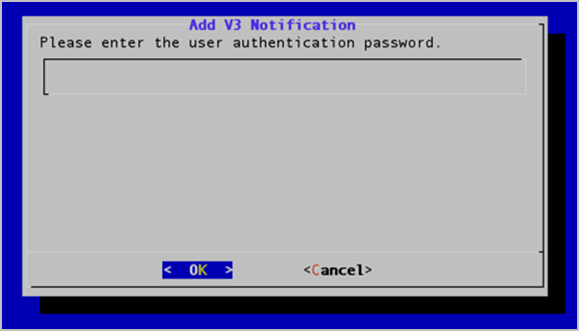
- Enter the user authentication password.
- Press the Enter key to select OK.

- Select the user privacy method: AES, DES, or None.
- Press the Enter key to select OK.
- Enter the privacy password.
- Press the Enter key to select OK. A message displays stating “Successfully added notification.”
- Press the Enter key to select OK.
Remove SNMP v3 notifications
To remove SNMP v3 notifications:
- Log in to the System Console. The Main Menu displays.

- Enter 7 to select the Advanced option.
- Press the Enter key to select OK. The Main Menu for the Advanced configuration displays.

- Enter 5 to select the SNMP Administration option.
- Press the Enter key to select OK. The SNMP Menu displays.
- Enter 3 to select the V3 Users option.
- Press the Enter key to select OK. The SNMP V3 Users Menu displays.
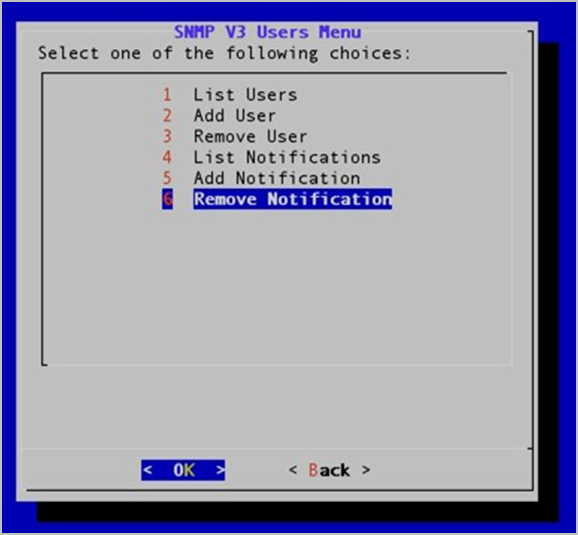
- Enter 6 to select the Remove Notification option.
- Press the Enter key to select OK. The Remove V3 Notification window displays.
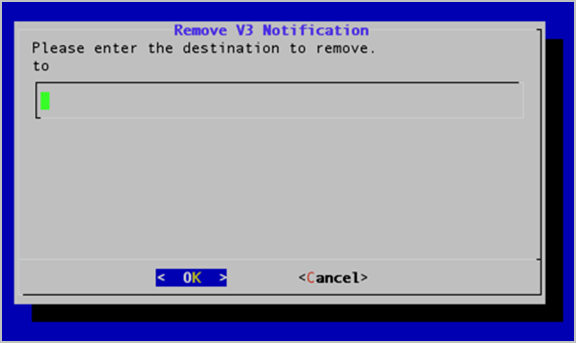
- Enter the IP address or FQDN of the notification you want to remove.
- Press the Enter key to select OK. A message displays stating “Successfully removed notification.”
- Press the Enter key to select OK.
Configure SSH
To configure SSH:
- Log in to the System Console. The Main Menu displays.
- Enter 7 to select the Advanced option.
- Press the Enter key to select OK. The Main Menu for the Advanced configuration displays.

- Enter 6 to select the SSH Configuration option.
- Press the Enter key to select OK. The SSH Port window displays.
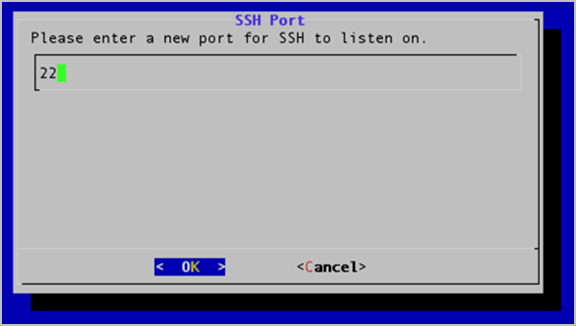
- Enter the port number on which SSH can listen.
- Press the Enter key to select OK. The Confirm window displays.
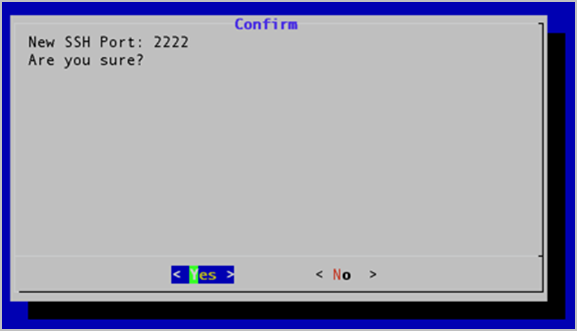
- Press the Enter key to select Yes. Another Confirm window displays asking if you want to apply the new SSH port setting.
- Press the Enter key to select Yes.
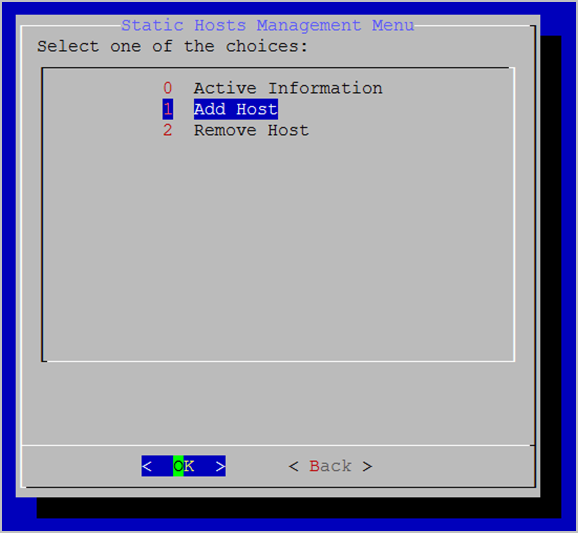
Manage static hosts
Static host entries can be added to a single hostfile on your VidyoPortal. These entries are used to map an IP address to a specific Static Host or FQDN.
|
Note We recommend that this feature not replace adding proper records to your internal and external DNS servers. It should only be used to support DMZ deployments where there is no DNS server access from the DMZ and allowing the different servers to properly locate each other. The Cluster FQDN of the VidyoPortal can be added to the hostfile to avoid making DNS queries from your VidyoManager, VidyoRouter, and VidyoProxy to the same VidyoPortal on which they reside. If you use the same Public FQDN as your Cluster FQDN, then it is not necessary to add the Cluster FQDN to your hostfile. |
View active information
To view active information:
- Log in to the System Console. The Main Menu displays.

- Enter 7 to select the Advanced option.
- Press the Enter key to select OK. The Main Menu for the Advanced configuration displays.

- Enter 7 to select the Static Hosts option.
- Press the Enter key to select OK. The Static Hosts Management Menu displays.
- Enter 0 to select the Active Information option.
- Press the Enter key to select OK. The Static Hosts Active Information window displays.
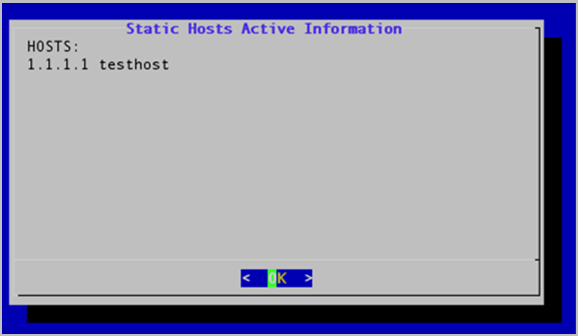
- Press the Enter key to select OK.
Add static hosts
To add static hosts:
- Log in to the System Console. The Main Menu displays.

- Enter 7 to select the Advanced option.
- Press the Enter key to select OK. The Main Menu for the Advanced configuration displays.

- Enter 7 to select the Static Hosts option.
- Press the Enter key to select OK. The Static Hosts Management Menu displays.
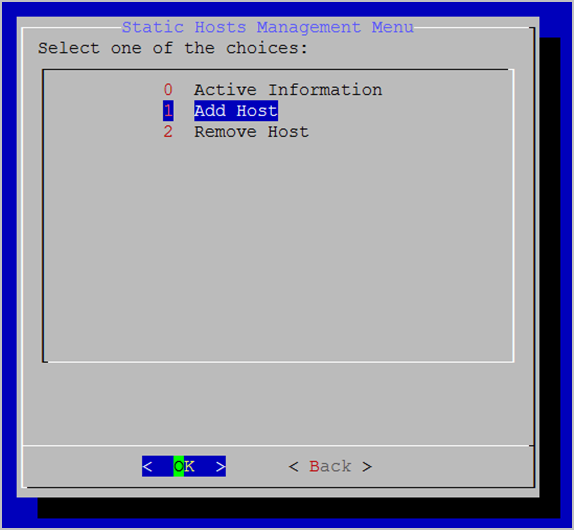
- Enter 1 to select the Add Host option.
- Press the Enter key to select OK. The Static Hosts Management Menu window displays.
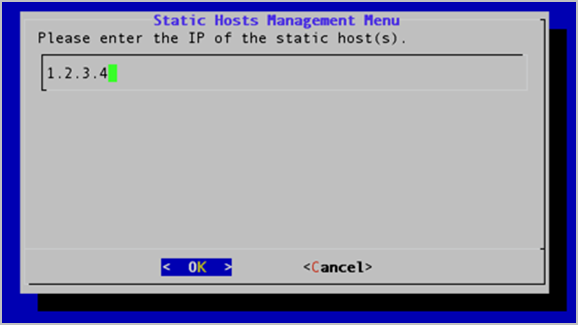
- Enter the IP address of the static host you want to add.
- Press the Enter key to select OK. The next Static Hosts Management Menu window displays.
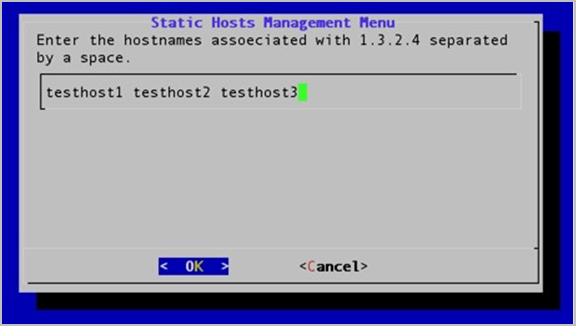
- Enter the hostname(s) you want to associate with the IP address you just entered.
- Press the Enter key to select Yes. The Message window displays indicating that the IP address has been added.
- Press the Enter key to select OK.
Remove static hosts
To remove static hosts:
- Log in to the System Console. The Main Menu displays.

- Enter 7 to select the Advanced option.
- Press the Enter key to select OK. The Main Menu for the Advanced configuration displays.

- Enter 7 to select the Static Hosts option.
- Press the Enter key to select OK. The Static Hosts Management Menu displays.

- Enter 2 to select the Remove Host option.
- Press the Enter key to select OK. The Static Hosts Management Menu window displays.
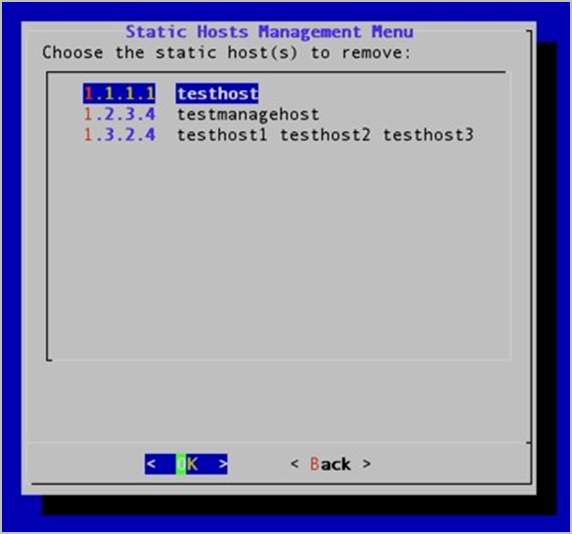
- Select the IP address of the static host you want to remove.
- Press the Enter key to select OK. The Confirm window displays.
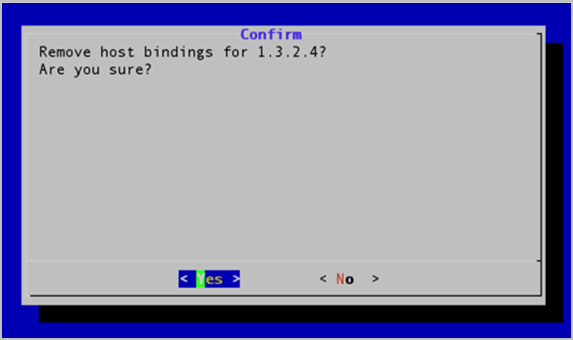
- Press the Enter key to select Yes. The Message window displays indicating that the IP address has been removed.
- Press the Enter key to select OK.
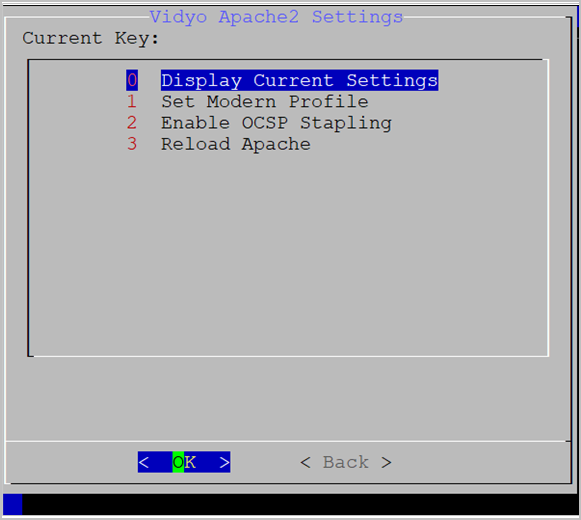
Manage Vidyo Apache settings
This section describes how to view current settings, set modern or intermediate profiles, enable or disable OCSP stapling, and reload Apache.
Display current settings
To display current settings:
- Log in to the System Console. The Main Menu displays.

- Enter 7 to select the Advanced option.
- Press the Enter key to select OK. The Main Menu for the Advanced configuration displays.

- Enter 8 to select the Vidyo Apache Settings option.
- Press the Enter key to select OK. The Vidyo Apache2 Settings window displays.

- Enter 0 to select the Display Current Settings option. The Apache Active Information window displays.
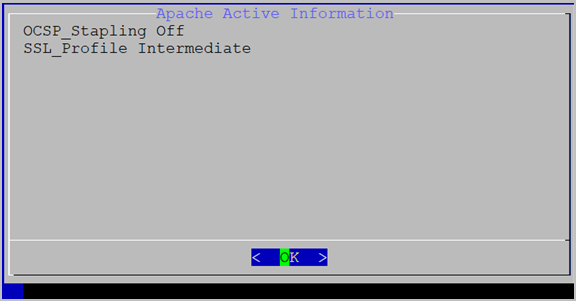
- Press the Enter key to select OK.
Set SSL profiles
To set SSL profile:
- Log in to the System Console. The Main Menu displays.
- Enter 7 to select the Advanced option.
- Press the Enter key to select OK. The Main Menu for the Advanced configuration displays.
- Enter 6 to select the Vidyo Apache Settings.
- Press the Enter key to select OK. The Vidyo Apache2 Settings window displays.
- Enter 1 to select the Set SSL Profile option.
- Select the appropriate option. Refer to the below table for the profile configuration details:
-
Mode TLS Versions Cipher Suites (in server-preferred order) Default 1.0 (deprecated)
1.1 (deprecated)
1.2
1.3
TLS 1.3
- TLS_AES_256_GCM_SHA384
- TLS_CHACHA20_POLY1305_SHA256
- TLS_AES_128_GCM_SHA256
TLS 1.2
- TLS_ECDHE_RSA_WITH_AES_256_GCM_SHA384
- TLS_DHE_RSA_WITH_AES_256_CCM_8
- TLS_DHE_RSA_WITH_AES_256_CCM
- TLS_ECDHE_RSA_WITH_AES_128_GCM_SHA256
- TLS_DHE_RSA_WITH_AES_128_GCM_SHA256
- TLS_DHE_RSA_WITH_AES_128_CCM_8
- TLS_DHE_RSA_WITH_AES_128_CCM
- TLS_ECDHE_RSA_WITH_AES_256_CBC_SHA384
- TLS_DHE_RSA_WITH_AES_256_CBC_SHA256
- TLS_ECDHE_RSA_WITH_AES_128_CBC_SHA256
- TLS_DHE_RSA_WITH_AES_128_CBC_SHA256
- TLS_ECDHE_RSA_WITH_AES_256_CBC_SHA
- TLS_DHE_RSA_WITH_AES_256_CBC_SHA
- TLS_ECDHE_RSA_WITH_AES_128_CBC_SHA
- TLS_DHE_RSA_WITH_AES_128_CBC_SHA
- TLS_RSA_WITH_AES_256_GCM_SHA384
- TLS_RSA_WITH_AES_256_CCM_8
- TLS_RSA_WITH_AES_256_CCM
- TLS_RSA_WITH_AES_128_GCM_SHA256
- TLS_RSA_WITH_AES_128_CCM_8
- TLS_RSA_WITH_AES_128_CCM
- TLS_RSA_WITH_AES_256_CBC_SHA256
- TLS_RSA_WITH_AES_128_CBC_SHA256
- TLS_RSA_WITH_AES_256_CBC_SHA
- TLS_RSA_WITH_AES_128_CBC_SHA
Intermediate 1.0 (deprecated)
1.1 (deprecated)
1.2
1.3
TLS 1.3
- TLS_AES_256_GCM_SHA384
- TLS_CHACHA20_POLY1305_SHA256
- TLS_AES_128_GCM_SHA256
TLS 1.2
- TLS_ECDHE_RSA_WITH_AES_256_GCM_SHA384
- TLS_ECDHE_RSA_WITH_AES_128_GCM_SHA256
- TLS_DHE_RSA_WITH_AES_256_GCM_SHA384
- TLS_DHE_RSA_WITH_AES_128_GCM_SHA256
- TLS_ECDHE_RSA_WITH_AES_256_CBC_SHA384
- TLS_ECDHE_RSA_WITH_AES_256_CBC_SHA
- TLS_DHE_RSA_WITH_AES_256_CCM_8
- TLS_DHE_RSA_WITH_AES_256_CCM
- TLS_DHE_RSA_WITH_AES_256_CBC_SHA256
- TLS_DHE_RSA_WITH_AES_256_CBC_SHA
Modern 1.2
1.3
TLS 1.3
- TLS_AES_256_GCM_SHA384
- TLS_CHACHA20_POLY1305_SHA256
- TLS_AES_128_GCM_SHA256
TLS 1.2
- TLS_ECDHE_RSA_WITH_AES_256_GCM_SHA384
- TLS_ECDHE_RSA_WITH_AES_128_GCM_SHA256
- TLS_ECDHE_RSA_WITH_AES_256_CBC_SHA384
- TLS_ECDHE_RSA_WITH_AES_128_CBC_SHA256
Modern Strict 1.2
1.3
TLS 1.3
- TLS_AES_256_GCM_SHA384
- TLS_CHACHA20_POLY1305_SHA256
- TLS_AES_128_GCM_SHA256
TLS 1.2
- TLS_ECDHE_RSA_WITH_AES_256_GCM_SHA384
- TLS_ECDHE_RSA_WITH_AES_128_GCM_SHA256
- TLS_ECDHE_RSA_WITH_CHACHA20_POLY1305_SHA256
- Anchor Version 22.2.1 or later
- Feature Version 23.1.0 or later
- Press the Enter key to select OK. The Message window displays.
- Press the Enter key to select OK.
|
Note MODERN STRICT mode is only available in the following versions: |
|
Note When setting profiles, make sure to reload Apache for settings to take effect. Go back to the Vidyo Apache2 Settings window, and then press 3 for the Reload Apache option. To set Intermediate Profile after Set Modern Profile, go back into the Vidyo Apache2 Settings window and then select Intermediate Profile. |
Enable or disable OCSP stapling
To enable or disable OCSP stapling:
- Log in to the System Console. The Main Menu displays.
- Enter 7 to select the Advanced option.
- Press the Enter key to select OK. The Main Menu for the Advanced configuration displays.

- Enter 8 to select the Vidyo Apache Settings option.
- Press the Enter key to select OK. The Vidyo Apache2 Settings window displays.
- Enter 2 to select the Enable OCSP Stapling option. The Message window displays.
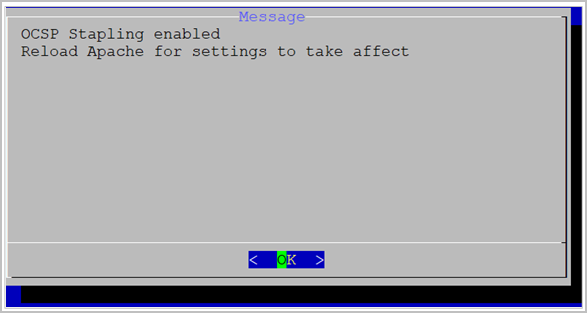
- Press the Enter key to select OK.
|
Note After enabling OCSP stapling, you must reload Apache for the settings to take effect. To do so, return to the Vidyo Apache2 Settings window, and then enter 3 for the Reload Apache option. To disable OCSP stapling after enabling it, return the Vidyo Apache2 Settings window, and then enter 2 to disable OCSP stapling. |
Reload Apache
To reload Apache:
- Log in to the System Console. The Main Menu displays.

- Enter 7 to select the Advanced option.
- Press the Enter key to select OK. The Main Menu for the Advanced configuration displays.

- Enter 8 to select the Vidyo Apache Settings option.
- Press the Enter key to select OK. The Vidyo Apache2 Settings window displays.

- Enter 3 to select the Reload Apache option. The Message window displays.
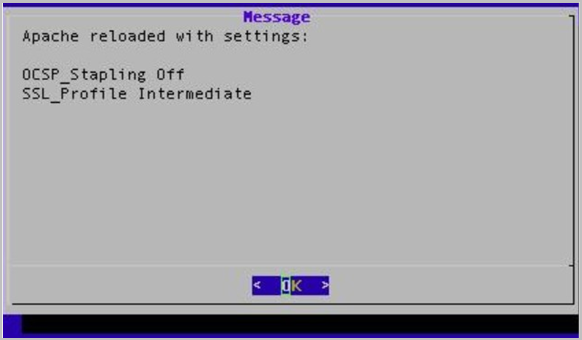
- Press the Enter key to select OK.
Manage VidyoPlatform API users
This section describes how to display a list of your API users as well as how to add, remove, and update API users.
List API users
To list API users:
- Log in to the System Console. The Main Menu displays.

- Enter 7 to select the Advanced option.
- Press the Enter key to select OK. The Main Menu for the Advanced configuration displays.

- Enter 9 to select the VidyoPlatformAPI User option.
- Press the Enter key to select OK. The Password required to continue window displays.
- Enter your password.
- Press the Enter key to select OK. The VidyoAPI User Menu window displays.
- Enter 0 to select the List Api Users option.
- Press the Enter key to select OK. The User Active Information window displays listing the current user(s).
- Press the Enter key to select OK.
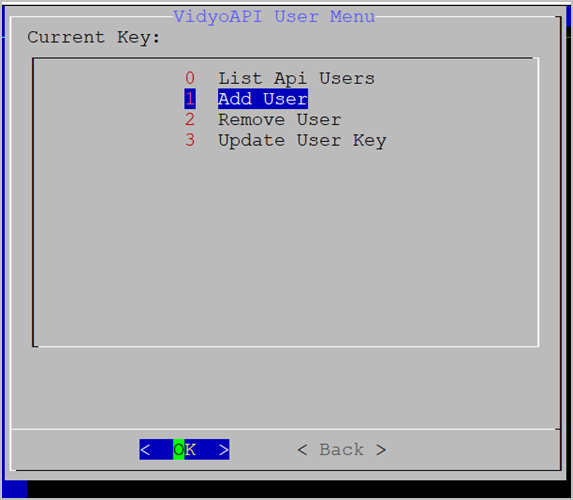
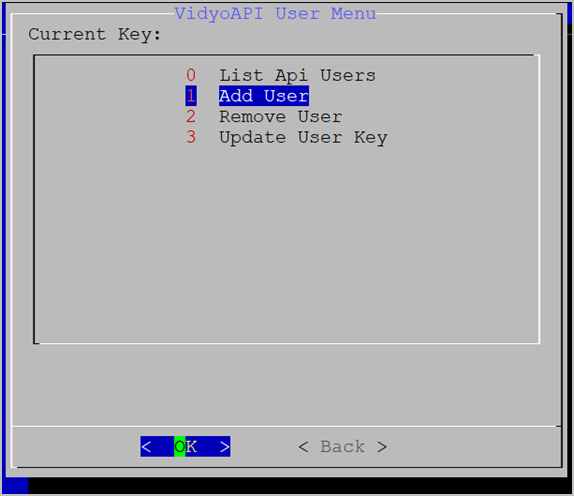
Add API users
To add API users:
- Log in to the System Console. The Main Menu displays.
- Enter 7 to select the Advanced option.
- Press the Enter key to select OK. The Main Menu for the Advanced configuration displays.

- Enter 9 to select the VidyoPlatformAPI User option.
- Press the Enter key to select OK. The Password required to continue window displays.
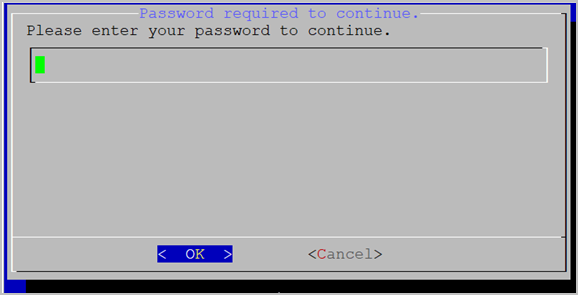
- Enter your password.
- Press the Enter key to select OK. The VidyoAPI User Menu window displays.
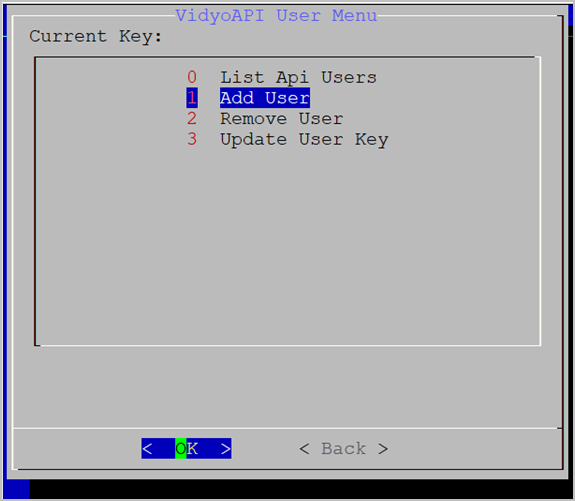
- Enter 1 to select the Add User option.
- Press the Enter key to select OK. The Admin Users Management Menu window displays.
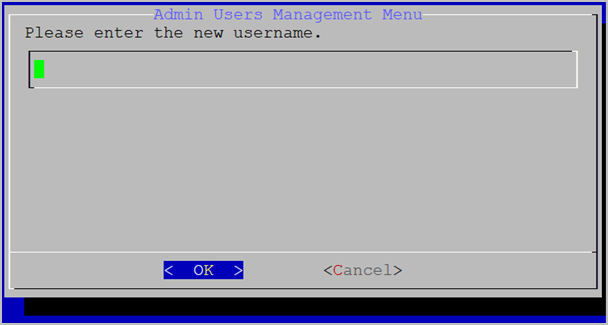
- Enter a username.
- Press the Enter key to select OK. The Admin Users Management Menu window displays.
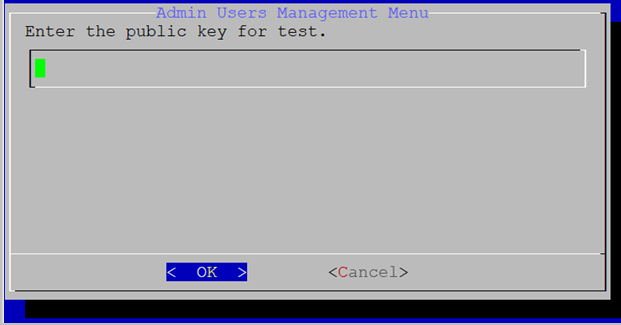
- Enter the public key.
- Press the Enter key to select OK. The Message window displays the message “User has been added”.
- Press the Enter key to select OK. The Message window confirms the user was added.

Remove API users
To remove API users:
- Log in to the System Console. The Main Menu displays.
- Enter 7 to select the Advanced option.
- Press the Enter key to select OK. The Main Menu for the Advanced configuration displays.

- Enter 9 to select the VidyoPlatformAPI User option.
- Press the Enter key to select OK. The Password required to continue window displays.
- Enter your password.
- Press the Enter key to select OK. The VidyoAPI User Menu window displays.
- Enter 2 to select the Remove User option.
- Press the Enter key to select OK.
- Select the user you want to remove.
- Press the Enter key to select OK. The Confirm window displays the “Remove Api user [name], Are you sure?” message.
- Press the Enter key to select OK. The system will then display a message that the user was successfully removed.
Update the user key
To update the user key:
- Log in to the System Console. The Main Menu displays.

- Enter 7 to select the Advanced option.
- Press the Enter key to select OK. The Main Menu for the Advanced configuration displays.

- Enter 9 to select the VidyoPlatformAPI User option.
- Press the Enter key to select OK. The VidyoAPI User Menu displays.

- Enter 3 to select the Update User Key option.
- Press the Enter key to select OK. The Admin Users Management Menu window displays.
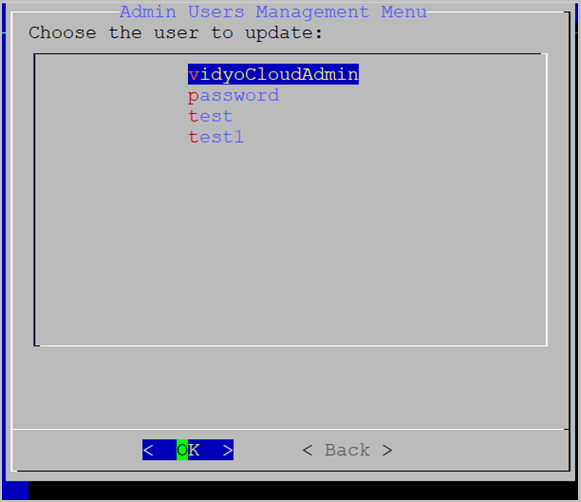
- Select the admin user to update.
- Press the Enter key to select OK. The Admin Users Management Menu window displays.
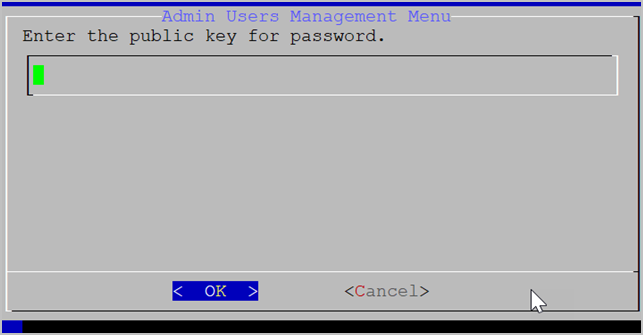
- Enter the public key for password.
- Press the Enter key to select OK. The Message window displays the updated password key.
- Press the Enter key to select OK.
Configure remote Vidyo Support access
This section describes how to generate a one-time encrypted password that enables the Vidyo Customer Support team to remotely access your VidyoGateway system in a secure manner. The encrypted password that is generated expires at midnight UTC the day after it is generated.
You can also disable remote Vidyo Support access as described in this section.
Enable remote Vidyo Support access
To enable remote Vidyo Support access:
- Log in to the System Console. The Main Menu displays.
- Enter 7 to select the Advanced option.
- Press the Enter key to select OK. The Main Menu for the Advanced configuration displays.

- Enter 10 to select the Vidyo Support option.
- Press the Enter key to select OK. The following message displays:

- Press any key on your keyboard.
- Enter y to generate a new token for remote support access.
- Press the Enter key.
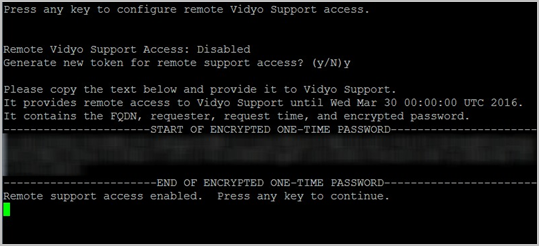
- If you are accessing the System Console via SSH, a one-time encrypted password is generated as shown:
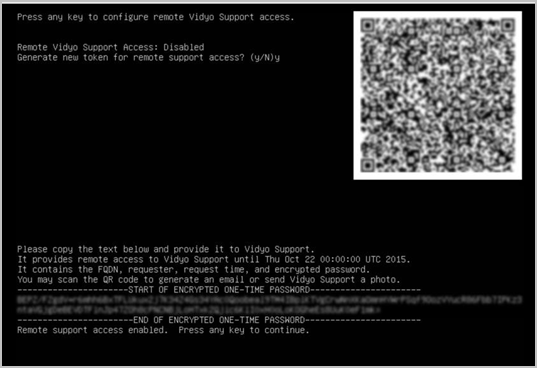
- If you are directly accessing the System Console, a one-time encrypted password is generated as shown:
- Do one of the following:
- If you are accessing the System Console via SSH, copy the one-time encrypted password shown on the screen and provide it to Vidyo Support.
- If you are directly accessing the System Console, scan the QR code and send it to Vidyo Support.
|
Note The password that is generated expires at midnight UTC the day after it is generated. |
Disable remote Vidyo Support access
To disable remote Vidyo Support access:
- Log in to the System Console. The Main Menu displays.

- Enter 7 to select the Advanced option.
- Press the Enter key to select OK. The Main Menu for the Advanced configuration displays.
- Enter 10 to select the Vidyo Support option.
- Press the Enter key to select OK. The following message displays:

- Press any key on your keyboard.
- Enter y to disable remote support access.
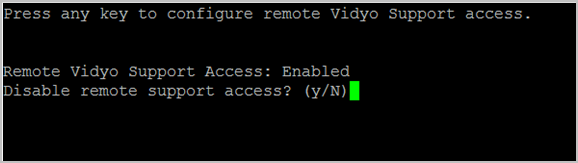
- Press the Enter key. A message indicates that remote access is disabled.
- Press any key to return to the Advanced Main Menu.
Reboot the System Console
To reboot the System Console:
- Log in to the System Console. The Main Menu displays.

- Enter 8 to select the Reboot option.
- Press the Enter key to select OK. The Confirm window displays.
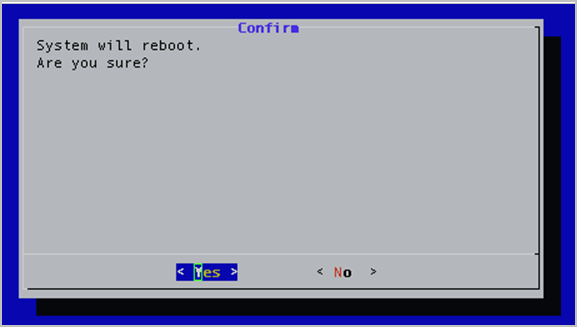
- Press the Enter key to select Yes.
Shut down the System Console
To shut down the System Console:
- Log in to the System Console. The Main Menu displays.

- Enter 9 to select the Shutdown option.
- Press the Enter key to select OK. The Confirm window displays.
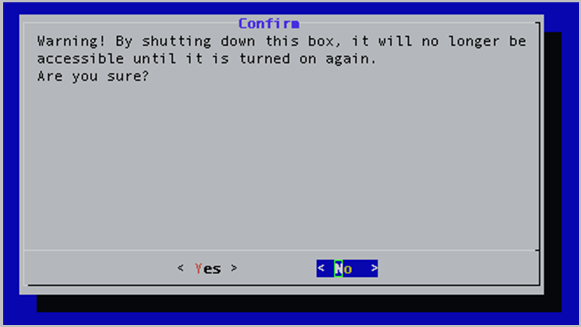
- Press the Enter key to select Yes.
Log in to the Admin Portal
Now that you have connected your VidyoGateway server to the network, you must log in to its Admin portal using the System Console account and configure your VidyoGateway so it can function within your video conferencing system.
To log in to the Admin Portal:
- Enter the URL or IP address for the VidyoGateway in the address bar of a web browser: The URL of your VidyoGateway is typically a domain name: [examplegateway.com]
- Log in to the Admin portal using your System Console account.
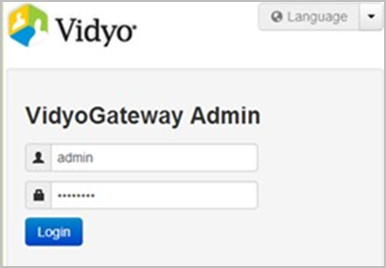
- Click Continue. The VidyoGateway Admin portal displays.
|
Note If you do not enter information on this page, you will be logged out from inactivity. |
Prior to logging in, the Login History pop-up shows the last five login attempts made to the Admin portal.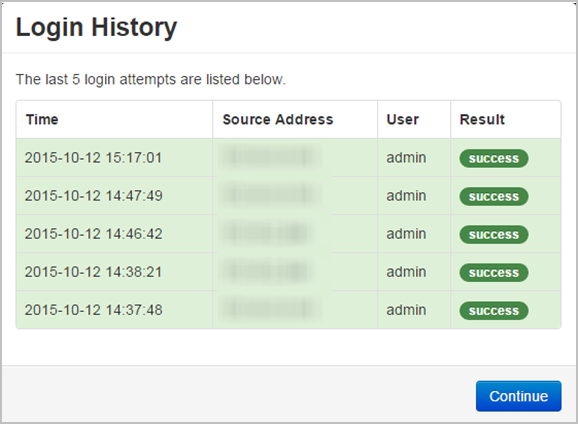
Set the language for the VidyoGateway Admin portal
The VidyoGateway Admin portal pages are available in these 15 languages:
- Chinese (Simplified)
- Chinese (Traditional)
- English
- Finnish
- French
- German
- Italian
- Japanese
- Korean
- Polish
- Portuguese
- Russian
- Spanish
- Thai
- Turkish
To set your preferred language:
- Select your desired language using the language drop-down on the upper right corner of the VidyoGateway Admin Login page.