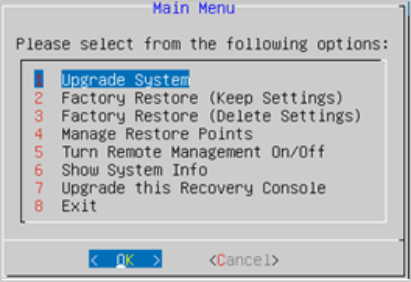
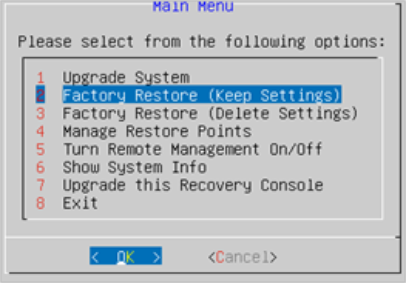
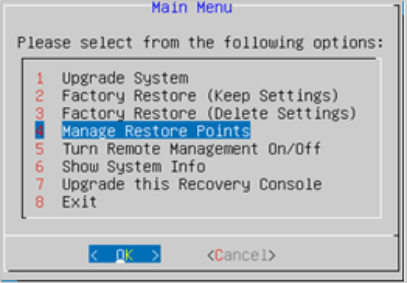
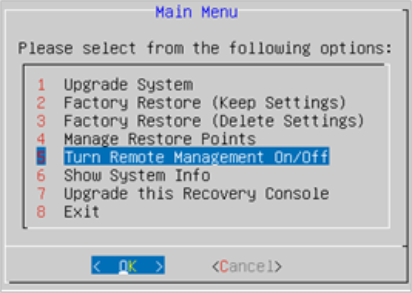
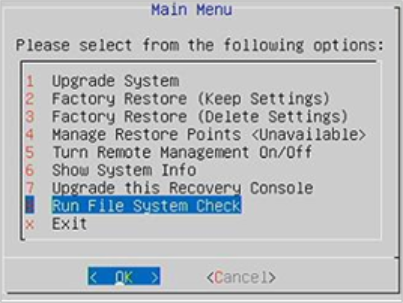
5. Use the Recovery Console
The Recovery Console enables you to:
- Upgrade the system
- Perform a factory restore
- Manage restore points
- Turn remote management on or off
- Upgrade the Recovery Console
Access the Recovery Console
To access the Recovery Console:
- Connect a keyboard directly to the VidyoRoom server.
- While the server is rebooting, press and hold the Left Shift key, and then immediately press and hold the Right Shift key and release the Left Shift key, and then immediately press and hold the Left Shift key and release the Right Shift key.
- Keep repeating the previous step until the Recovery Console Main Menu appears.
|
Note If using VidyoRoom HD-100 Rev 4A to run VidyoRoom version 3.3.19 and later, do the following to access the Recovery Console: While the server is rebooting, press the Esc key on your keyboard repeatedly until the GRUB boot menu appears. Once it appears, select the Recovery Console option using the arrow keys on your keyboard, and then press the Enter key. |
Upgrade the system
You can upgrade your system using an image file from the local disk or an image file from a USB flash drive that you insert directly into the Room System.
Alternatively, you can upgrade the system using the Admin UI Firmware tab. The Firmware tab enables you to perform the upgrade remotely. For more information about the Admin UI Firmware tab, see Update the firmware.
|
Note Version 20.2.0 and later of the VidyoConnect Room is available with a new and improved user interface (also known as the Modern UI). The HD-2, HD-3, and HD-3B systems can be upgraded to the Modern UI, but they must upgrade to Windows 10 IoT first before downloading the VidyoConnect Room installer. If you need more information about upgrading your system to Windows 10 IoT, refer to Upgrade VidyoRoom to Windows 10 IoT in the Vidyo Help. This article describes how to upgrade and re-image your VidyoRoom system from Windows 7 to Windows 10 IoT. |
Upgrade the system using an image file from the local disk
To upgrade the system using an image file from the local disk, you must first upload the upgrade image using the Admin UI Firmware tab. You can then reboot the server to access the Recovery Console and perform the upgrade.
For more information about how to use the Admin UI Firmware tab, see Update the firmware.
To upgrade the system using an image file from the local disk:
- Enter 1 to select the Upgrade System option.
- Press the Enter key on your keyboard to select OK. The System Upgrade window appears.
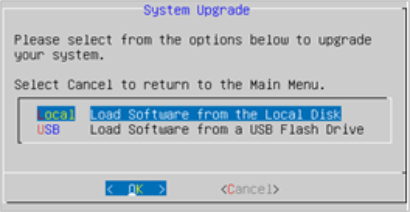
- Select the Local Load Software from the Local Disk option.
- Press the Enter key on your keyboard to select OK. The File Selection window appears with a list of available image files.
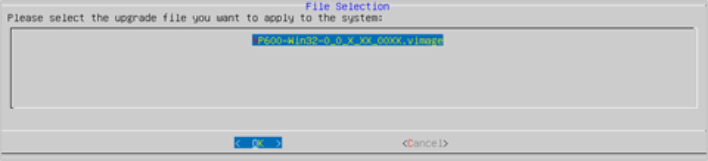
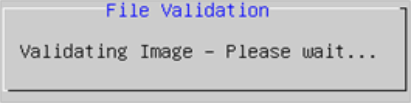
- Select the file you want to use to upgrade the system and select OK. A message appears asking you to confirm the upgrade, and then another message appears as the system validates the file.

- The new image file is applied to the VidyoRoom system.
Upgrade the system using a USB flash drive
You can upgrade the system by copying the upgrade image to a USB flash drive, and then inserting that flash drive directly into the VidyoRoom server. If you choose this method, you must copy the upgrade file to the top-level directory of the USB flash drive.
To upgrade the system using a USB flash drive:
- Enter 1 to select the Upgrade System option.
- Press the Enter key to select OK. The System Upgrade window appears.
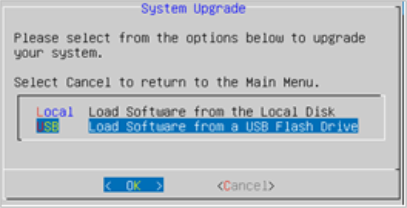
- Select the USB Load Software from a USB Flash Drive option.
- Press the Enter key to select OK. The USB Upgrade window appears.
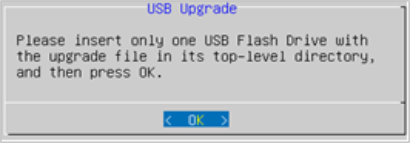
- Ensure that the upgrade file is in the top-level directory of the USB flash drive.
- Insert the flash drive into the VidyoRoom server.
- Press the Enter key on your keyboard to select OK. The Detecting Drive window appears. (If no image files are found, an error message appears. If image files are found, the File Selection window appears with a list of available files.)
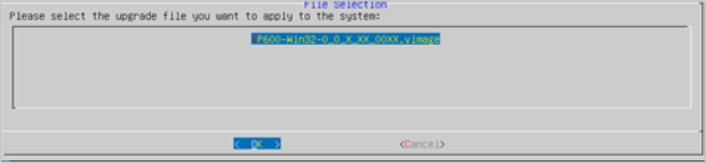
- Select the file you want to use to upgrade the system and select OK. A message appears asking you to confirm the upgrade, and then another message appears as the system validates the file.
- The new image file is applied to the VidyoRoom system.
Perform a factory restore
The Factory Restore options in the Recovery Console enable you to restore your VidyoConnect Room or VidyoRoom to the default factory image. You can choose to either perform the restore and preserve all of your settings or perform the restore and remove all of your settings.
|
Caution Starting with VidyoRoom version 3.2.5, five days after uploading a new image, that image automatically becomes the factory default base image the VidyoRoom system reverts to when using the “Factory Restore” feature. Therefore, if you perform a factory restore within five days of applying a new image for the VidyoRoom, it will revert back to the image that was originally on the system; if you perform a factory restore after five days, it will revert to the last image for uploaded for that VidyoRoom. |
To perform a factory restore for Windows 7-based systems:
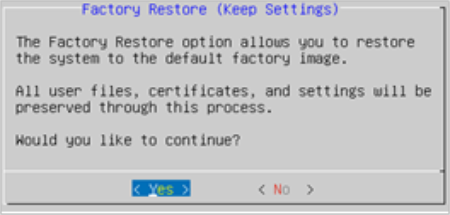
- Enter 2 to select the Factory Restore (Keep Settings) option or enter 3 to select the Factory Restore (Delete Settings) option.
- Press the Enter key on your keyboard to select OK.
- If you select the Factory Restore (Keep Settings) option, the VidyoRoom is restored to the default factory image but all of your settings are preserved.
- If you select the Factory Restore (Delete Settings) option, the VidyoRoom is restored to the default factory image, and all of the user files, logs, certificates, and settings are removed.
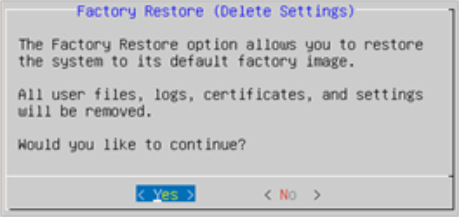
- Press the Enter key on your keyboard to select Yes to perform the factory restore. When the restore successfully completes, a message asks you to reboot. (No is selected by default.)
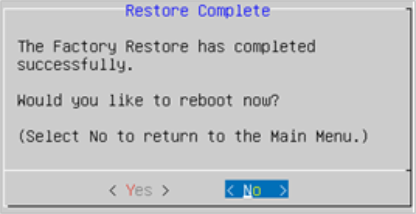
- Press the left arrow key on your keyboard to select Yes, and then press the Enter key on your keyboard to reboot.
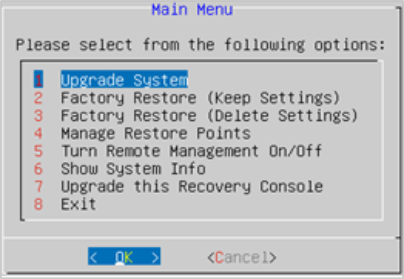
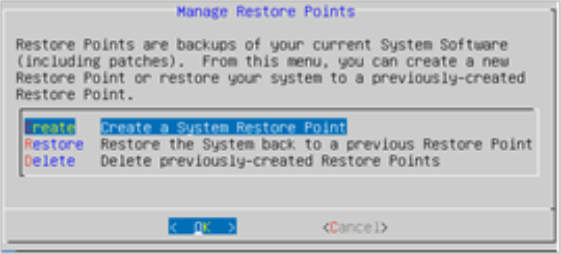
Manage restore points
Restore points are backups of your system software (including patches). By using the Manage Restore Points option in the Recovery Console, you can restore your VidyoRoom system to a restore point that you had previously created, you can create new restore points, and you can delete previously created restore points.
To manage restore points:
- Enter 4 to select the Manage Restore Points option.
- Press the Enter key on your keyboard to select OK. The Manage Restore Points window appears.
- Select the Create a System Restore Point option, Restore the System back to a previous Restore Point option, or Delete previously-created Restore Points option.
- Press the Enter key to select OK.
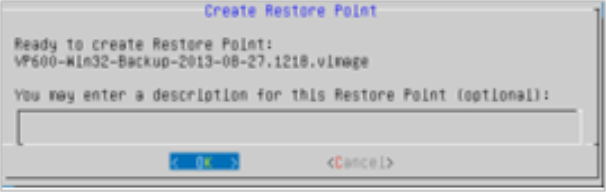
- If you select the Create a System Restore Point option, the system automatically sets the file name but you can enter a description (such as “August Upgrade to 2.5”), and then press the Enter key on your keyboard to select OK. The new restore point is created.
- If you select the Restore the System back to a previous Restore Point option, select the file you want to apply to the VidyoRoom and press the Enter key on your keyboard to select OK. The VidyoRoom system is restored back to the selected restore point.

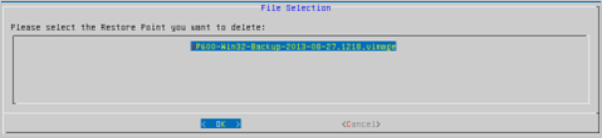
- If you select the Delete previously-created Restore Points option, select the file you want to delete and press the Enter key on your keyboard to select OK. The restore point is deleted.
Turn remote management on or off
Remote management enables you to upgrade and configure your VidyoRoom system over the network.
To turn remote management on or off:
- Enter 5 to select the Turn Remote Management On/Off option.
- Press the Enter key on your keyboard to select OK. The Turn Remote Management On/Off window appears.
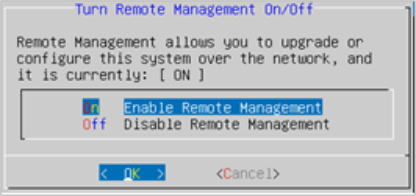
- Select the On Enable Remote Management or select the Off Disable Remote Management option.
- Press the Enter key to select OK.
Upgrade the Recovery Console
You can upgrade the Recovery Console software without having to reimage the whole system.
To upgrade the Recovery Console:
- Enter 7 to select the Upgrade this Recovery Console option.
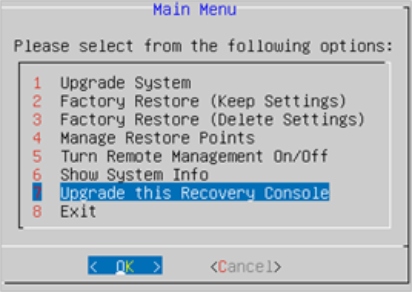
- Press the Enter key on your keyboard and select OK. The File Selection window appears.
- Insert the USB flash drive into the VidyoRoom server.
- Select an upgrade file.
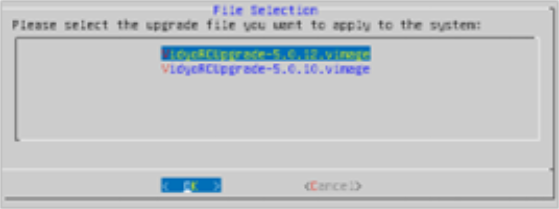
- Press the Enter key to select OK. The software for the Recovery Console itself is updated.
Run the file system check
The Run File System Check option only appears in the Recovery Console Main Menu when using VidyoRoom HD-100 Rev 4A to run VidyoRoom version 3.3.19 and later.
The File System Check is used to fix common errors in the Windows file system that are often caused by an unexpected shutdown (for example, a power outage). Additionally, Windows will occasionally fail to load due to file system inconsistencies, so this check can also be used to fix these errors.
|
Note In some circumstances, File System Check can be used to fix a VidyoRoom system that won’t boot properly. If the File System Check does not successfully fix the system, use the Factory Restore option. For more information, see Perform a factory restore. |
To run the file system check:
- Enter 8 to select the Run File System Check option.
- Press the Enter key on your keyboard to select OK. The File System Check window appears.
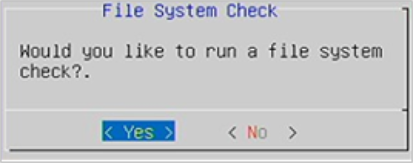
- Press the Enter key on your keyboard to select Yes confirming that you would like to run a file system check.
- The system performs a file check on the next window. After the file check is completed, this message appears:
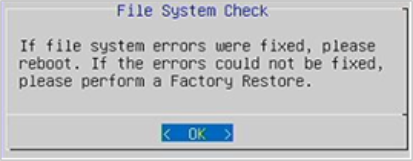
- Press the Enter key to select OK.
- Perform a reboot if the file system errors were fixed, or perform a factory restore if the errors could not be fixed. For more information, see Perform a factory restore.
